
How to Remove Background in Canva: Step-by-Step Guide (2026)
Canva's Background Remover handles most portraits and product shots in one click - but it is a Canva Pro-only feature. This guide covers the full step-by-step process, honest test results across four image types, and what to do when the results need refinement.

Canva's Background Remover is built right into the editor, making it the most convenient way to cut out an image if you are already working in Canva. One click and the background is gone. No separate app, no file export, no switching tools.
There is a catch worth knowing upfront: it is a Canva Pro-only feature. If you are on the plan, the button appears with a crown icon and clicking it takes you to an upgrade prompt. Canva Pro costs $15 per month on a monthly plan, or $120 per year if you pay annually.
This guide covers two ways to access the tool on desktop, the mobile app workflow, what the results actually look like across four different image types, and what to use when Canva's output is not precise enough for the job.
How to Remove a Background in Canva: Step-by-Step
There are two ways to reach the background remover on desktop. The floating toolbar path is faster; the Edit photo panel path is the fallback when the toolbar option is not visible. Both produce the same result.
Method 1 - via the Floating Toolbar (Fastest Route)
Step 1: Select Your Image
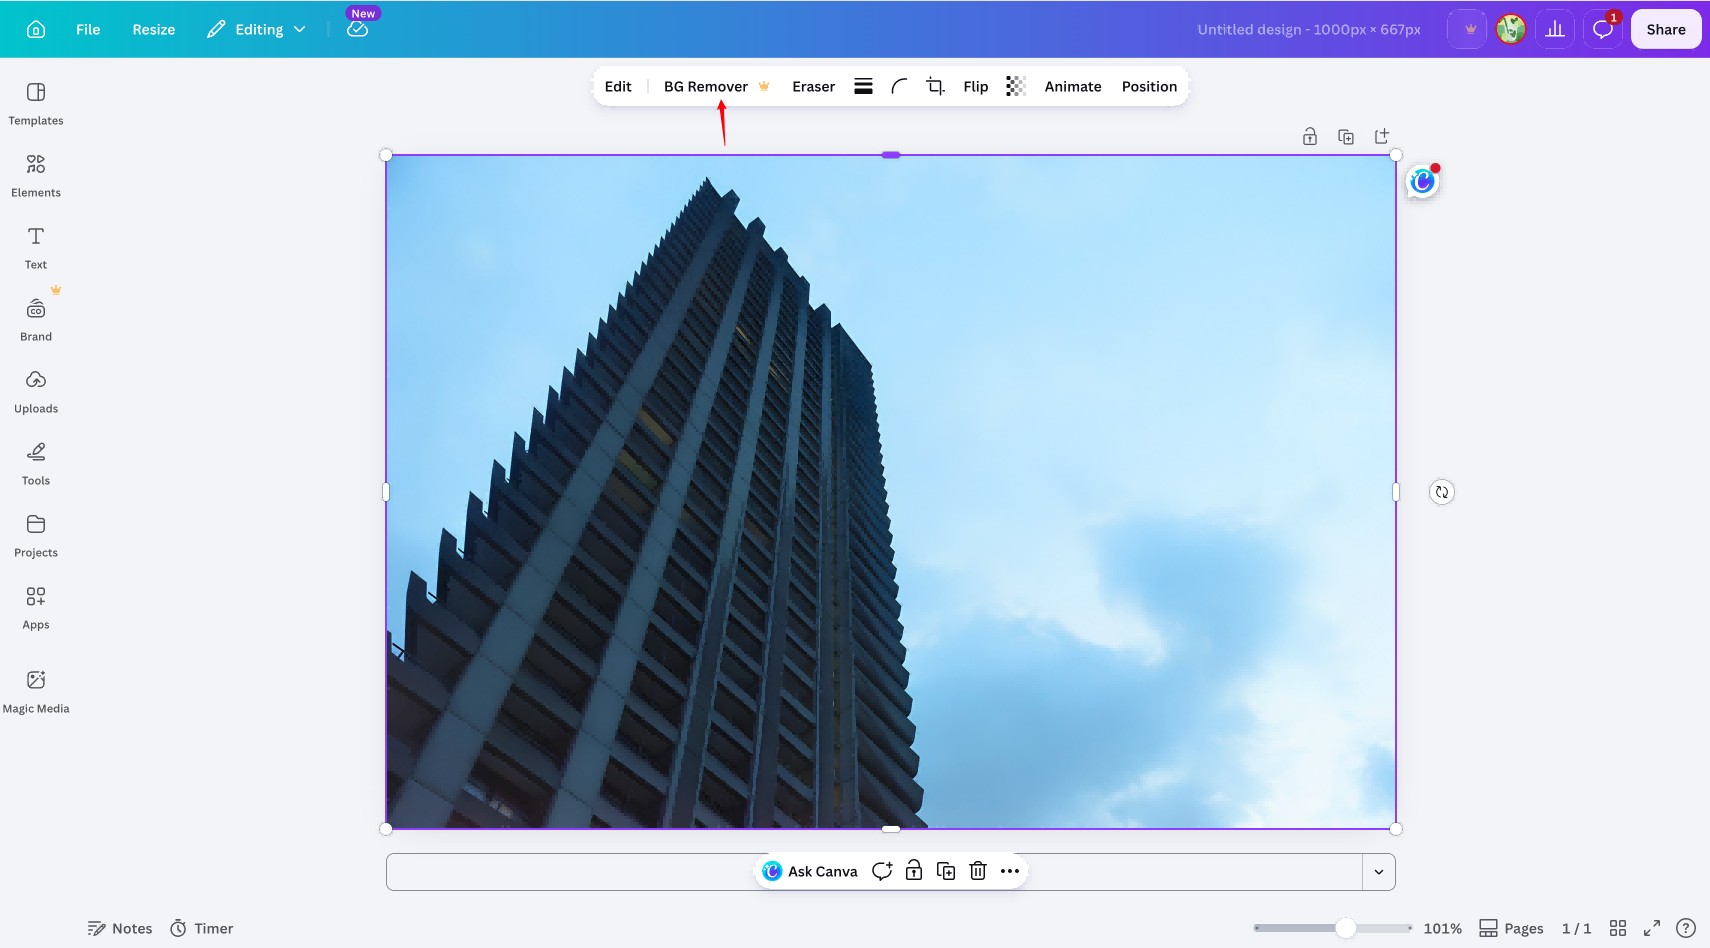
Open your Canva project and click the image. A floating toolbar appears above it with options including Edit, BG Remover, Eraser, and a few others. The BG Remover button has a small crown icon indicating it requires Canva Pro.
Step 2: Click BG Remover
Click BG Remover. Canva processes the image immediately. On most images it takes a few seconds. The background is removed and the cutout appears on the transparent canvas.
Step 3: Refine with Erase and Restore
If the result has missed areas or incorrectly removed parts of the subject, click Erase or Restore in the toolbar. Use Erase to remove remaining background areas the AI missed, and Restore to bring back any part of the subject that was accidentally removed. Adjust the brush size for edge work.
Step 4: Save or Continue Editing
Click Done. You can now download the image as a transparent PNG, swap in a new background, or continue building your design. Note: if BG Remover does not appear in the toolbar, click Edit photo instead. This opens the full Edit panel on the left.
Method 2 - via the Edit Photo Panel
Step 1: Open Edit Photo
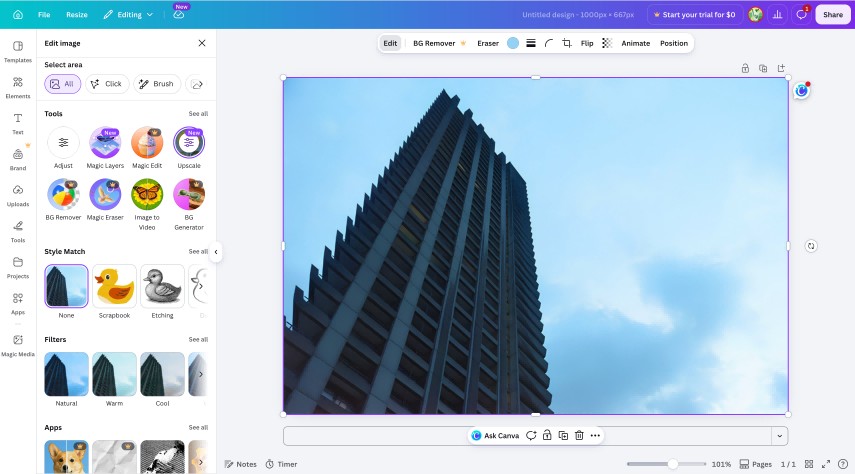
Click the image, then click Edit photo in the top-left corner of the Canva interface. A left panel opens showing Select area options, Tools, Style Match, Filters, and Apps.
Step 2: Find and Click BG Remover
Scroll down to the Tools section. You should see BG Remover listed there. If it is not visible, click See all next to Tools to expand the full list. Click BG Remover and Canva processes the image automatically.
Step 3: Refine and Export
Use the Erase and Restore tools to fix any edge issues. Adjust the brush size slider. Use a smaller brush for fine edge work near the subject and a larger brush for open background areas. Zoom into the canvas to at least 100 percent before making corrections. Imprecise edits are much harder to spot at smaller zoom levels. Click Done when the result looks clean.
Method 3 - remove the image's background using the Canva mobile app
The mobile app handles background removal through the Effects menu rather than the toolbar. The process is quick, and the Erase and Restore controls are available directly in the same panel.
Step 1: Select the Image
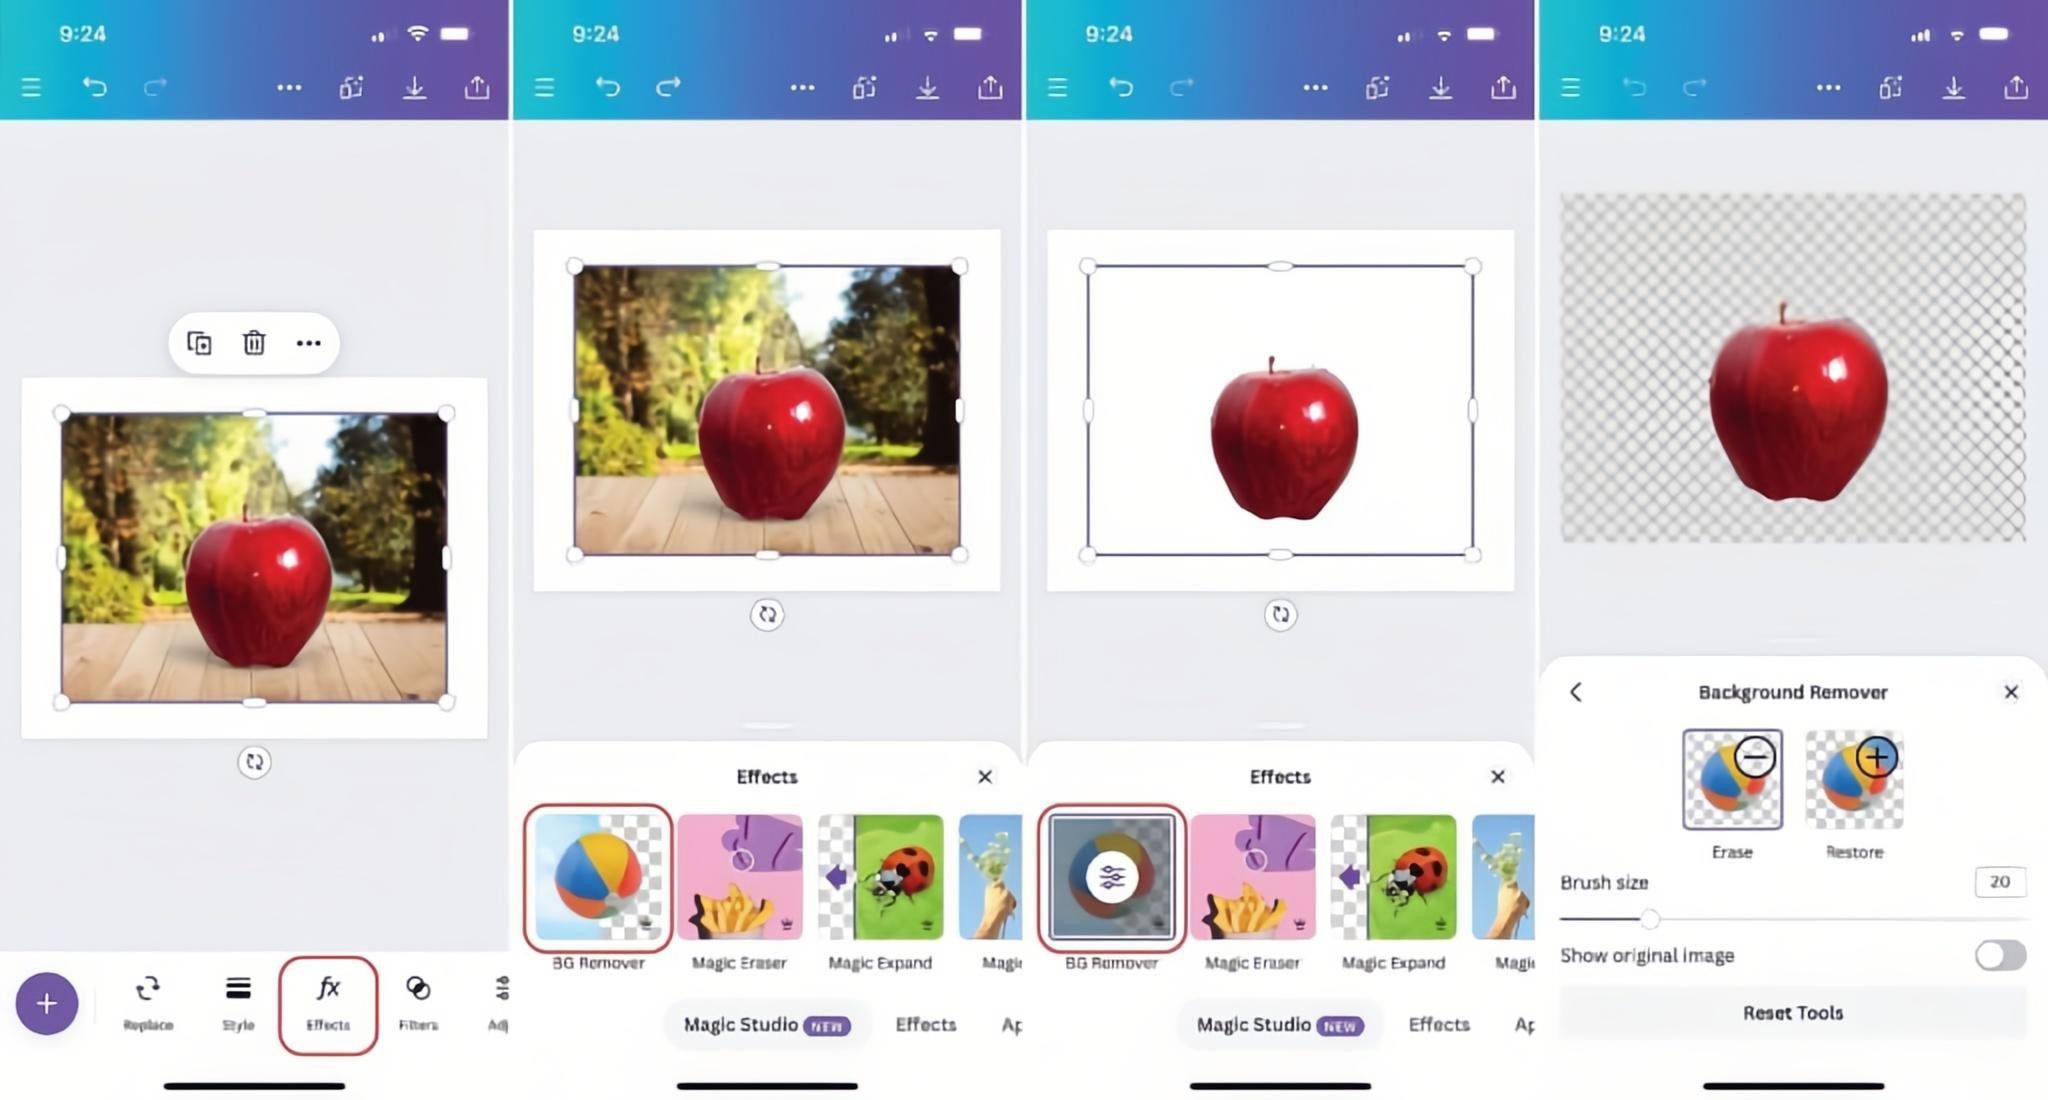
Open your Canva project in the app and tap the image you want to edit. A small action bar appears above it with options including Replace, Style, Effects, Filters, and Adjust.
Step 2: Open BG Remover in Effects
Tap the fx (Effects) button in the bottom toolbar. The Effects panel slides up showing Magic Studio tools. BG Remover appears as the first option. Tap it. Canva removes the background automatically and the image updates to show the cutout.
Step 3: Refine with Erase and Restore
After removal, a Background Remover panel appears on the right side of the screen showing Erase and Restore options with a brush size slider set to 20 by default. Tap Erase to paint over remaining background areas, or Restore to bring back parts of the subject that were removed. Image toggle lets you compare before and after. Tap the back arrow when done.
How to Use the Erase and Restore Tools for Manual Correction
The initial removal is rarely perfect on every image. These two tools let you clean up what the AI missed or incorrectly removed, directly inside the Canva editor.
-
After removal, select the image and click Eraser in the floating toolbar to open the Pixel Eraser panel
-
Erase: paint over remaining background areas the AI missed
-
Restore: paint over parts of the subject that were incorrectly removed
-
Adjust brush size: smaller for edges and fine detail, larger for open background areas away from the subject boundary
-
Zoom into the canvas before correcting to see edge detail clearly
Real-World Test: How Canva's Background Remover Performs Across 4 Image Types
The one-click result varies a lot depending on the image. Testing across four different subject types reveals exactly where the tool delivers and where it needs help.
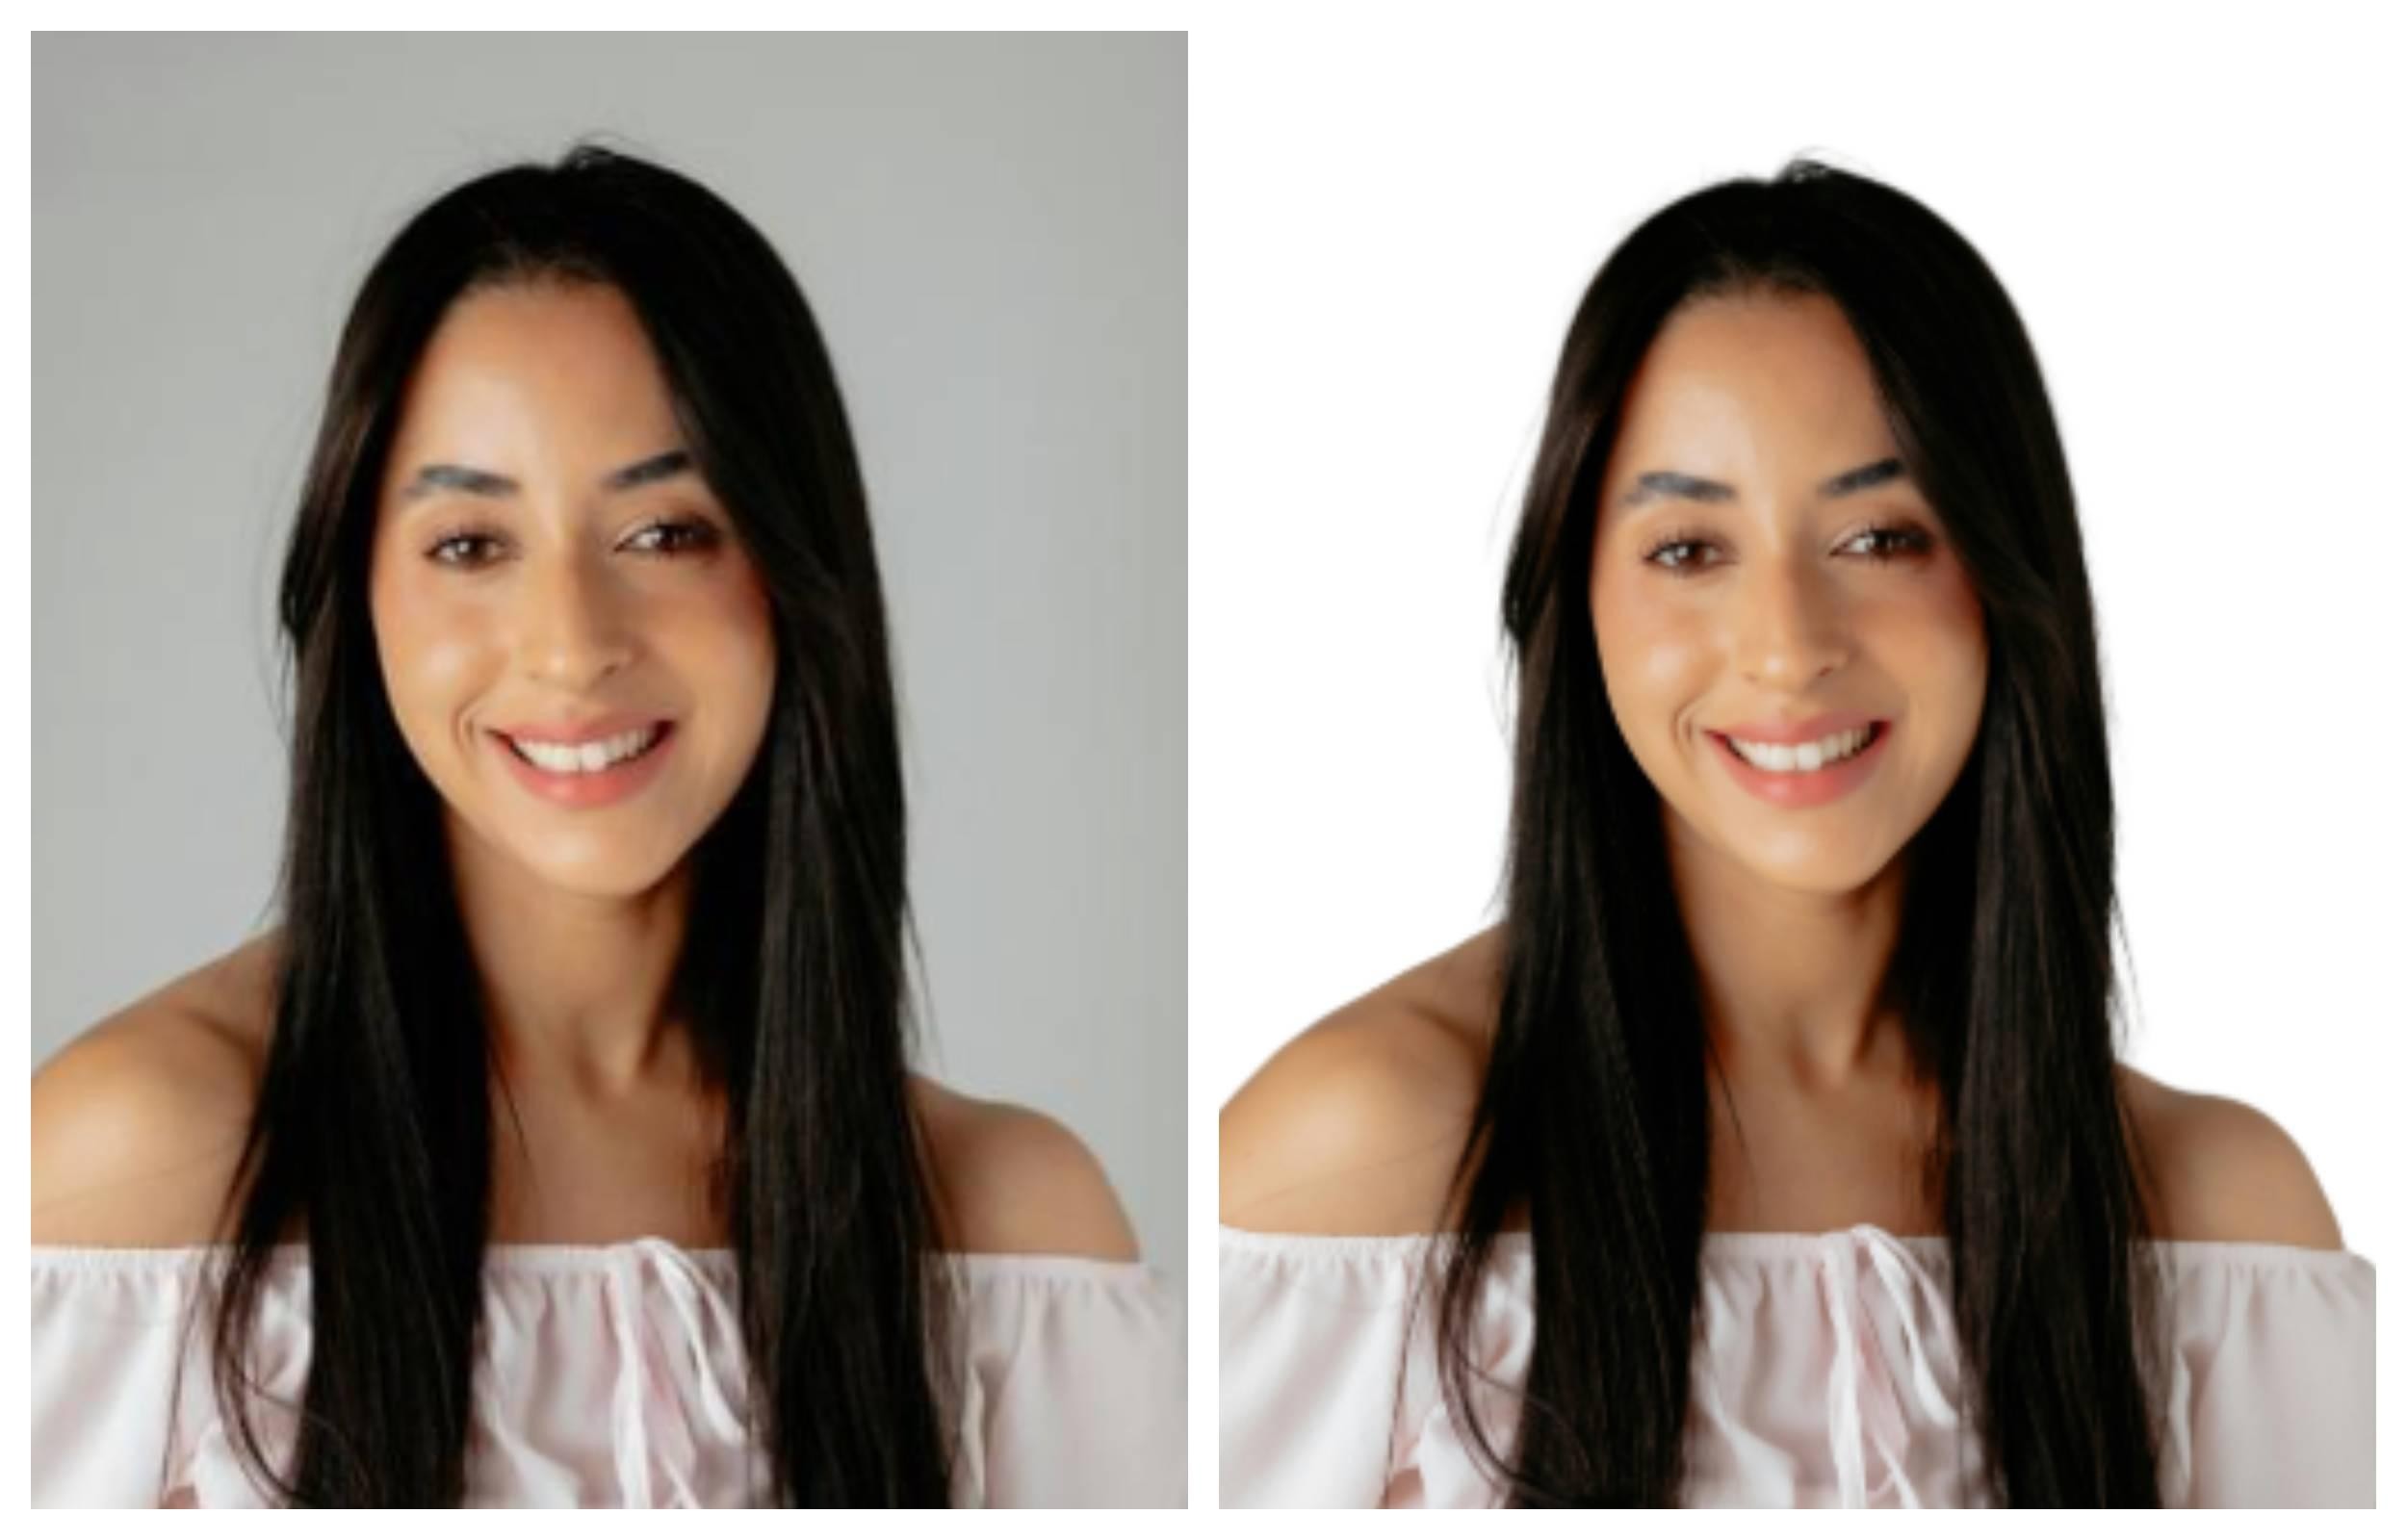
Test Case 1: High-Contrast Studio Portrait
Subject photographed against a clean, neutral-colored backdrop with consistent studio lighting.
Result: clean on the first pass. Sharp edges around the face, shoulders, and clothing. No manual correction needed. This is the scenario Background Remover handles best. Clear contrast between subject and background, no overlapping tones, defined edges. The AI has everything it needs to make an accurate selection.
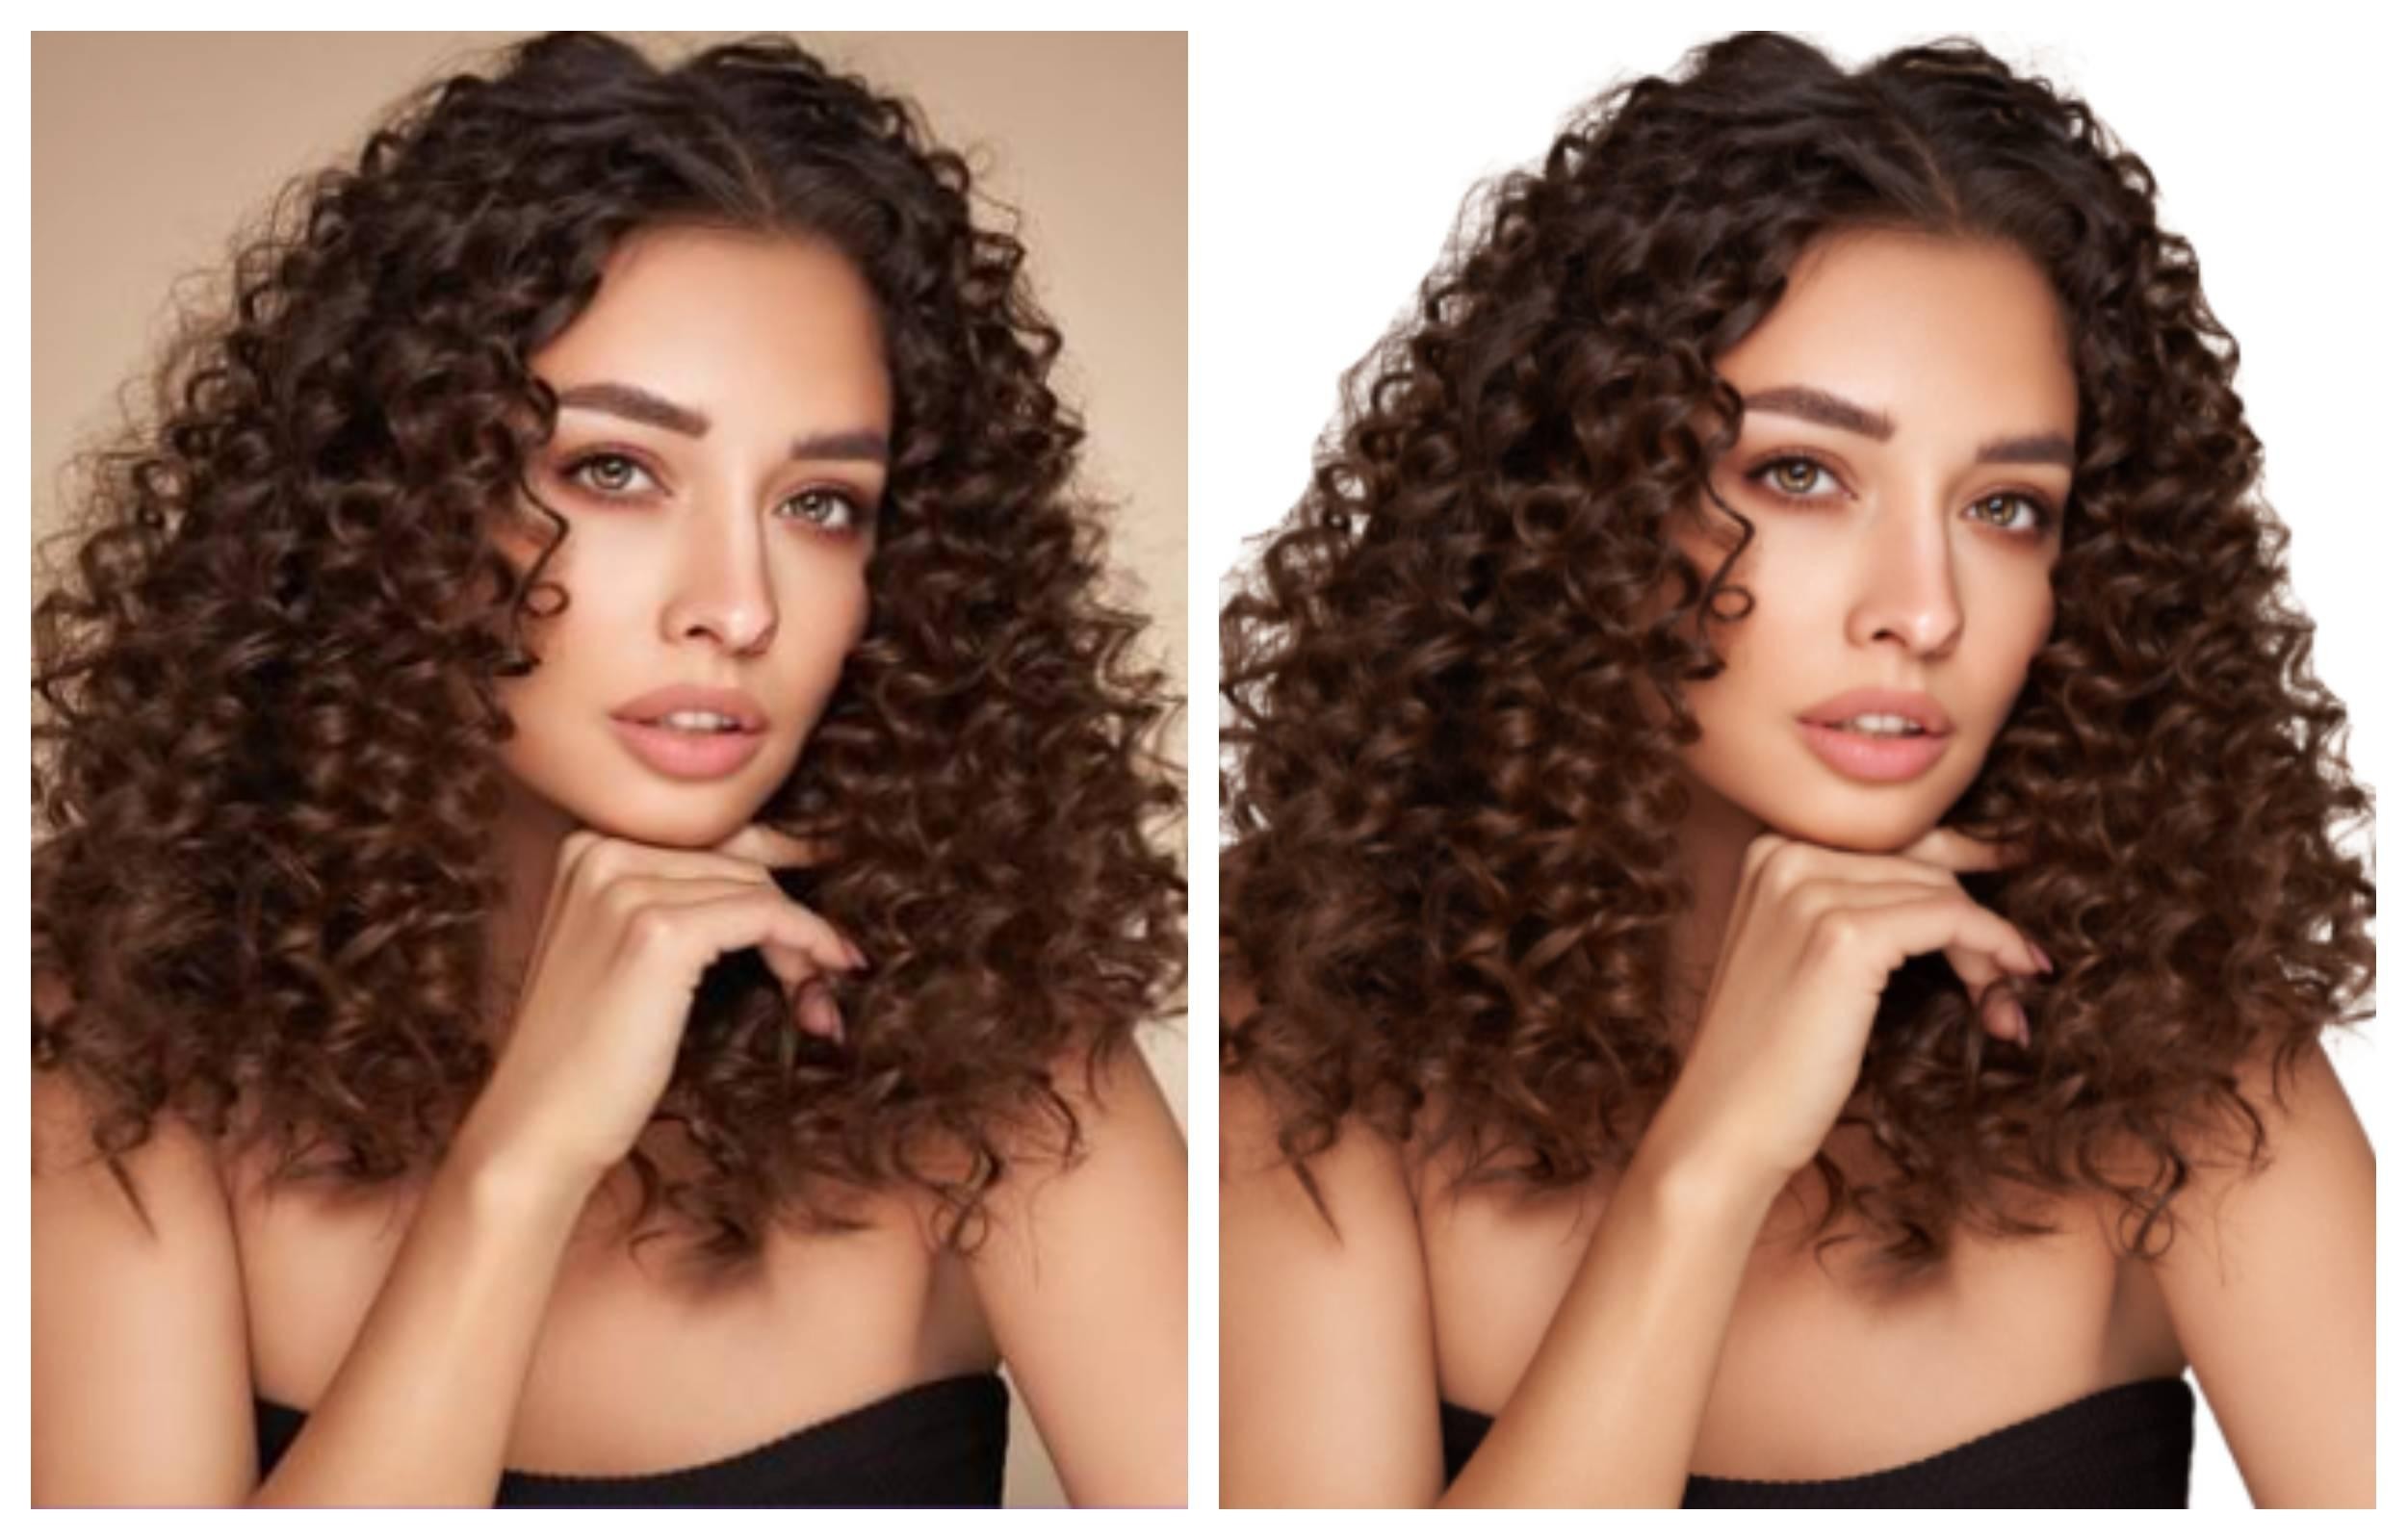
Test Case 2: Wispy Hair and Curly Edges
Portrait with voluminous or flyaway hair photographed against a moderately complex background.
Result: visible fringe. At 100 percent zoom, individual strands are blended into the edge rather than isolated. The AI treats the low-contrast hair tips as ambiguous and either clips them or merges them with the background tone. The Restore brush recovers some of this, but strand-level detail that was lost in the initial pass cannot be recreated.
Multiple independent reviews from 2025 and 2026 confirm this as Canva's most consistent limitation. It is not a bug. It is the limit of how the algorithm handles fine, low-contrast edges. Dedicated background removal tools with manual hair masking controls handle this type of image better.
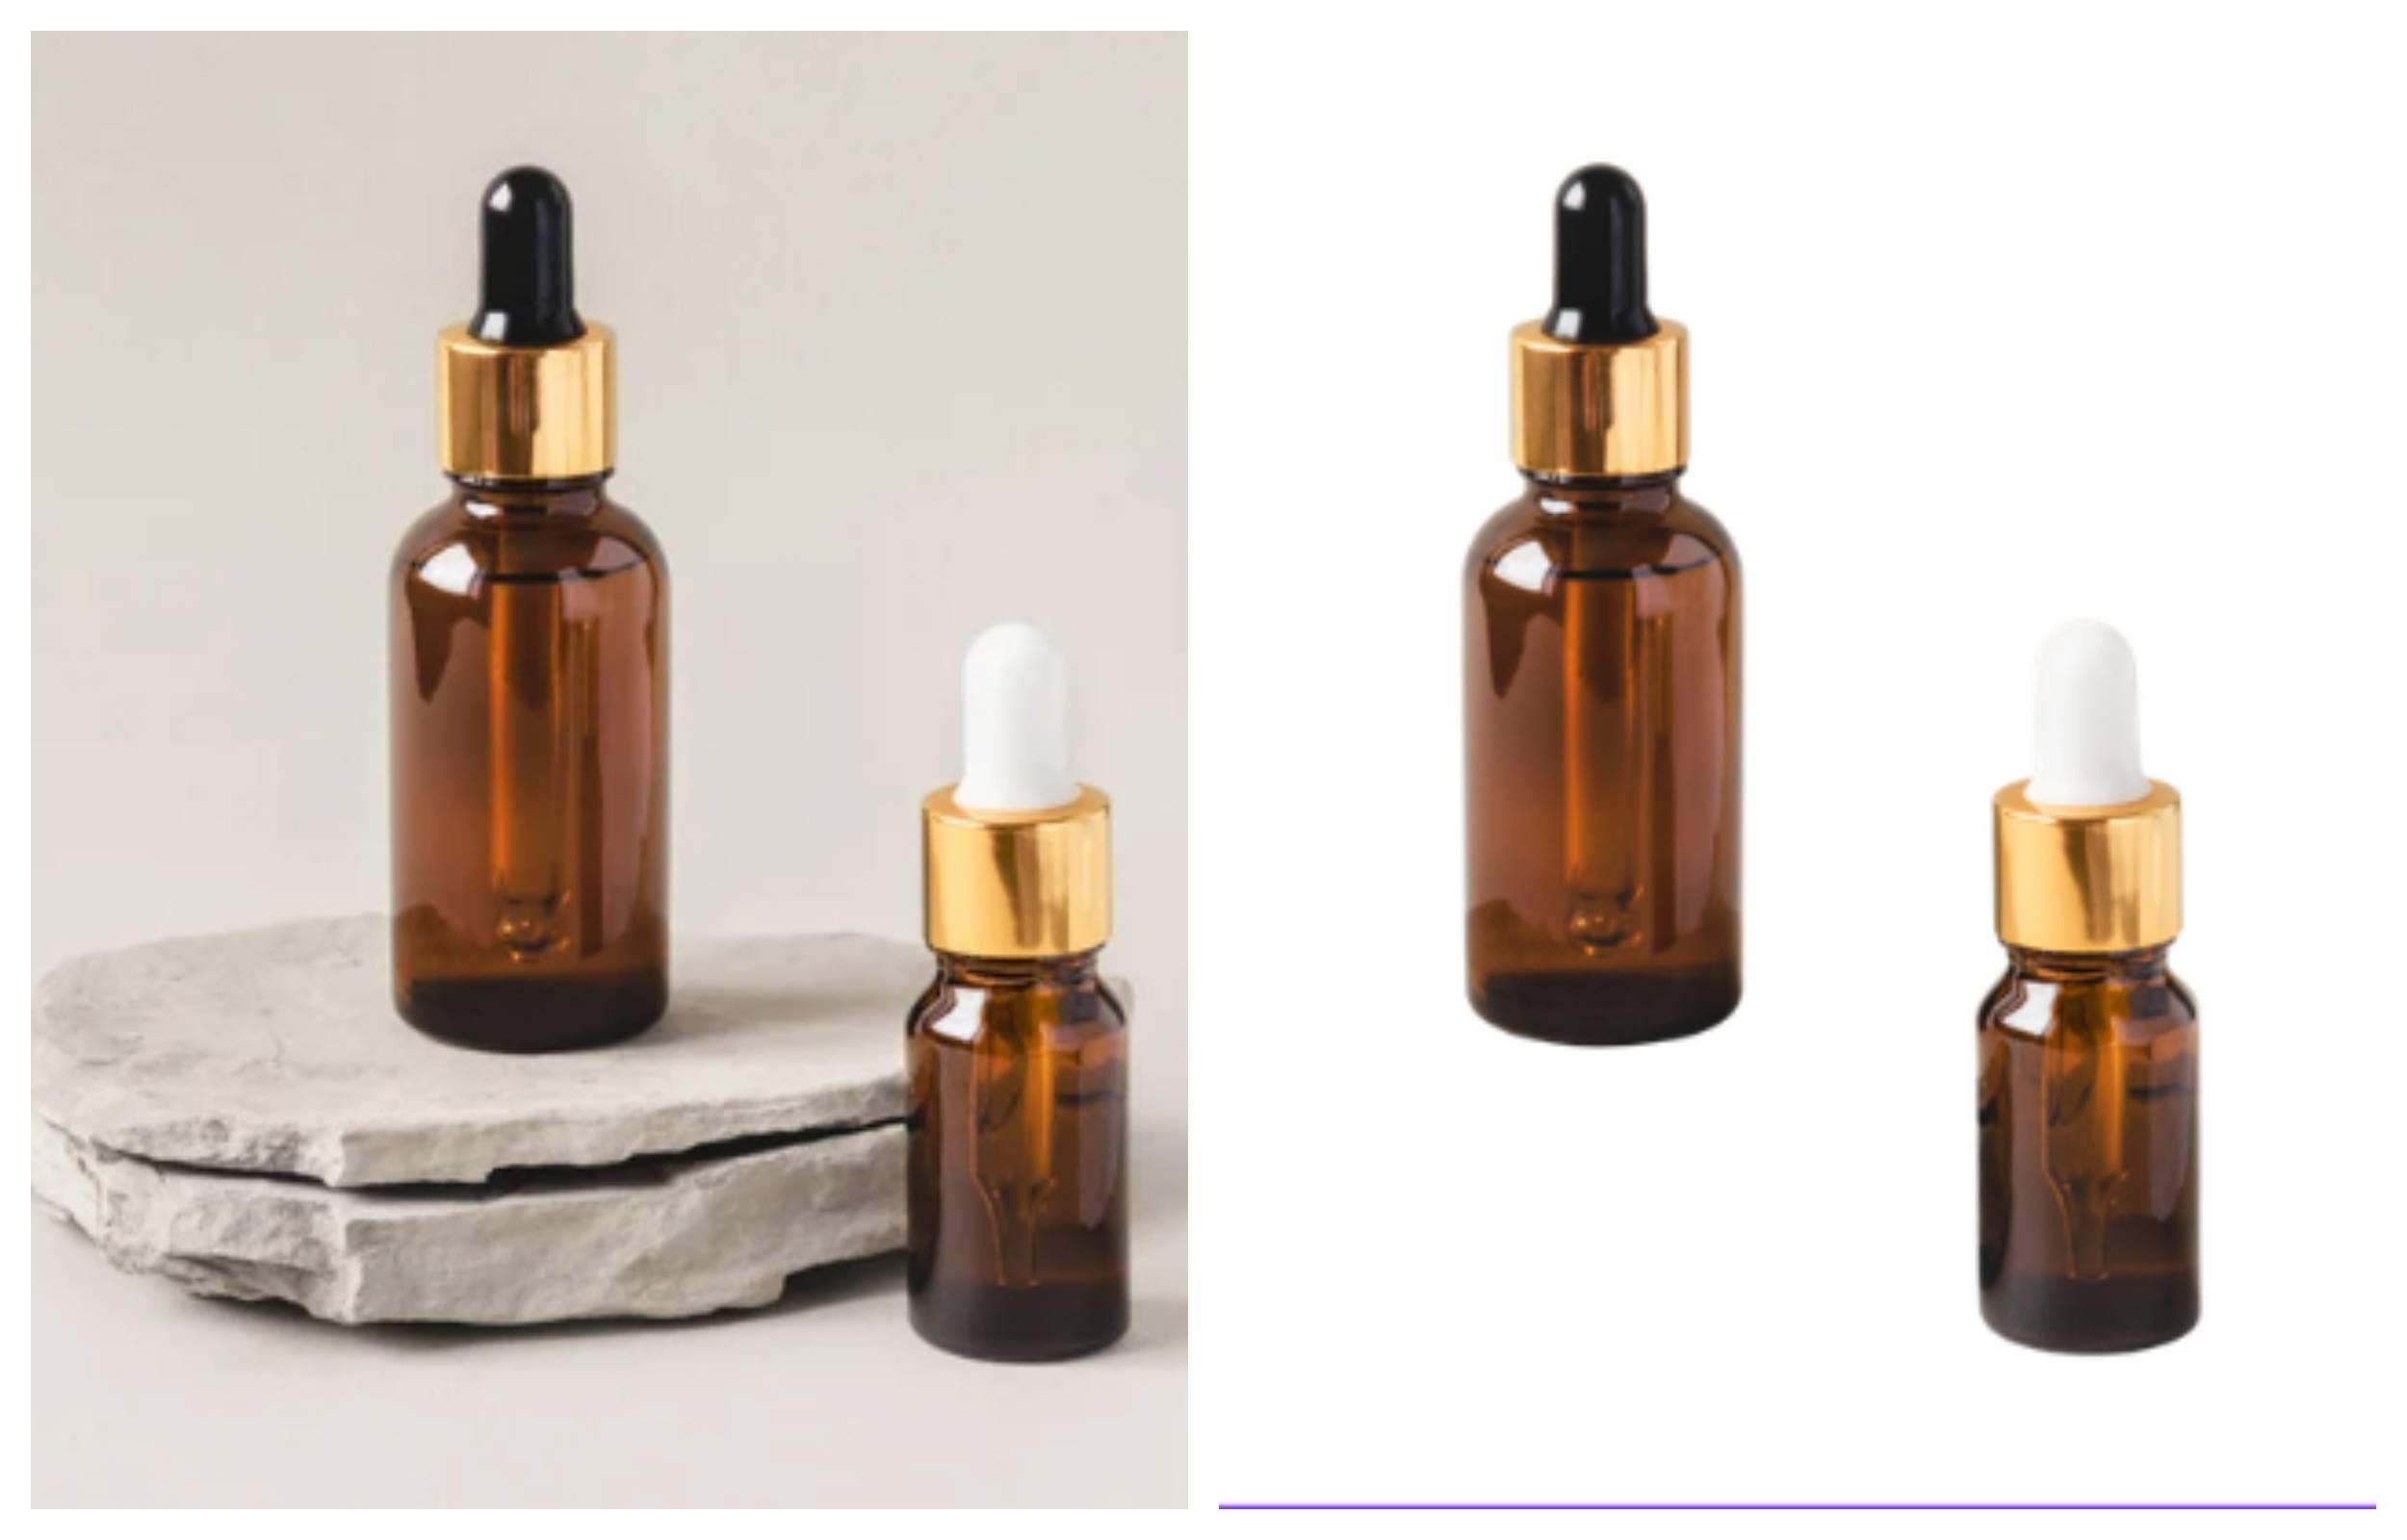
Test Case 3: Product on a Surface
A product (mug, bottle, cosmetic container) photographed on a table or flat surface.
Result: the product itself isolates cleanly. The shadow cast on the surface disappears along with the background. For e-commerce listings that need a realistic drop shadow, this must be added back manually using Canva's Shadow effect or a separate design tool after export.
Transparent or reflective products reveal another gap. Glass, sunglasses, jewelry, and clear containers sometimes get partially removed because the AI reads the see-through areas as background. Results on these product types are inconsistent enough that manual refinement is almost always needed.
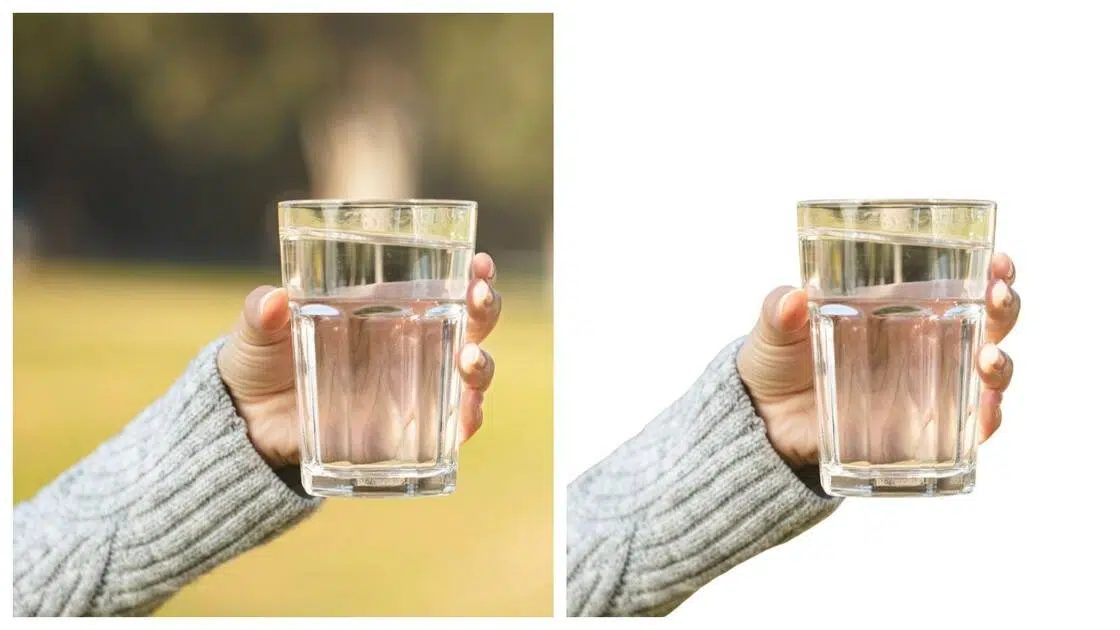
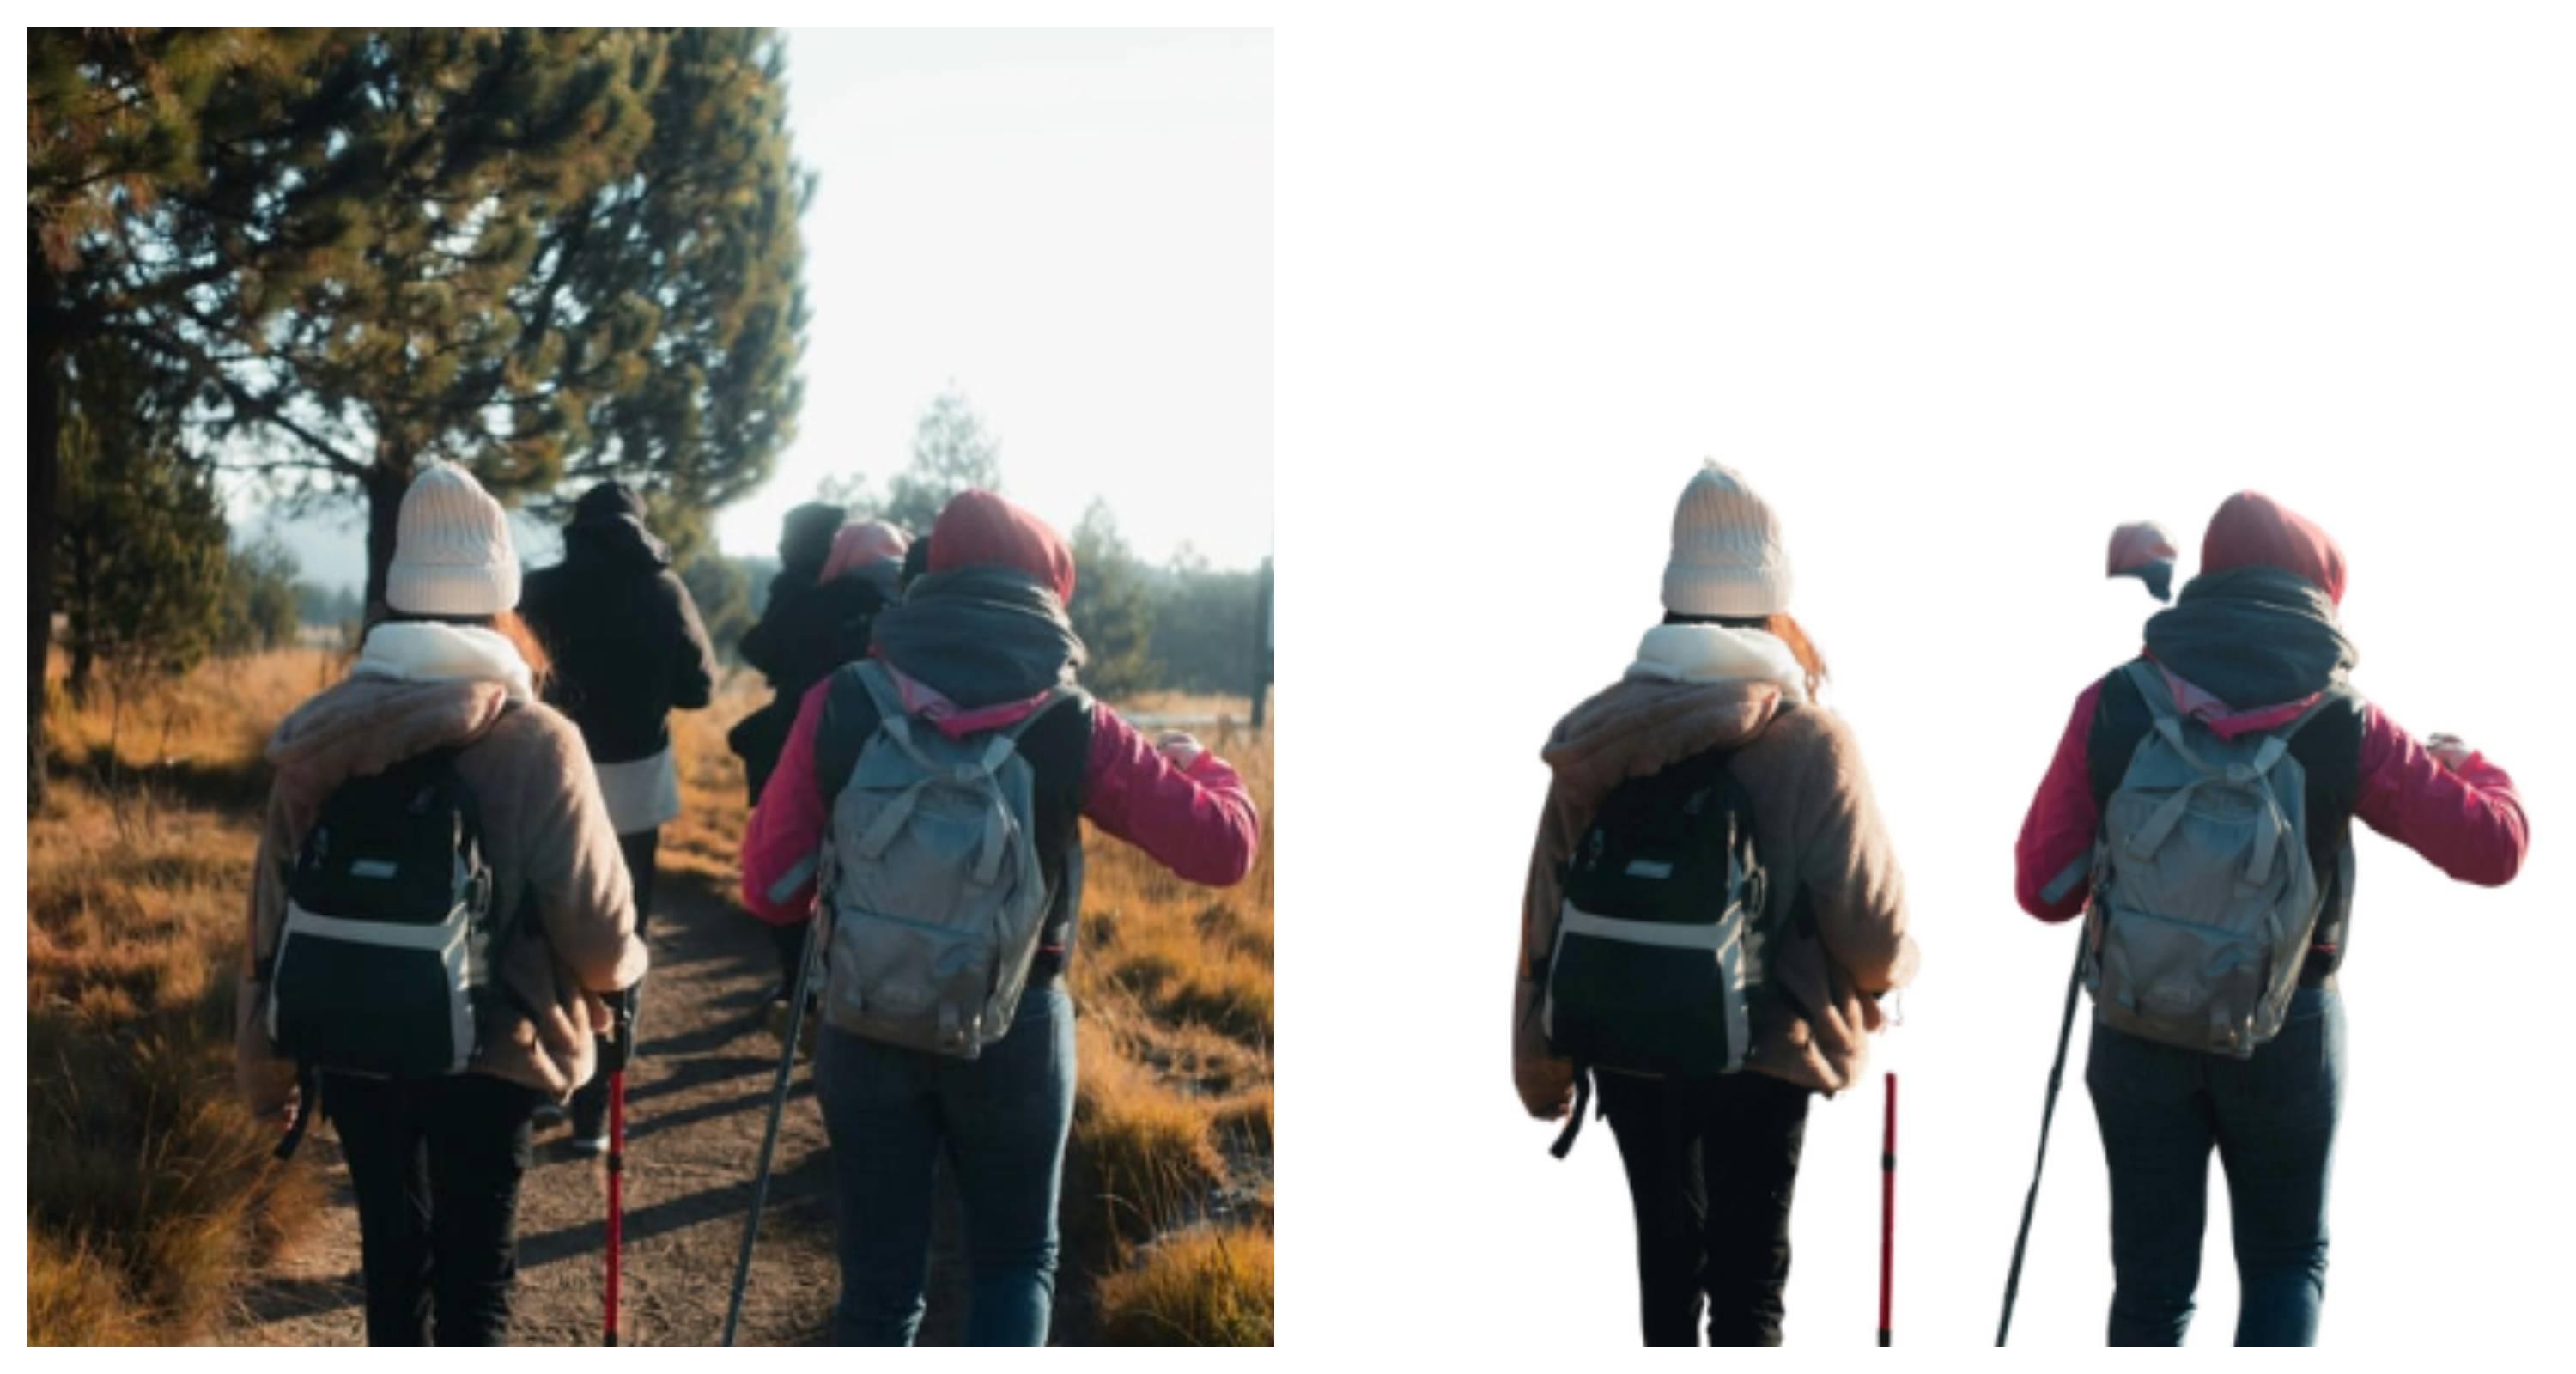
Test Case 4: Low-Contrast Outdoor Scene
A person or object photographed outdoors or in a busy environment where the subject and background share similar color tones.
Result: incorrect selections in both directions. Parts of the background get kept; parts of the subject get removed. Low image resolution makes this worse. Compressed or low-light images give the algorithm less contrast data to work with, and the AI makes more mistakes as a result.
The Erase and Restore tools can fix this, but the amount of manual work involved removes the convenience advantage of a one-click tool. If your images regularly fall into this category, a tool with dedicated manual masking controls will save time overall.
Where It Works and Where It Does Not
Reliable: studio portraits, product shots with plain backgrounds, headshots, social media cutouts against uniform backgrounds.
Inconsistent: curly or flyaway hair, outdoor low-contrast scenes, transparent or reflective objects, low-resolution or compressed source images.
Summary: Where Canva's Background Remover Works and Where It Does Not
-
Reliable: studio portraits, product shots with clear backgrounds, headshots, social media cutouts
-
Inconsistent: curly or flyaway hair, low-contrast scenes, transparent or reflective objects, outdoor subject-background overlap
The Hidden Catch: What Canva's Background Remover Actually Costs
Most people only discover the Background Remover is a paid feature after they have already tried to click it. The crown icon appears, and suddenly there is an upgrade prompt. Here is everything you need to know before deciding whether to pay.
-
It is a Canva Pro-only feature. The Background Remover does not exist on the Canva plan at all. Clicking the BG Remover button on a plan account shows a crown icon and redirects to an upgrade page.
-
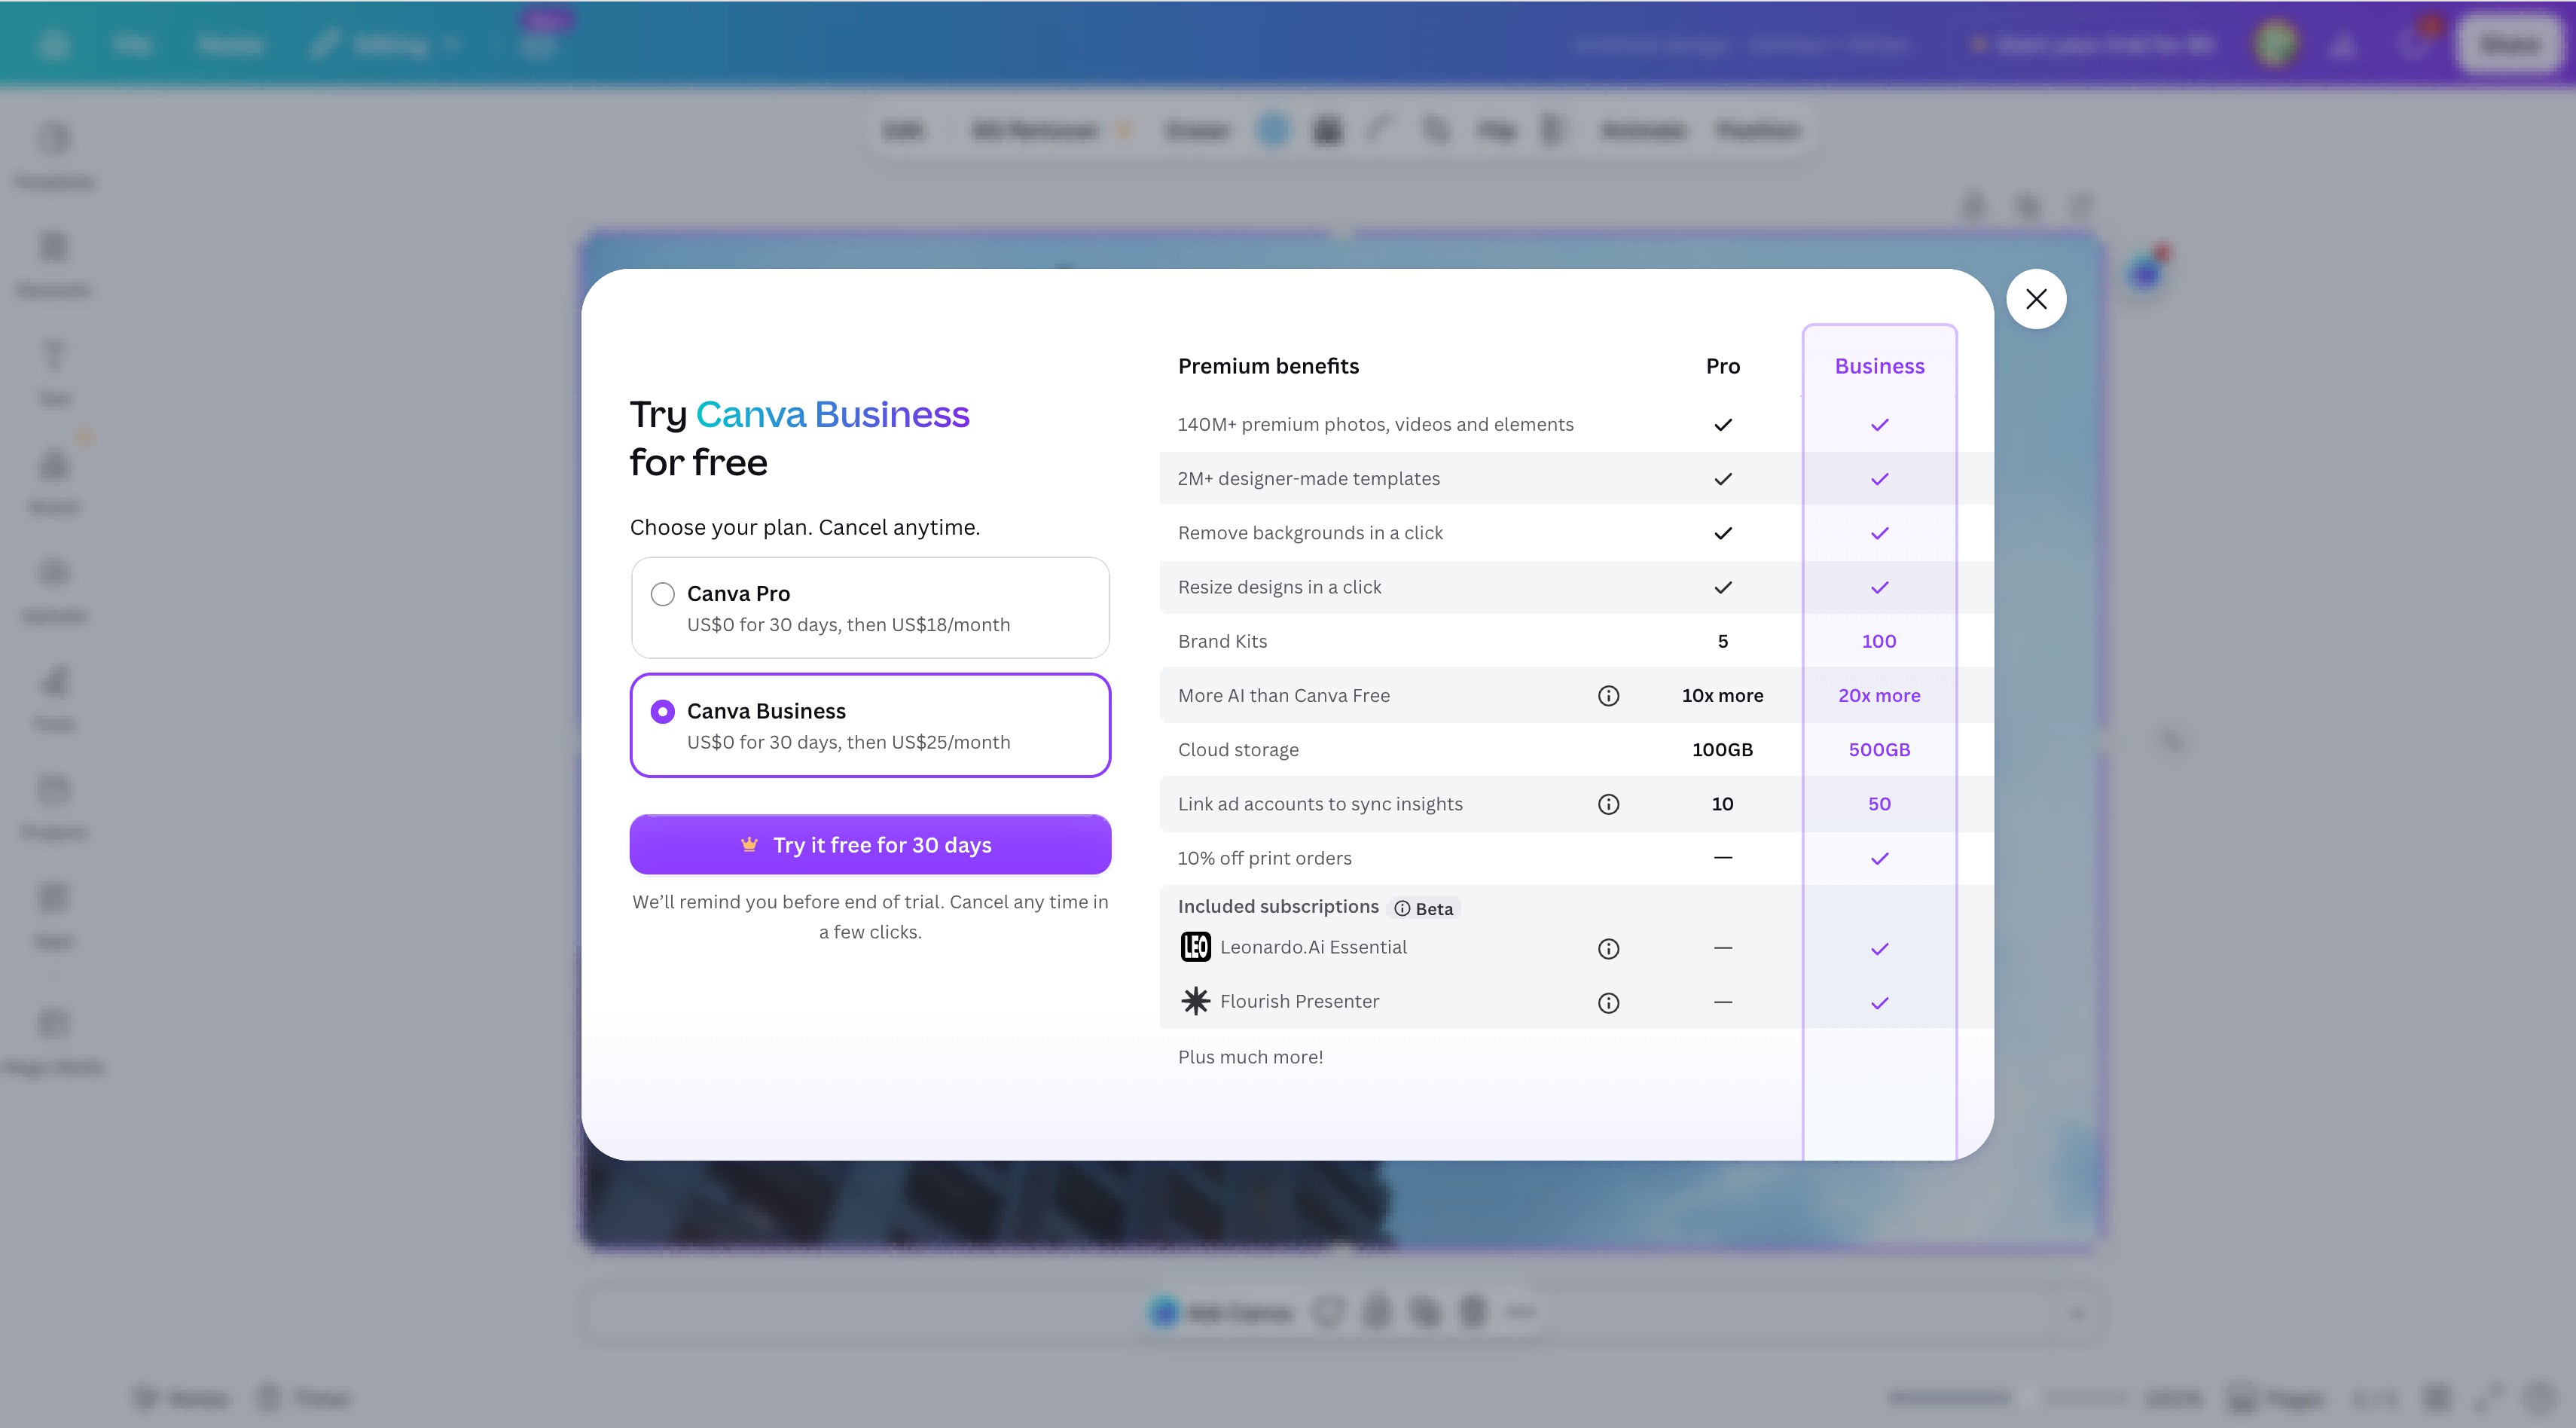
A 30-day trial is available. Go to Canva upload an image, log in, and launch the Background Remover. This triggers a 30-day trial prompt covering both Canva Pro ($0 for 30 days, then $18/month) and Canva Business ($0 for 30 days, then $25/month). You can cancel before the trial ends and will not be charged.
-
Canva Pro pricing after the trial: $15/month billed monthly, or $120/year (approximately $10/month) billed annually.
-
Canva for Education and Canva for Nonprofits accounts also include the Background Remover at no additional cost.
-
The subscription covers far more than background removal. Canva Pro includes 140M+ premium photos, Brand Kit, Magic Resize, Content Planner, and 100GB cloud storage. Background removal is one feature inside a broader paid tier.
-
Worth paying only if you use Canva regularly. If background removal is the only feature you need, the monthly cost is hard to justify. If Canva Pro is already part of your workflow, the Background Remover is included at no extra charge.
-
Transparent PNG export also requires Pro. Even if you remove a background using another tool and import the image into Canva, the plan account will export it with a white background. Transparent PNG output is locked behind Canva Pro.
Need More Precision? Try Zawa AI Background Remover
For images where Canva's output is not clean enough, particularly portraits with complex hair, products with reflective surfaces, or low-contrast outdoor shots. Zawa AI Background Remover is worth trying. It runs in a browser, so there is no installation involved, and it handles batch processing of up to 30 images in a single session, which Canva does not support.
Step-by-Step: Using Zawa AI Background Remover
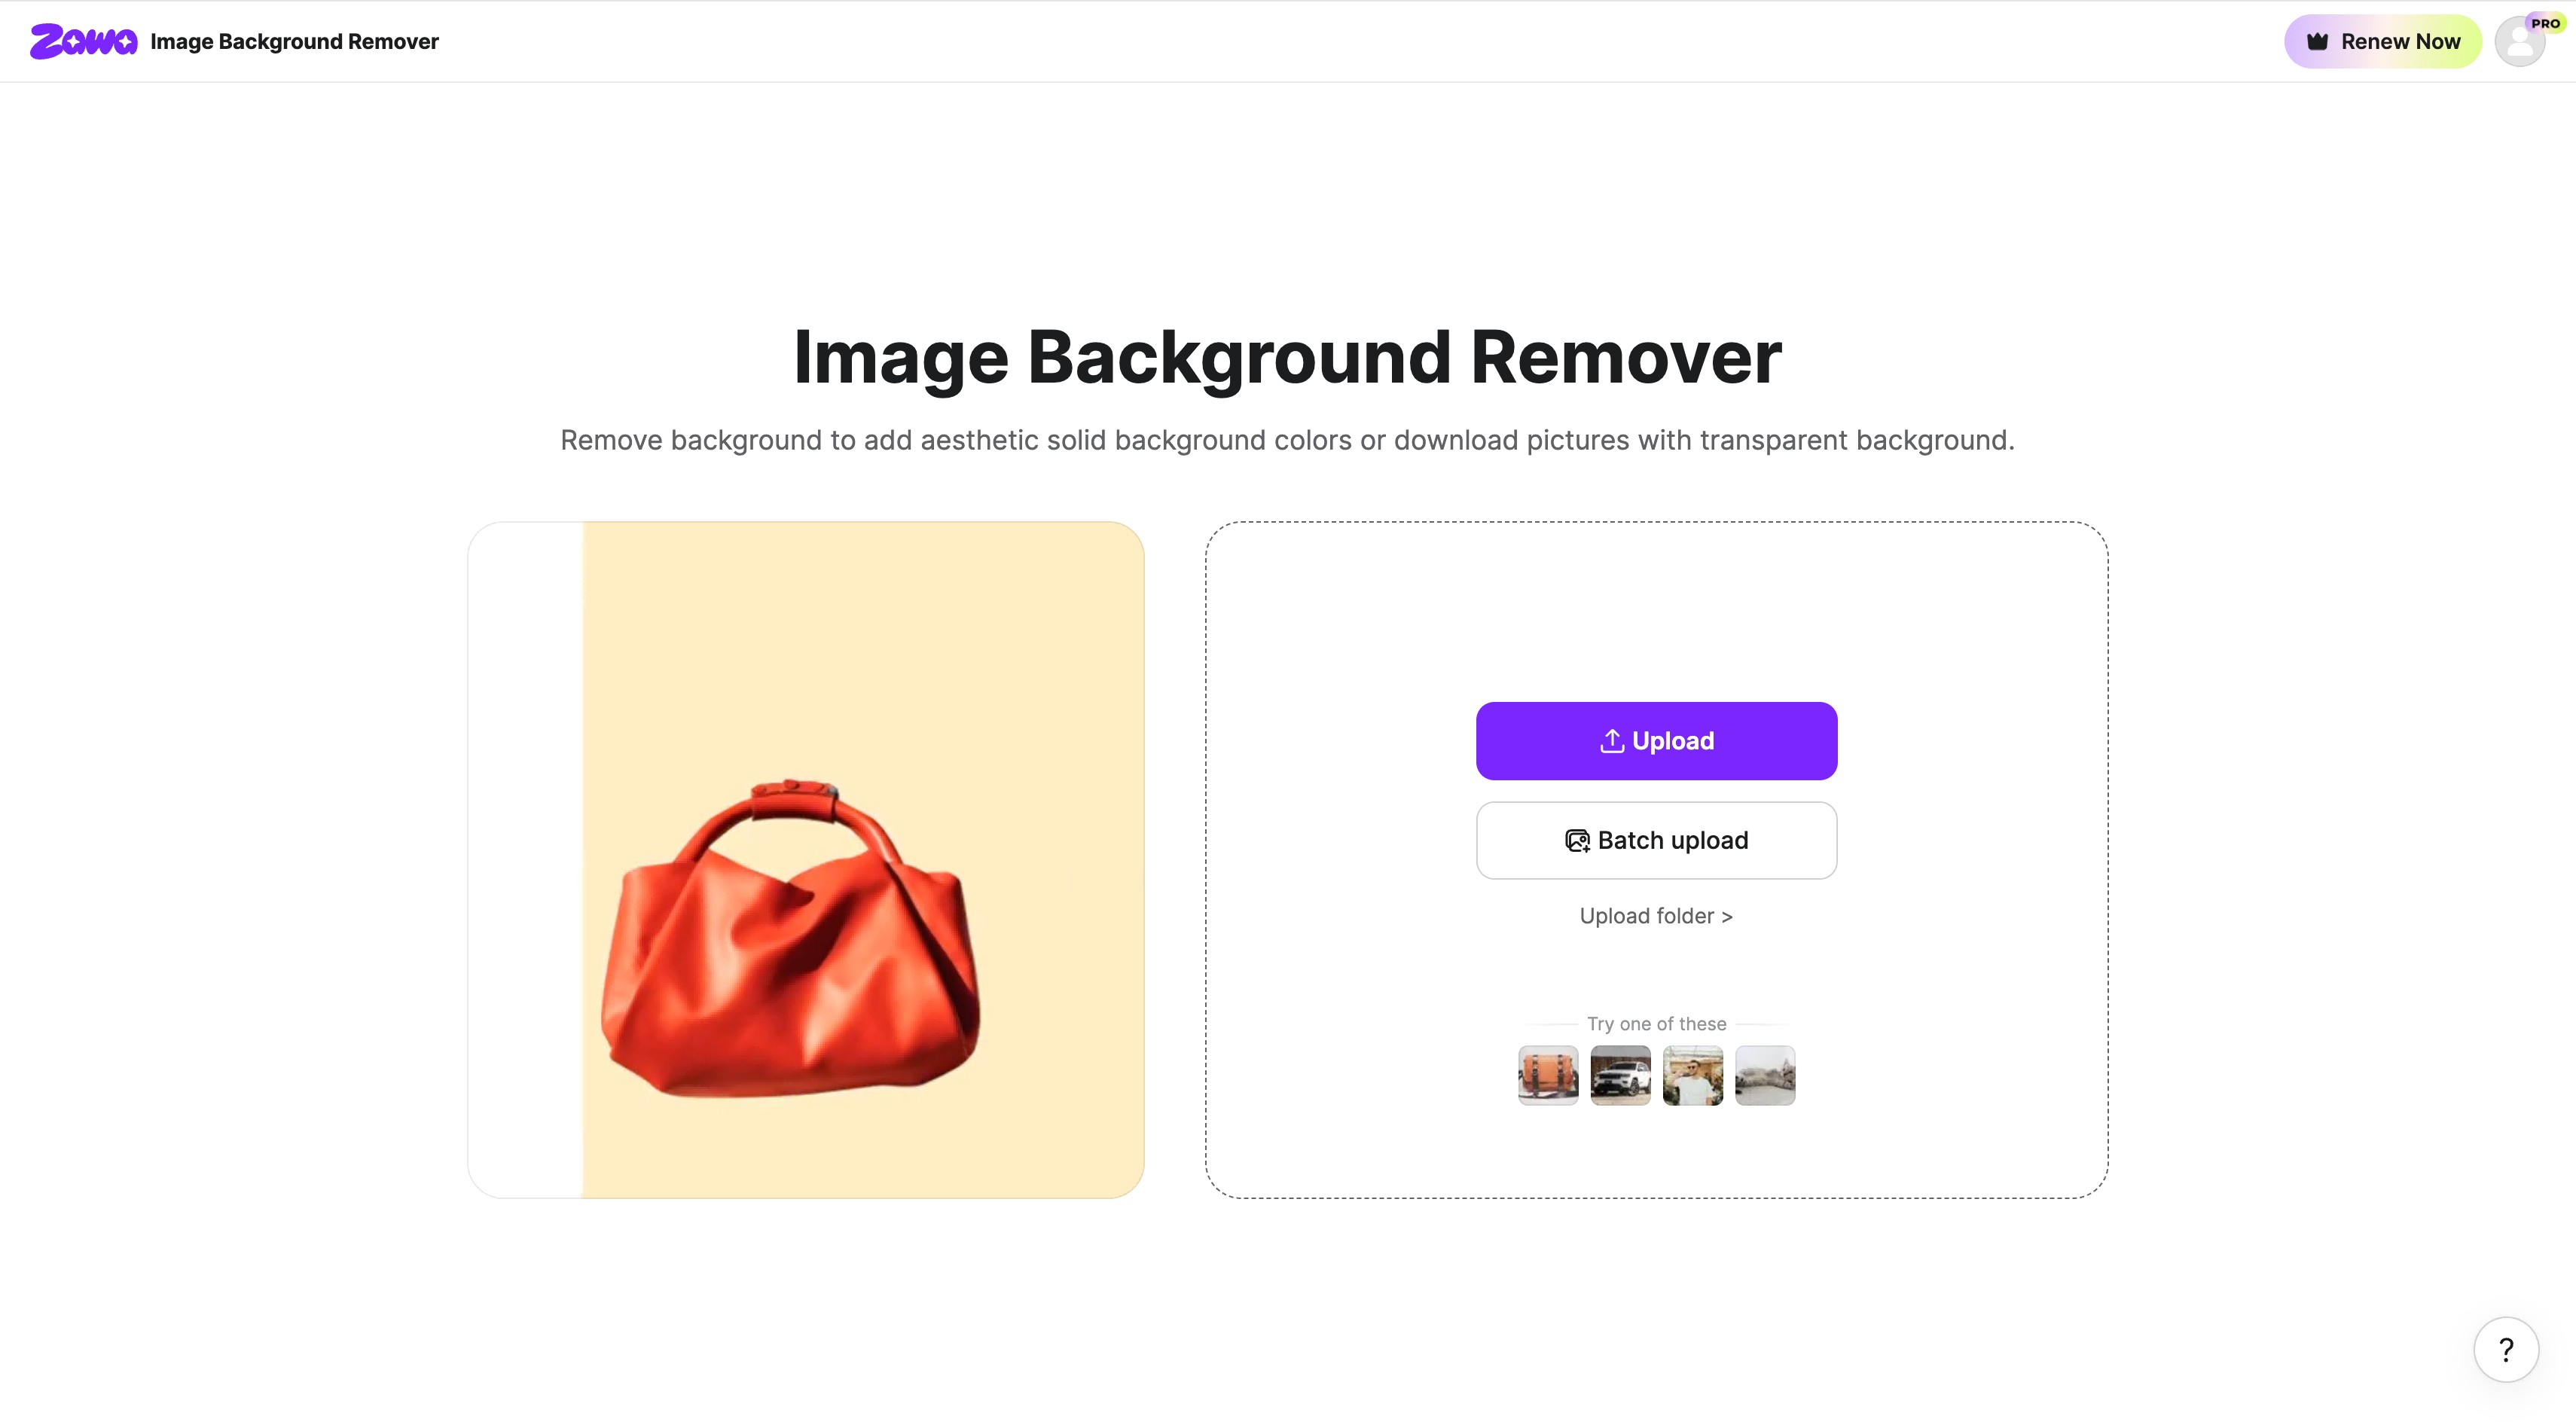
Step 1: Upload Your Image
Go to Zawa Click Upload to add a single image, or use Batch upload to process multiple files at once. Sample images are available at the bottom of the page if you want to test the tool before uploading your own.
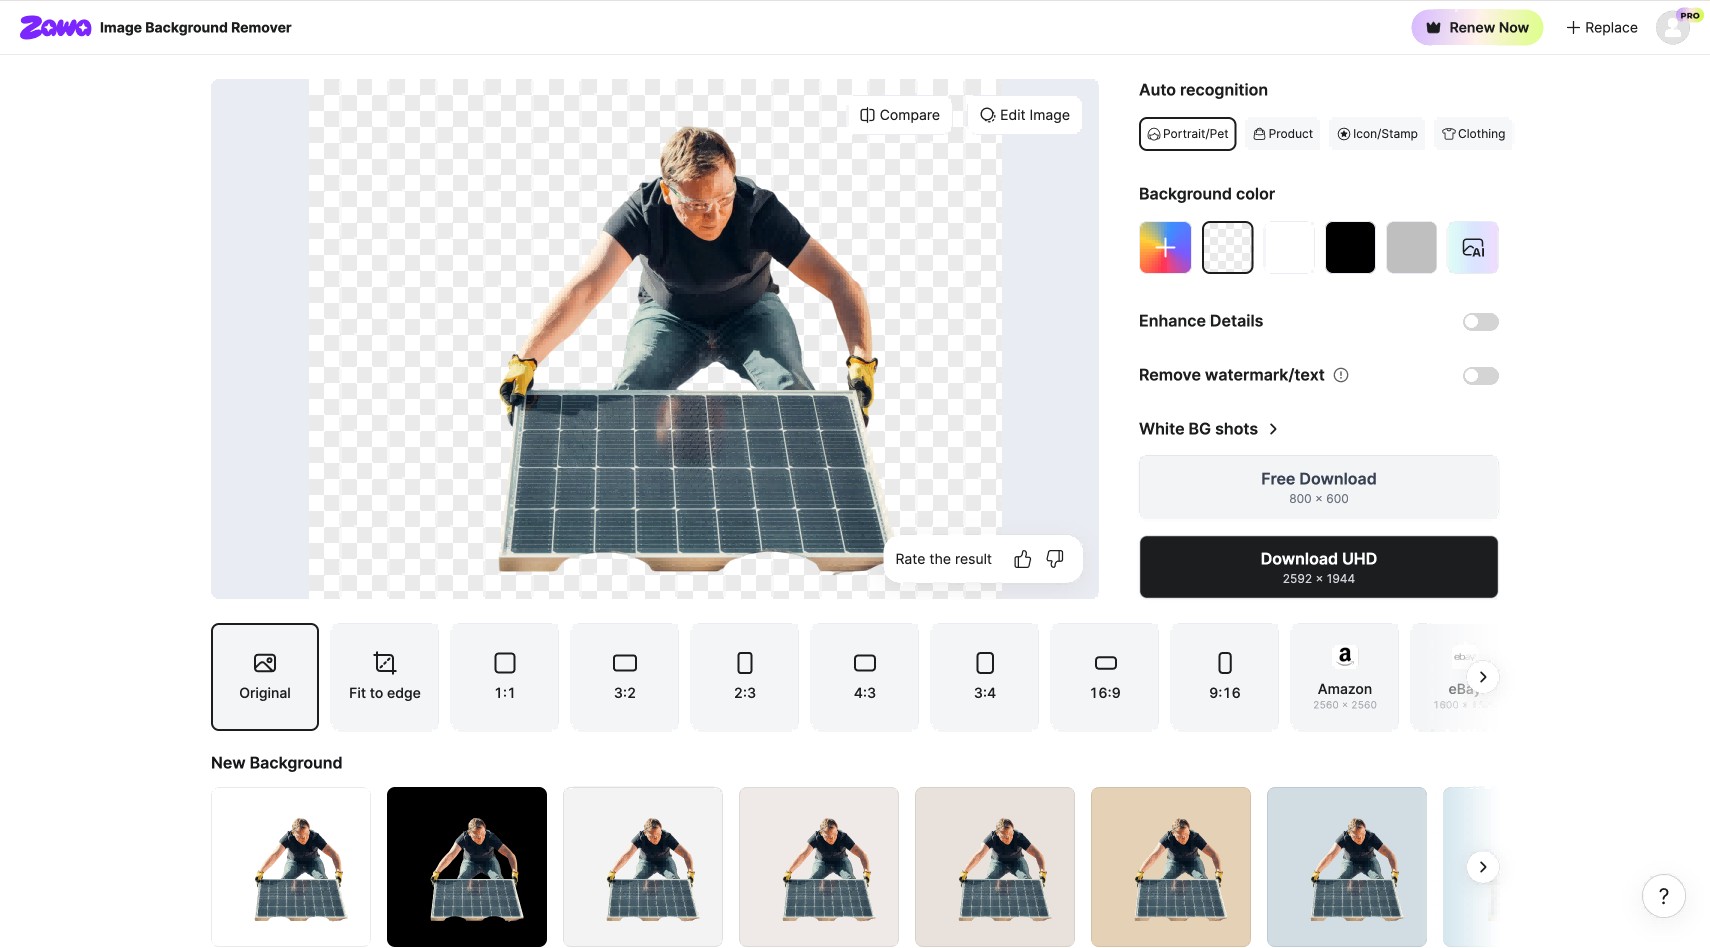
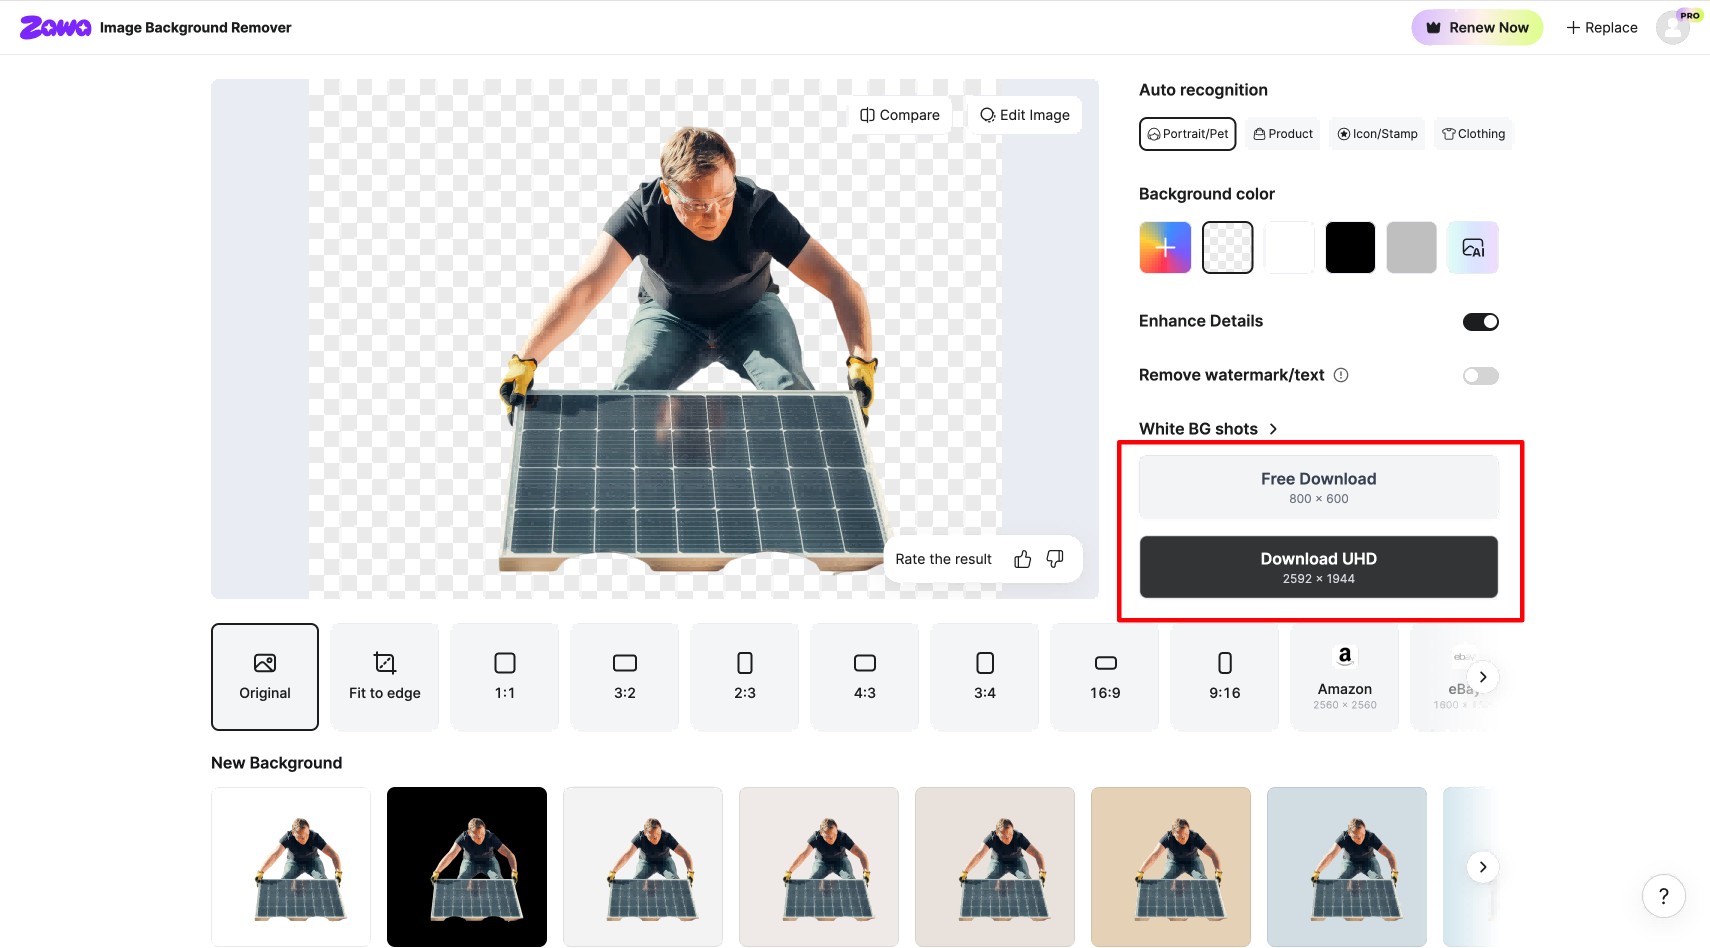
Step 2: Review and Adjust the Result
Zawa removes the background automatically. On the right panel you can choose from four Auto recognition categories: Portrait/Pet, Product, Icon/Stamp, and Clothing. Switch between them if the automatic result needs improvement. You can also change the background color, toggle Enhance Details for sharper edges, and enable Remove watermark/text if needed.
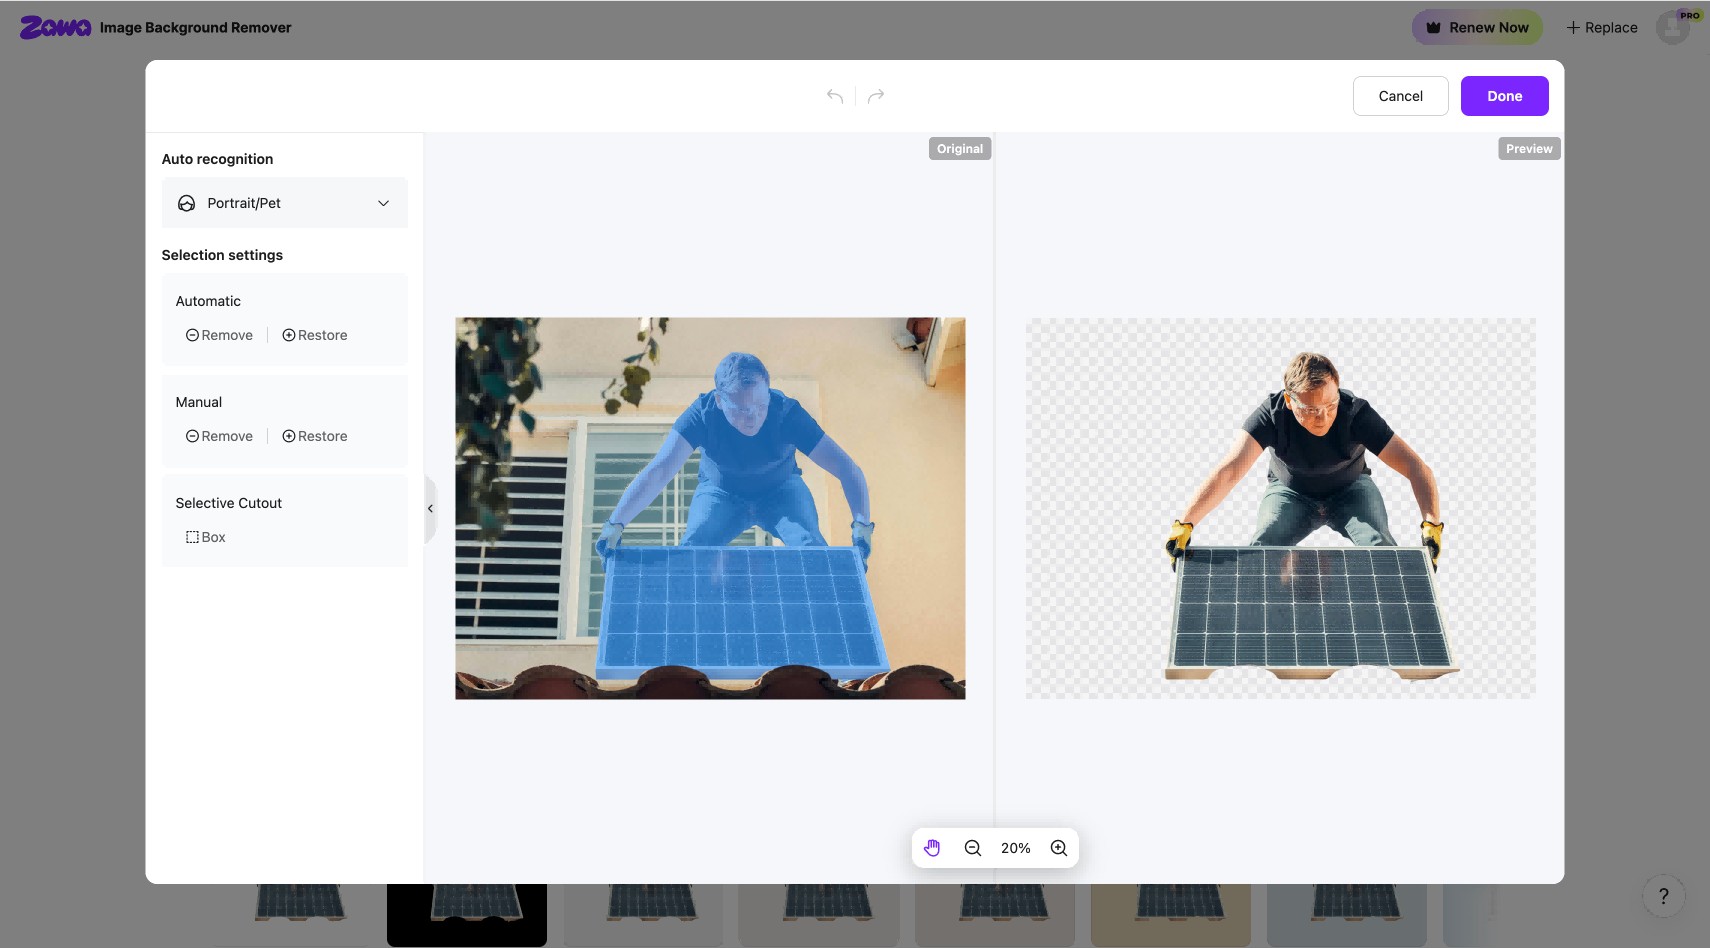
Step 3: Refine with Edit Image
If the cutout needs more work on specific edges, click Edit Image above the result. This opens a side-by-side panel showing the original and preview. The left panel gives you Automatic and Manual controls with separate Remove and Restore options for each. A Selective Cutout Box tool is also available for isolating a specific region. Make your adjustments and click Done.
Step 4: Download the Transparent PNG
Click Free Download for an 800x600 output, or Download UHD for the full 2592x1944 resolution version. The aspect ratio options at the bottom let you crop to standard formats before downloading, including 1:1, 3:2, 16:9, 9:16, Amazon, and eBay sizes.
Pro Tips for Cleaner Background Removal in Canva
Getting better results from Canva's Background Remover often starts before you even upload the image. These habits reduce how much manual correction is needed after the initial pass.
Pay Attention to Lighting and Shadows
-
Even lighting produces the most reliable results - avoid images with harsh directional shadows that fall across the subject boundary
-
For product photography, consistent studio lighting reduces shadow variation at the edges and improves AI accuracy
-
Canva removes the cast shadow from product shots automatically; if a realistic drop shadow is needed in the final design, add it manually using Canva's Shadow effect after exporting the cutout
Check Subject and Background Contrast
-
Canva's AI works from color and tone contrast - if clothing matches the background tone (white shirt against a pale wall), the AI cannot reliably separate them
-
For product photography, a white background works well unless the product itself is white or very light - in that case, use a mid-gray or contrasting backdrop instead
-
Dark subjects on dark backgrounds produce the least reliable results; increase background brightness before shooting if possible
Work at High Resolution
-
Upload the highest resolution version of the image available - more pixel data improves edge accuracy, particularly around fine detail
-
Compressed or low-resolution images (under 800px on the shortest side) consistently produce lower-quality edge detection
Use the Erase and Restore Brush at High Zoom
-
Zoom to at least 100% on the canvas before using the Erase or Restore brush - corrections made at full zoom are more precise and avoid overpainting adjacent areas
-
Use the smallest brush size when working near the subject edge; use a larger brush only in open background areas away from the boundary
Does Canva Background Remover Work on Videos?
Yes. Canva Pro includes a video background remover that works directly in the desktop editor. The process is similar to the image tool but takes longer to process depending on the clip length. Here is how to do it.
Step 1: Upload Your Video
Make sure you are on a Canva Pro account. From the Canva home page, click the plus icon on the left panel to create a new design. In the pop-up, go to Upload and select Add to uploads to bring your video into Canva. Once uploaded, find it under your Projects tab, select it, and click Use in a design.

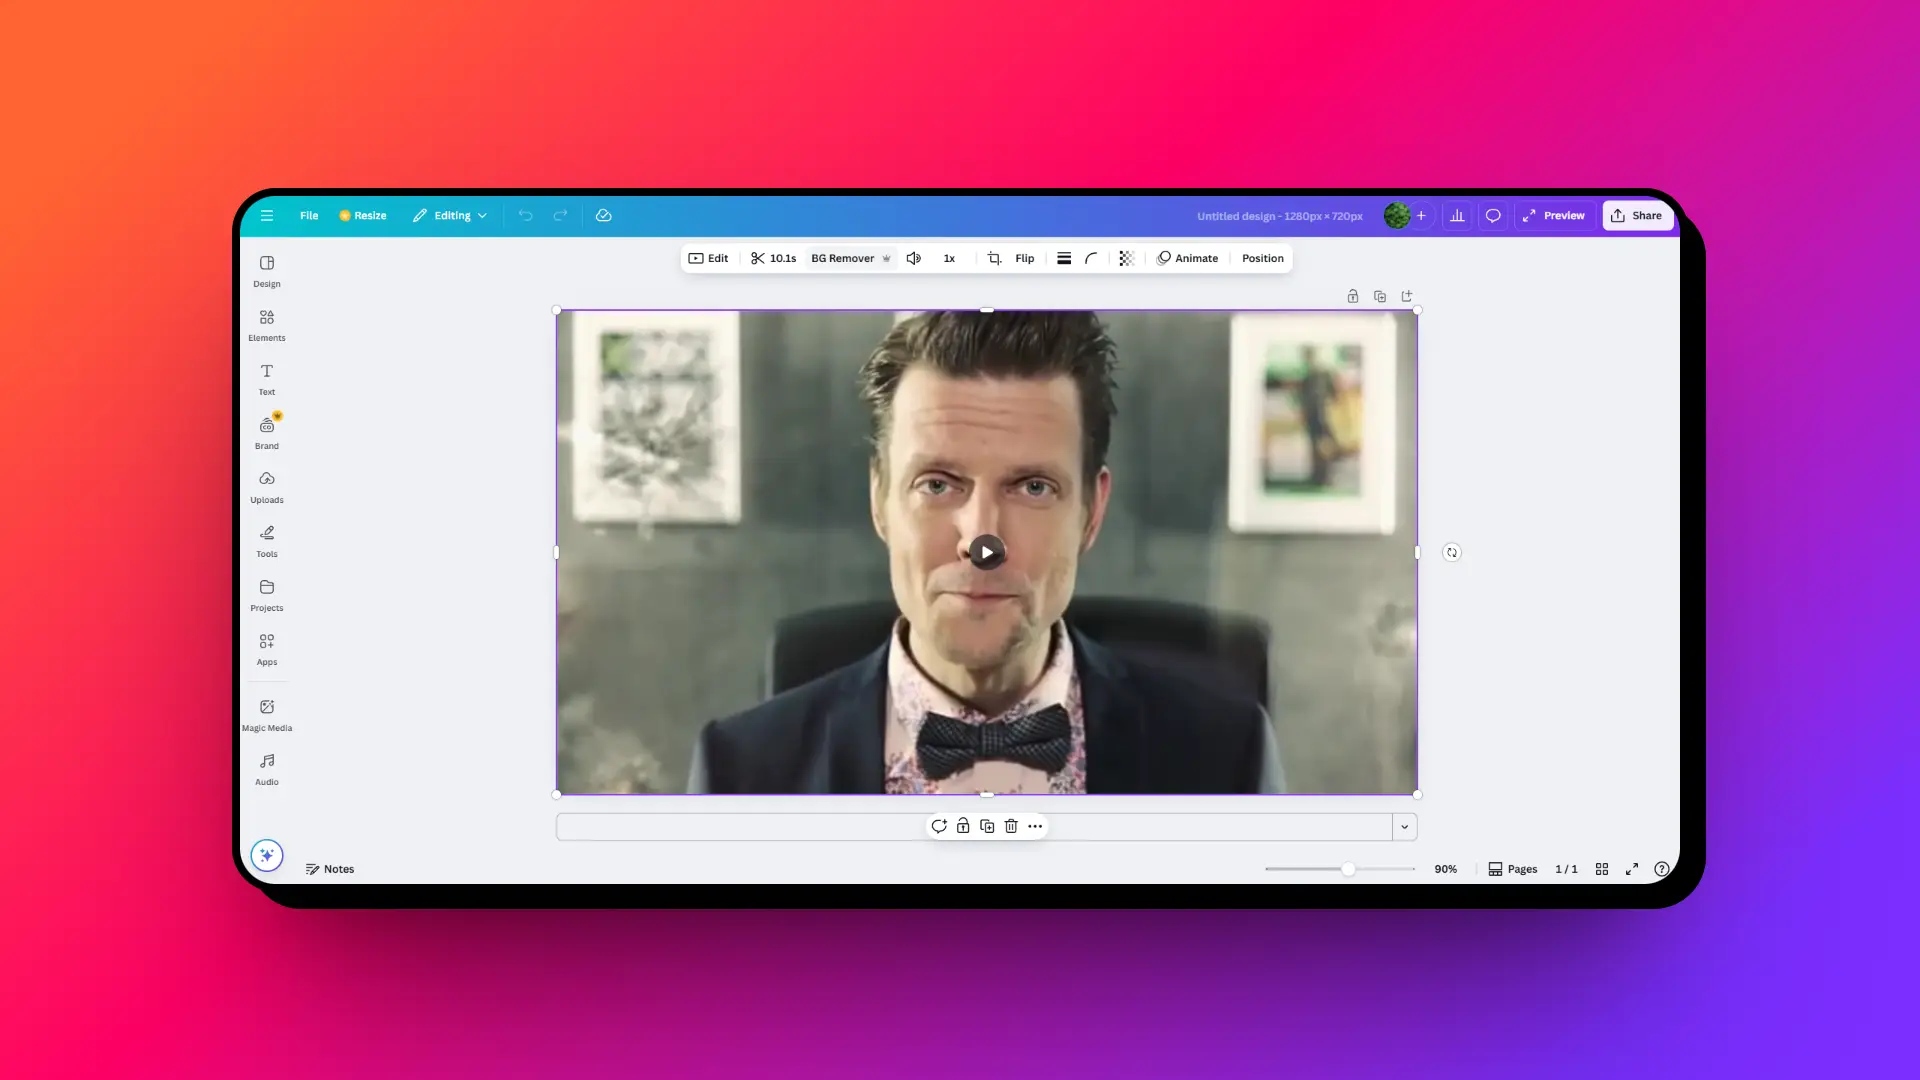
Step 2: Open the Background Remover
Your video loads on the canvas in the Canva editor. Click the video to select it. A toolbar appears at the top of the canvas with editing options. Click BG Remover from that toolbar. Canva begins processing the clip and removes the background automatically.
Step 3: Export Your Video
When the design is ready, click Share in the top right corner and select Download. Choose MP4 as the file format and click Download. Note that video does not support transparent export in Canva. You need to set a replacement background before downloading.
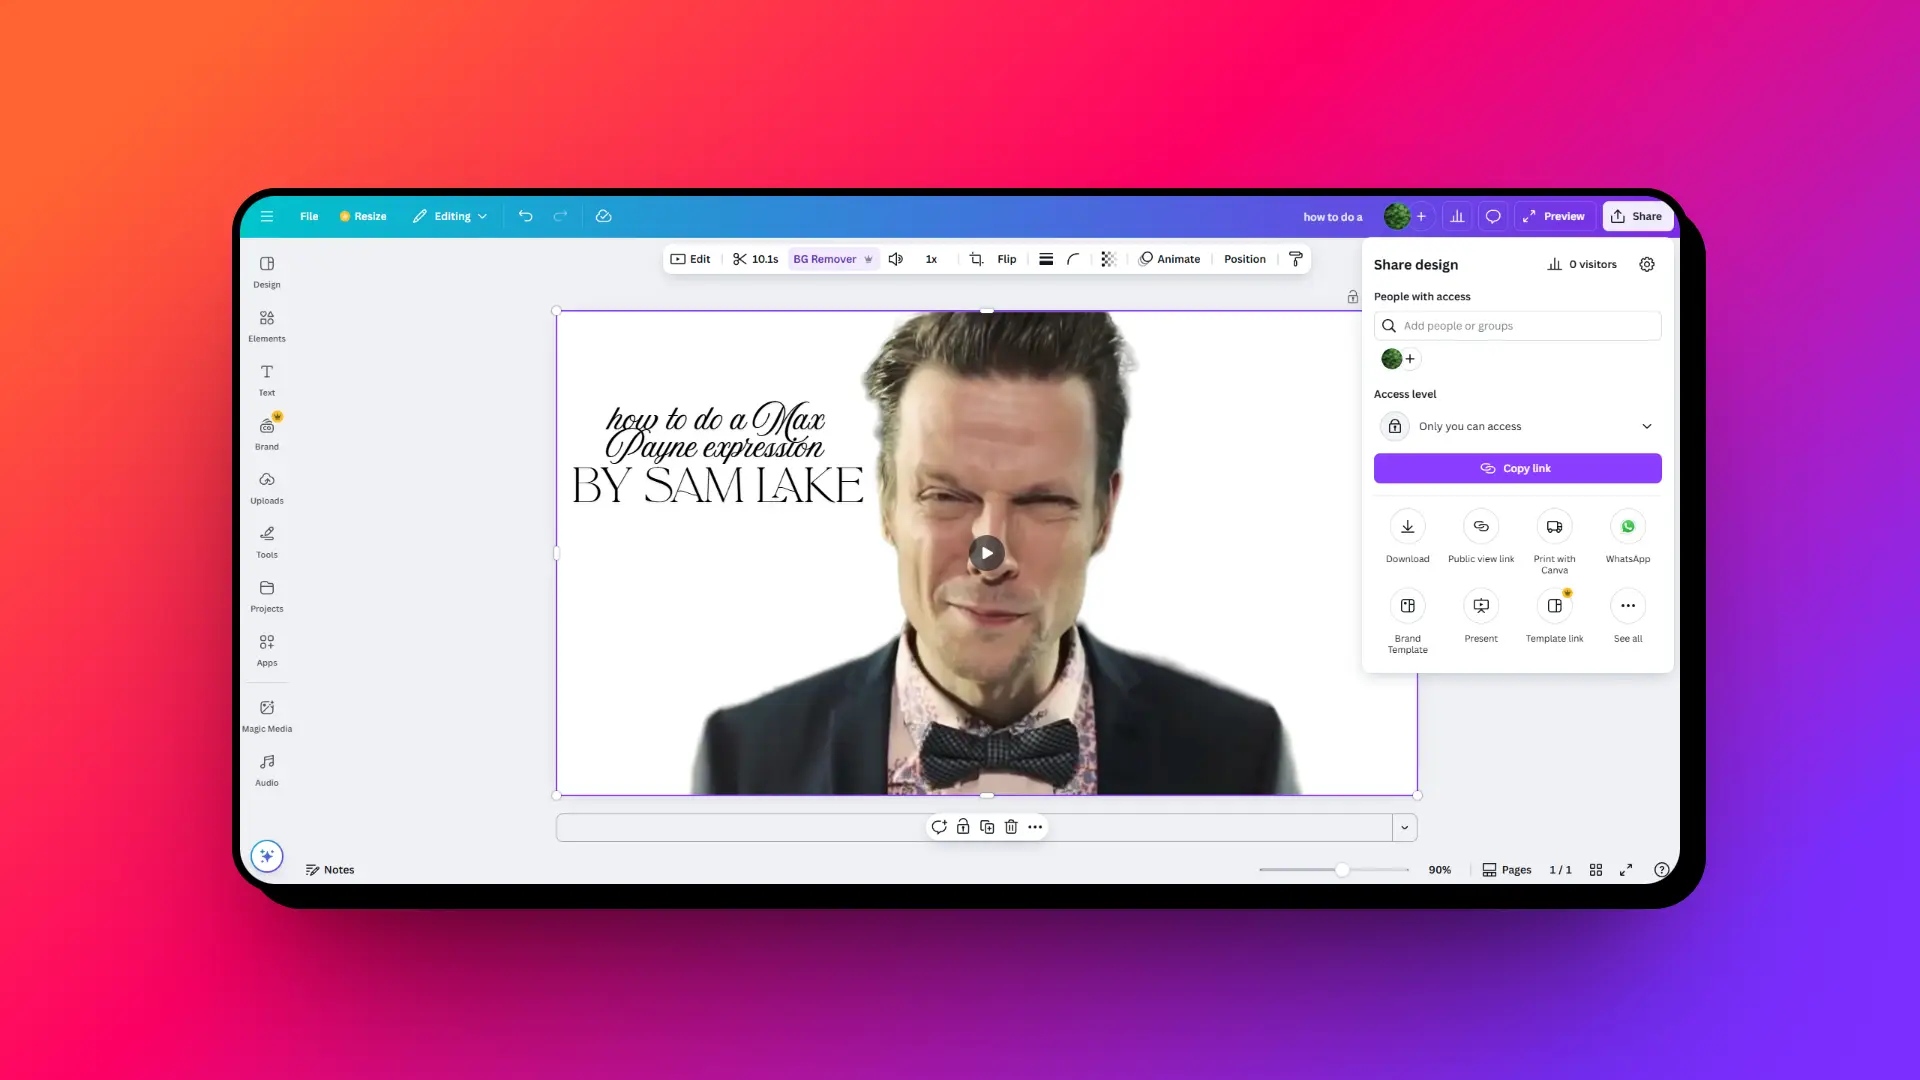
Note that transparent background export is not available for video; you will need to set a replacement background before downloading.
Conclusion
Removing a background in Canva is straightforward once you know where to find the tool. For most studio portraits, product shots with clean backgrounds, and standard headshots, the one-click result is accurate enough to use without manual correction.
The limitation is the subscription. If you are not already on Canva Pro, the $15 per month entry point is high if background removal is the only feature you need. The 30-day trial gives you time to test whether the quality works for your image types before committing.
For images where Canva falls short, particularly hair, reflective surfaces, or low-contrast outdoor shots. Zawa AI Background Remover handles those cases with better edge precision, batch processing, and a dedicated cutout workflow without requiring a broader design platform subscription.
FAQs
-
Is Canva Background Remover free??
No. Background Remover is a Canva Pro-only feature. On the plan it appears with a crown icon and prompts an upgrade. Canva Pro costs $15 per month billed monthly, or $120 per year billed annually. Canva for Education and Canva for Nonprofits accounts also include the feature.
-
How do I remove a background in Canva if I cannot find the BG Remover button?
Click the image, then click Edit photo in the top-left area of the Canva interface. In the left panel, go to Tools and look for BG Remover. If it is not listed, click See all next to Tools to expand the full list. If it still does not appear, the account is on the plan and requires a Pro upgrade to access the feature.
-
Why does Canva's background remover leave a fringe around the hair?
Canva's AI works from color and tone contrast to detect edges. Fine, flyaway, or curly hair has a low-contrast boundary with most backgrounds, so individual strands get blended into the edge rather than isolated cleanly. The Restore brush can recover some of this, but detail that was lost in the initial pass cannot be recreated. Dedicated tools with manual hair masking controls produce better results on this type of image.
-
Can I remove the background from multiple images at once in Canva?
Not in one operation. Each image must go through the Background Remover individually in Canva. For batch background removal, Zawa's AI Background Remover supports up to 30 images in a single browser session using its Batch upload feature.
-
Does Canva export transparent backgrounds on the plan?
No. Transparent PNG export requires Canva Pro. On the plan, PNG exports produce a white background even if the background was removed using a third-party tool before importing into Canva. The transparency is only preserved in the export on a Pro account.
-
How to remove background without using Canva Pro?
You can try the Background Remover via canva.com/features/background-remover, where Canva offers a 30-day trial that includes the feature. If you want a permanent option without a Canva subscription, Zawa AI Background Remover works in any browser at no cost for light use and handles most of the same image types with comparable or better edge quality on difficult subjects.
You May Be Interested
Remove Fold of Scanned Image: Best AI Restoration Guide

How to Remove People From Pictures

[2026 Updated] Best Apps to Remove Person From Picture

Canva Image Upscaler 2026: Full Review & Alternative

How to Remove Image Background in GIMP
