
How to Make a Grid on Instagram Story - Complete Step-by-Step Guide
Learn how to make a grid on Instagram Story in 2026. Find out step-by-step techniques, layout concepts, and easy tools. This guide explains everything step by step in detail, whether you are a creator or a brand. Keep reading!

The question of how to make a grid on Instagram Stories is important, as it can improve engagement and storytelling on your part. It is important to know the right process to follow, as it helps you create clean, uniform layouts. This article will help you learn the techniques, tools, and concepts to create successful Instagram Story grids. You will be taught step-by-step creation, design tips, and practical ways to improve your Story presentation. Continue reading to learn how to create grids and improve your Instagram presence in 2026 with a step-by-step guide.
How to make a grid on Instagram Story using Layout?
Step 1: Open Instagram and access the layout option
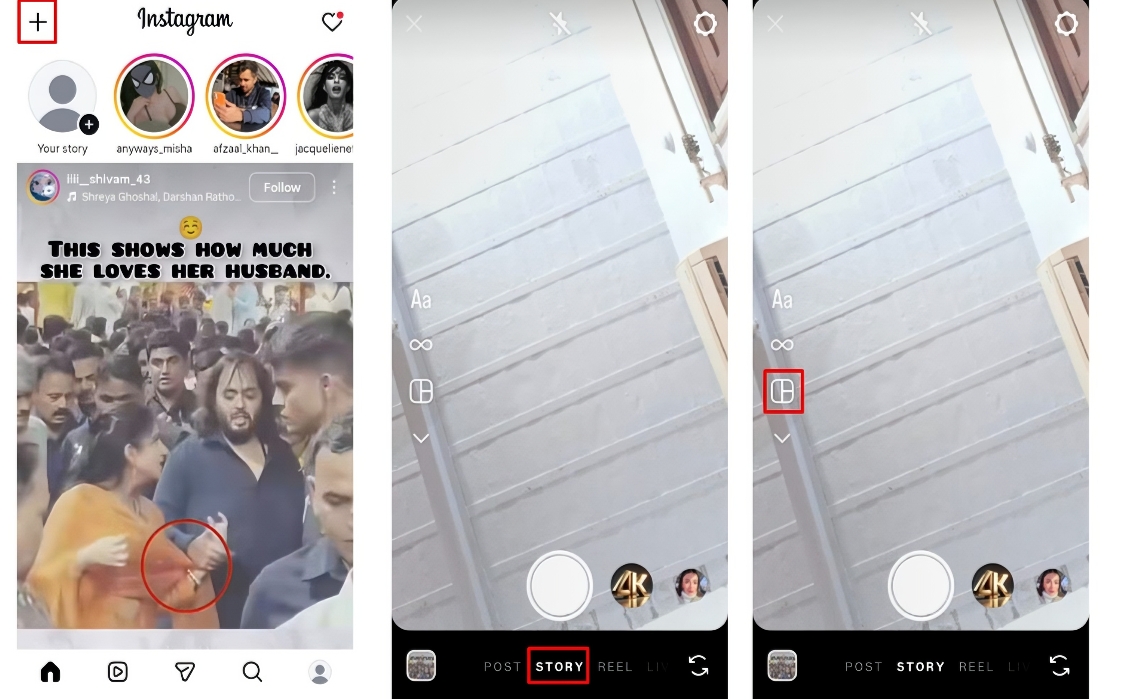
First, open the Instagram app, then click the "+" icon in the top-right corner of the main app interface. Later, click on the "STORY" option from the bottom-centered menu. After this, select the grid layout from the left-centered vertical menu, as shown in the image below.
Step 2: Choose a layout and add content to your grid
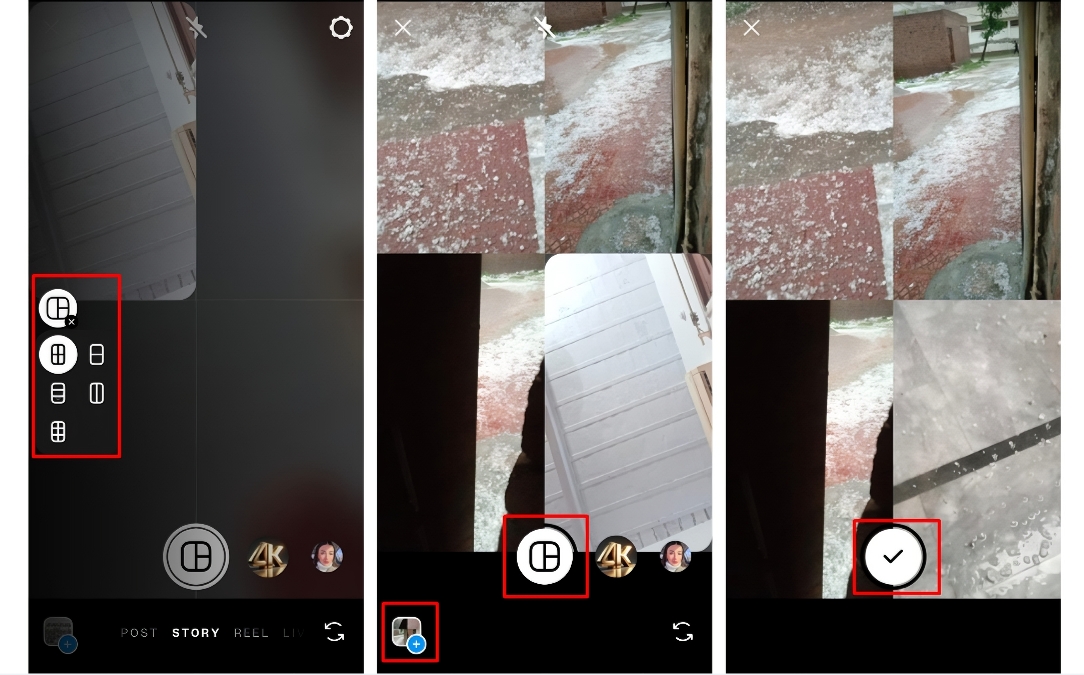
In the second step, select the layout type. You can choose the two-image-to-six-image layout format. After selecting the layout, either capture an image for each grid using the bottom-center camera icon, or upload one from the gallery using the option in the bottom-left corner. Once all content is uploaded, click on the tick icon as shown in the image below.
Step 3: Edit or share your grid Story
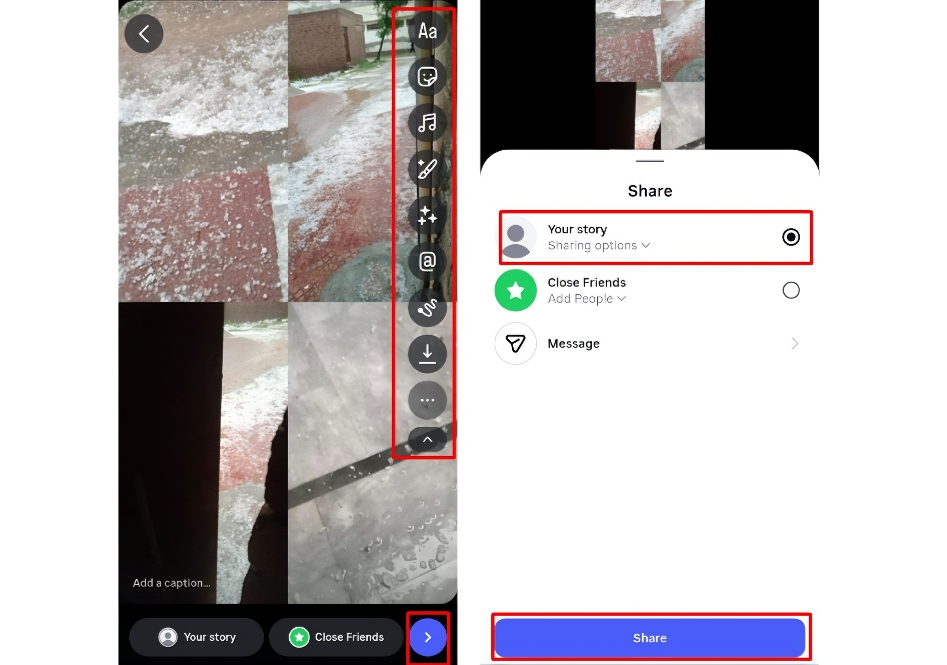
Finally, edit your Instagram story grid the way you like. You can add text, filters, effects, stickers, background music, etc. Once done, click on the "Next" tab present in the bottom right corner and select the "Your story" option. Next, click the "Share" tab to finish sharing the story on your Instagram.
How to make a grid photo for Instagram Story with the sticker
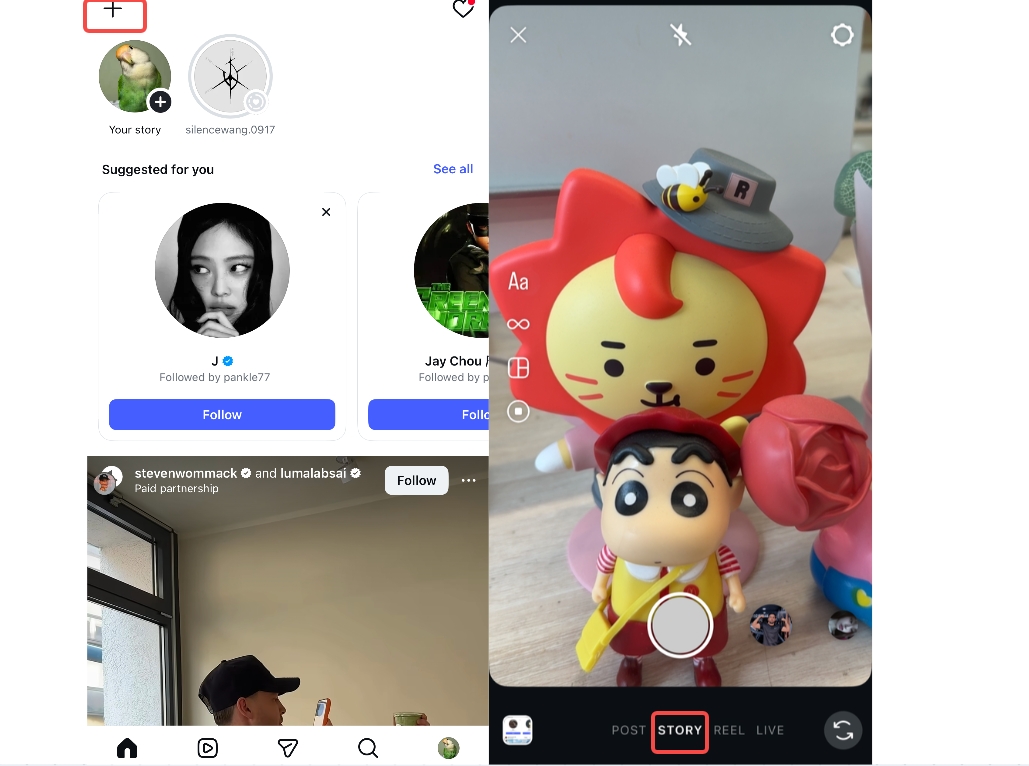
Step 1: Open Instagram and access the Story tab
Start by opening the Instagram app on your device. Next, tap the "+" icon located at the top-right corner of the main screen. After that, select the "STORY" option from the bottom-center menu to begin creating your Story.
Step 2: Capture or choose a background and upload photos
Next, select or capture a background from the gallery for your grid. Later, click the "stickers" tab in the top-right corner, as indicated below. From the open menu, click on the "PHOTO". Now start uploading the photo from your device.
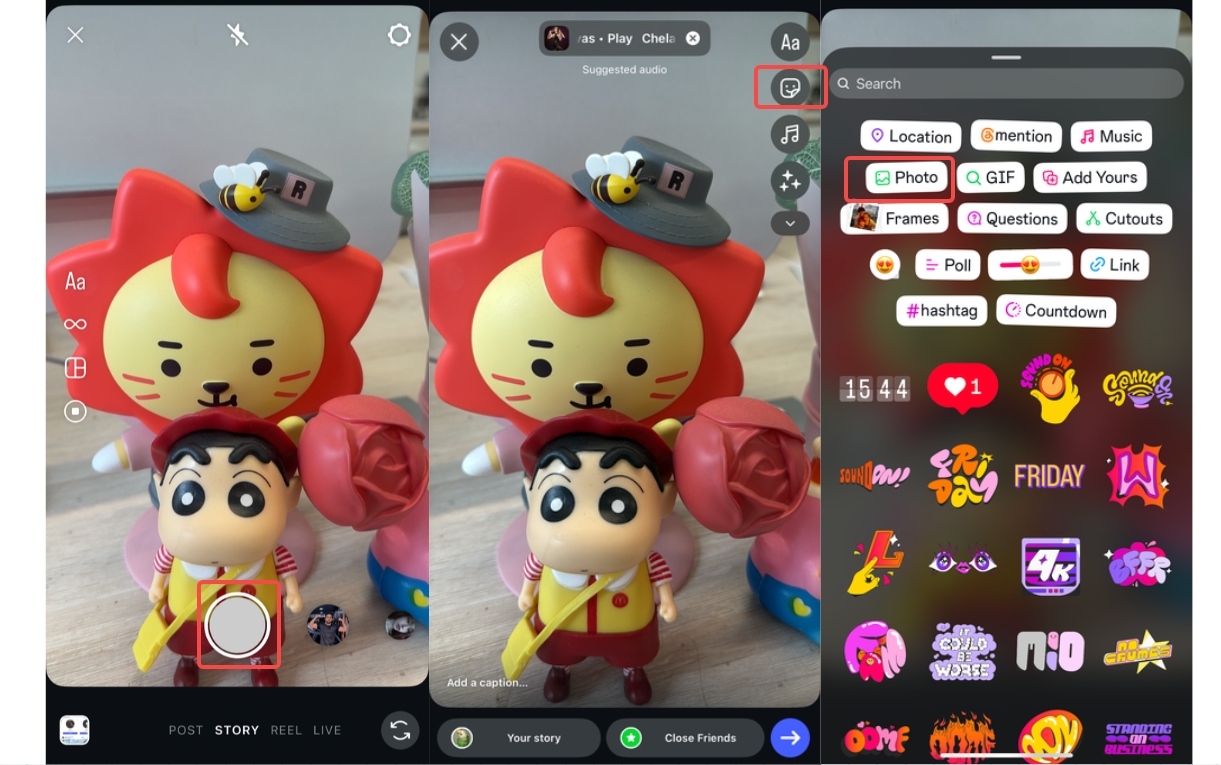
Step 3: Edit photos and share on Story
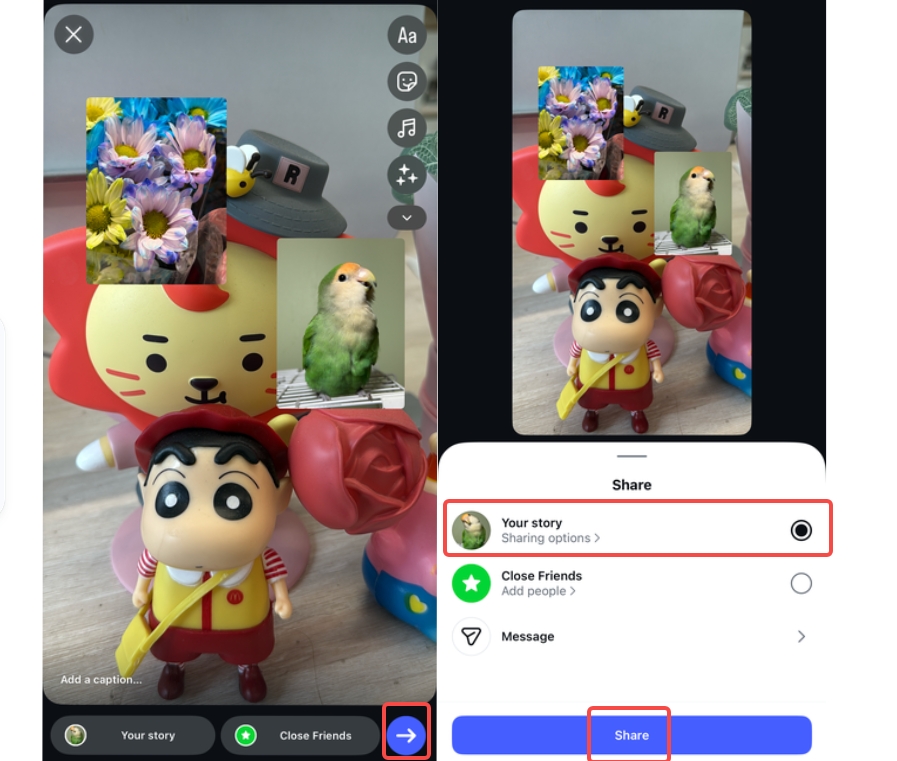
After uploading the photos, you can simply tap them to change the shape from circle to triangle, square, or irregular. Next, begin editing the photos using the tools on the right-side toolbar. You can add text, shapes, filters, effects, etc. Once done, click the "Next" tab in the bottom-right corner, then select "Your story", then click the "Share" tab.
How to make grid pictures on Instagram using Layering
Step 1: Open Instagram and upload a video background
First, open the Instagram app and go to its main interface. Later, click the "+" icon in the top-left corner. Access the "STORY" option from the bottom-centered menu through scrolling and clicking on it. Next, upload the video as a background from your gallery.
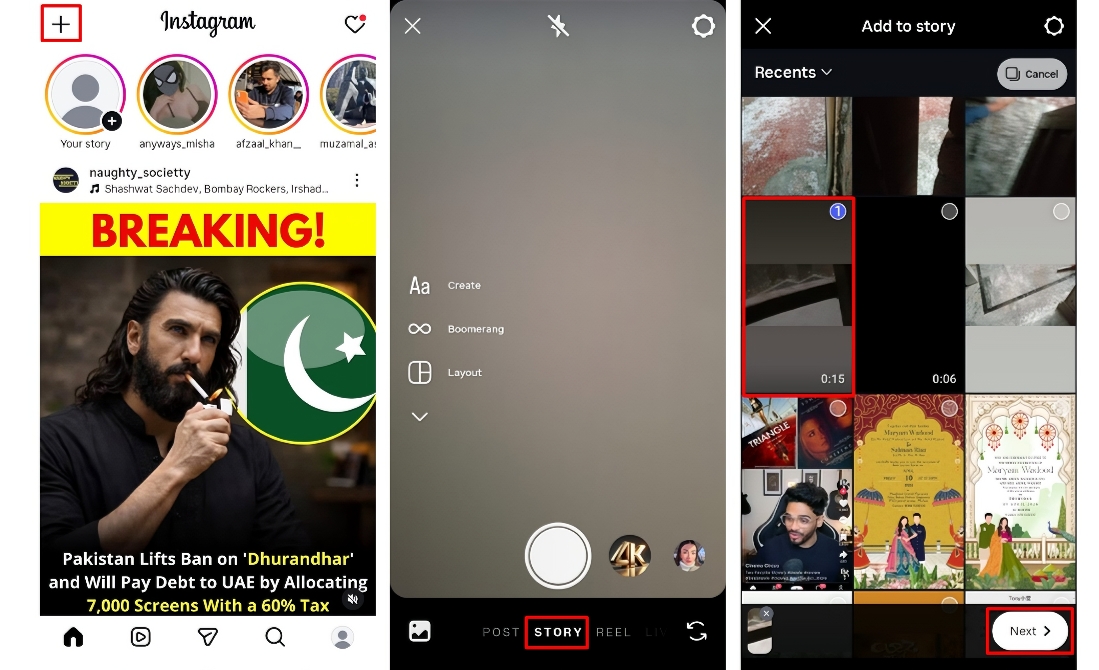
Step 2: Select a sticker and choose photos
After uploading the video, click the "stickers" option in the vertical menu bar on the right, then click the "PHOTO" option. You can now upload photos from your device to layer on your video as a grid.
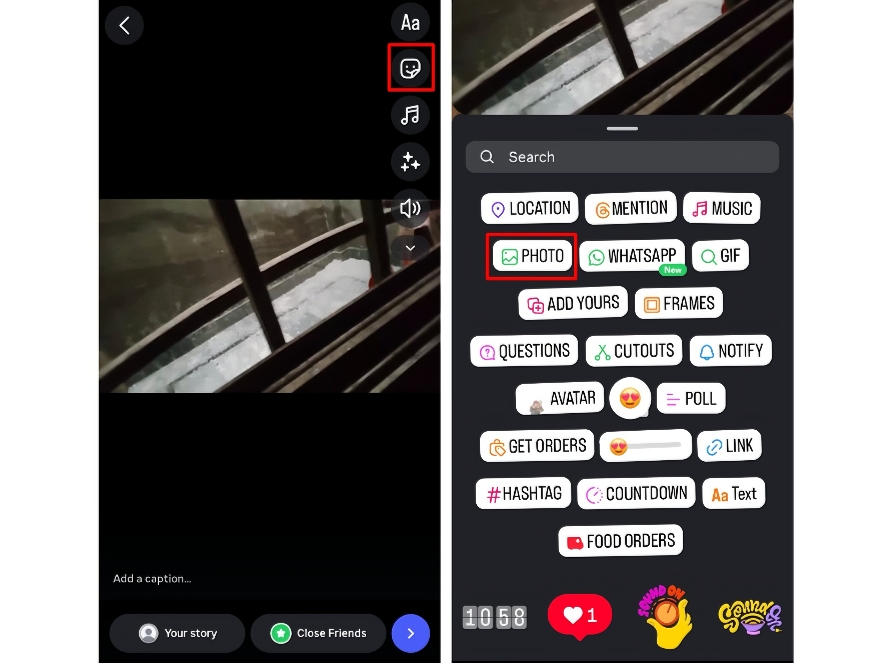
Step 3: Edit or share your grid Story
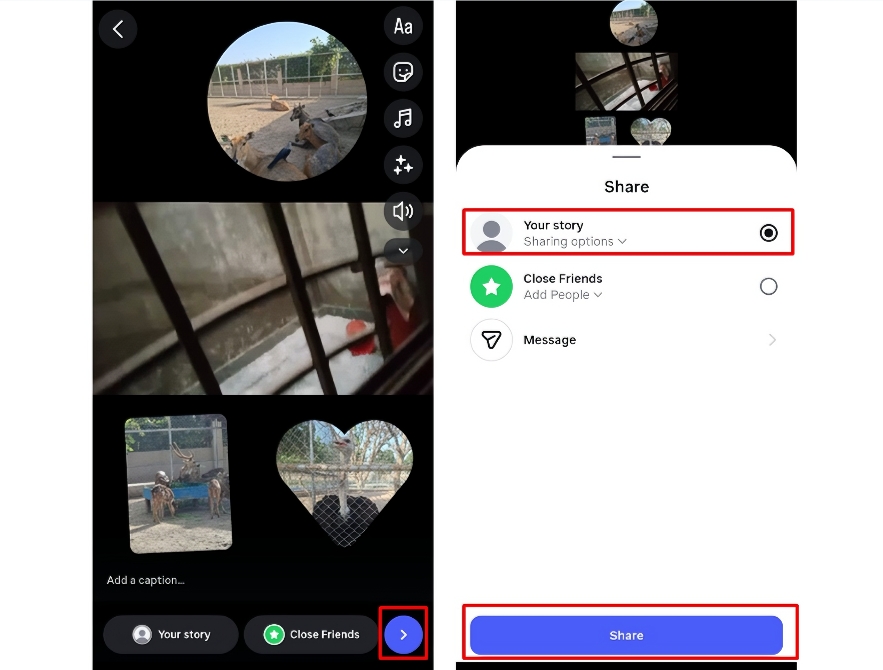
After uploading the photos, you can simply tap them to change the shape to circle, triangle, square, or irregular. Next, begin editing the photos using the option in the extreme-right vertical menu bar. You can add text, shapes, filters, effects, etc. Once done, click the "Next" tab in the bottom-right corner, then select "Your story", then click the "Share" tab.
Create a grid for Instagram - Popular ideas (2026)
Before & after
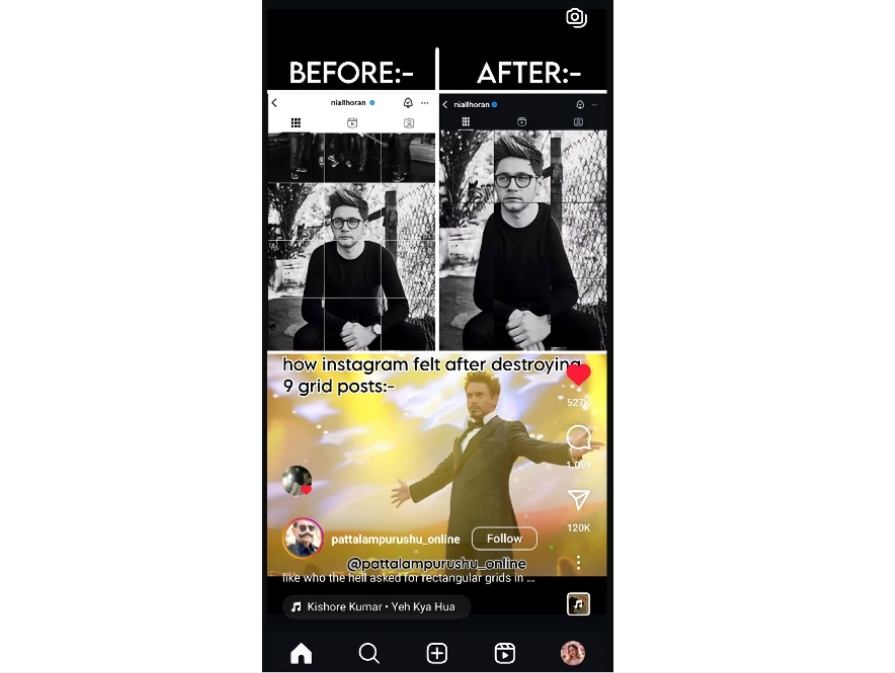
Before-and-after grids clearly show the transformation and attract strong audience engagement; you can display product changes, edits, or progress in a visual storytelling style. This format helps you build trust and visually showcase real results.
Product showcase
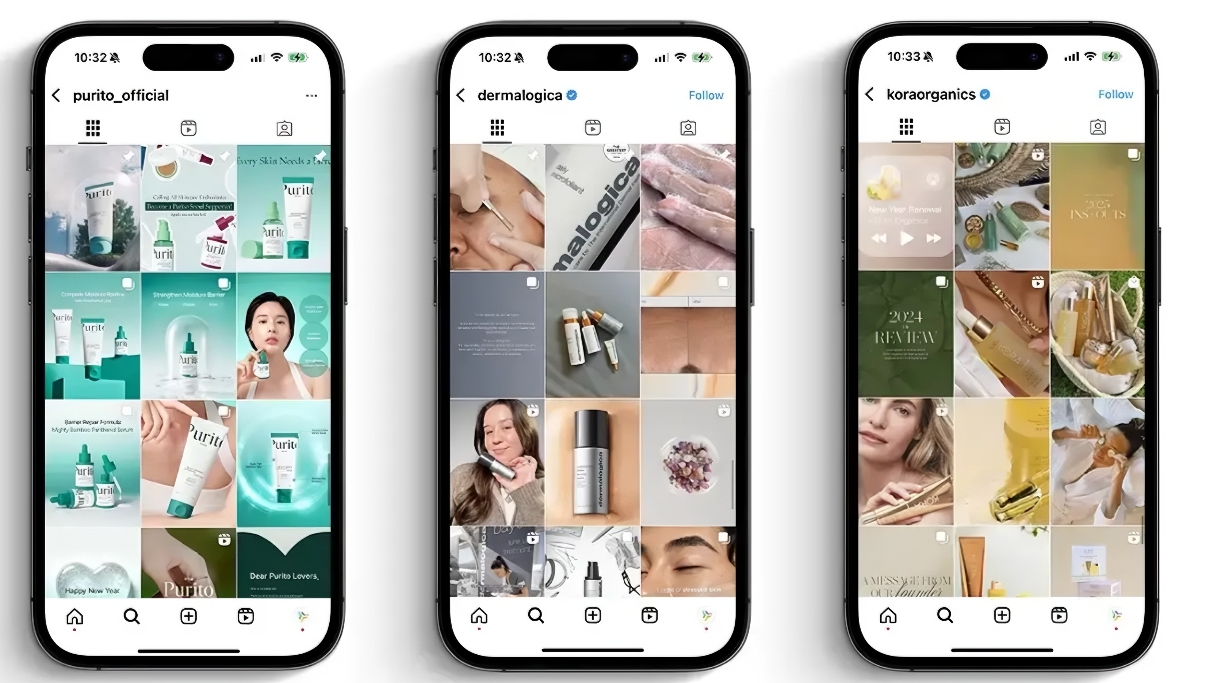
Product showcase grids highlight features, colors, and details in a clean layout design. You can present multiple angles or variations to quickly increase purchase interest. This approach helps brands increase clarity and boost conversions naturally online.
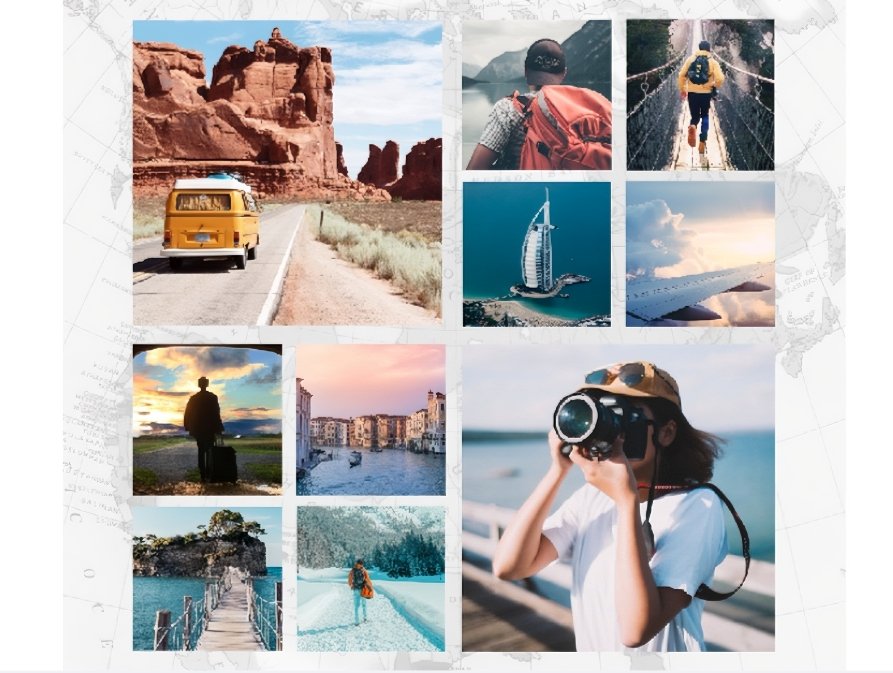
Travel collage
The travel collage grids combine destinations, experiences, and memories in a single layout. You will be able to combine photos from your travels to create compelling visual stories in a short time. This format helps evoke a sense of wanderlust and resonates emotionally with viewers, making the content more engaging and impactful. This format helps you create wanderlust and gain more Instagram viewers and likes.
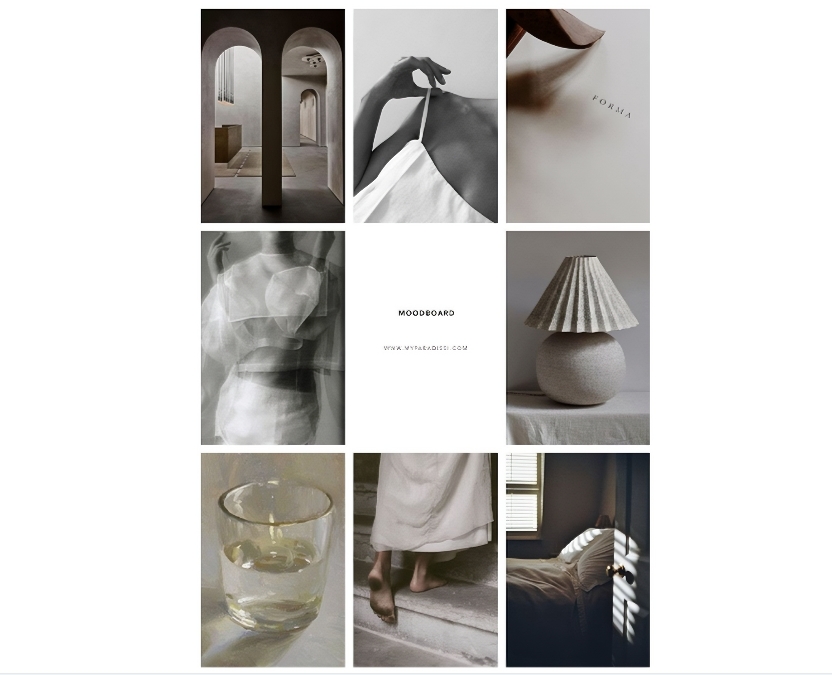
Mood board
Mood board grids articulate the themes, colors, and feelings through a curated visual aesthetic. This format is easy to use to plan content ideas or brand identity. This will keep your Instagram feed aesthetically consistent and attractive at all times.
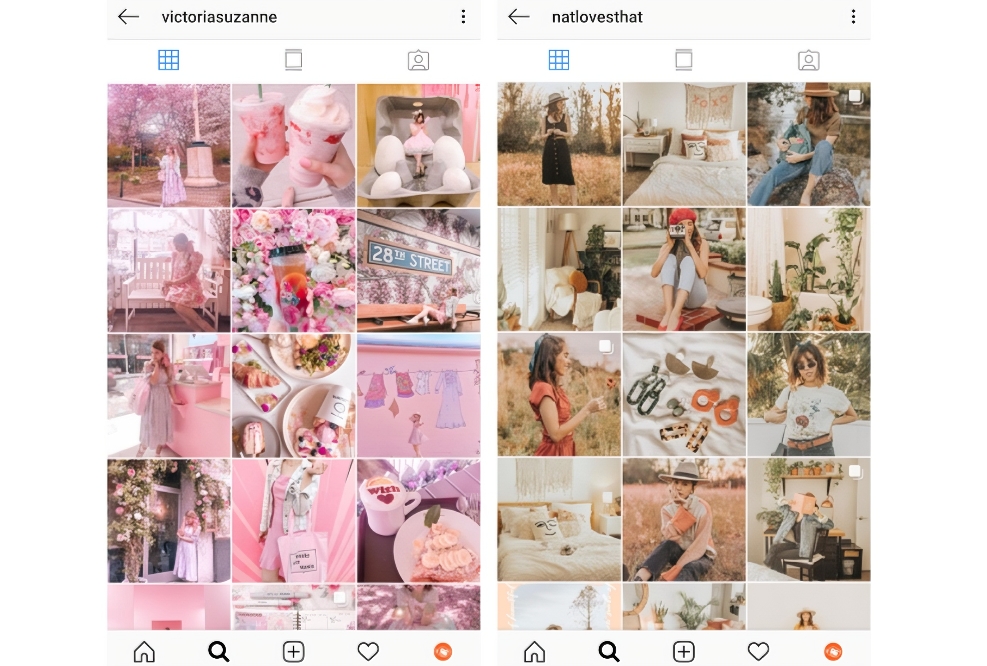
Event highlights
Highlight grids are visual tools that organize moments, speakers, and activities. You can present conferences, weddings, or launches in a neat visual flow. This helps viewers experience it and makes it much more engaging online.
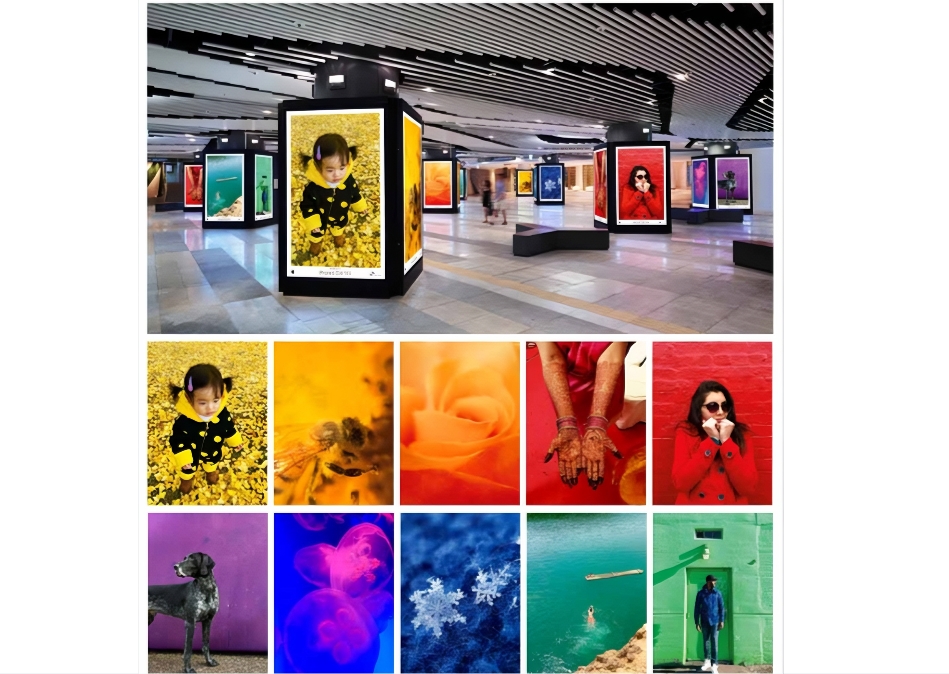
Brand storytelling
Brand storytelling grids share mission values and journey through visuals, consistently engaging. You can build an emotional connection with the audience through consistent visual design elements. This format strengthens your brand identity and makes your online presence memorable.
Popular tools you can use to craft Instagram grid layouts
Zawa
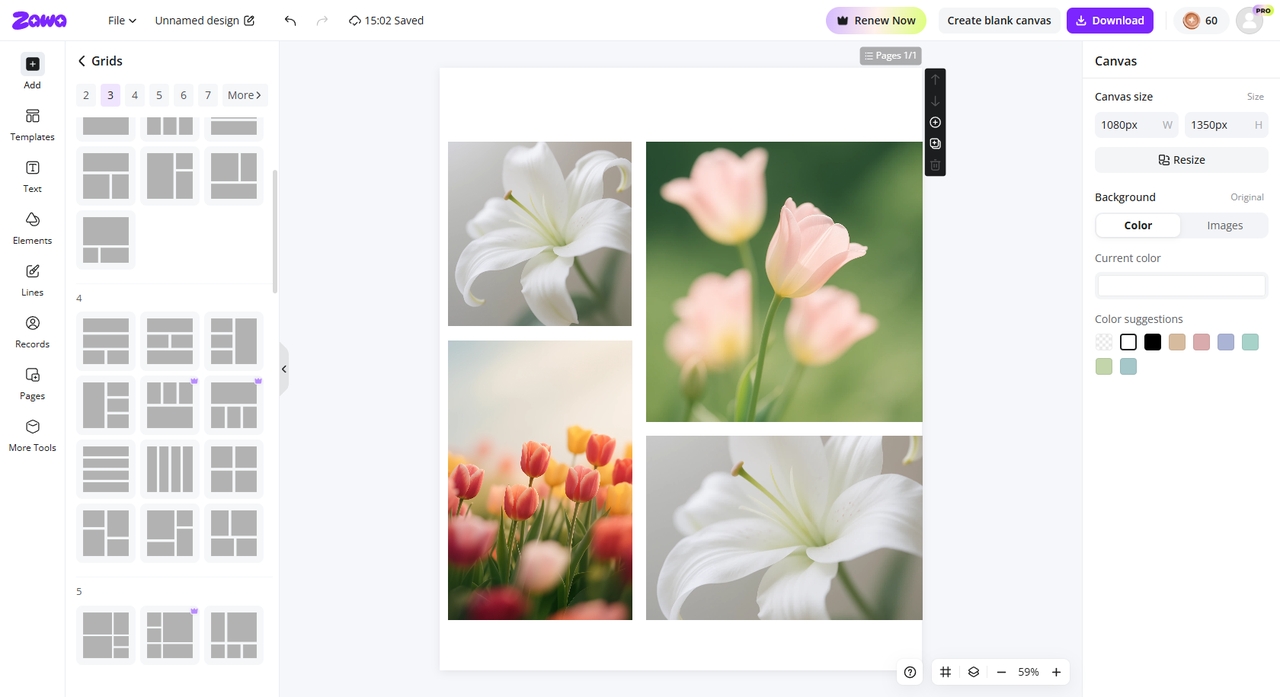
Zawa is an online tool to plan Instagram grids and preview layouts. You can see various layouts before publication to achieve aesthetic uniformity. It is intended to be used quickly and with rich grid planning. This makes it suitable for users who want simple control over the appearance of the Instagram grid.
Canva
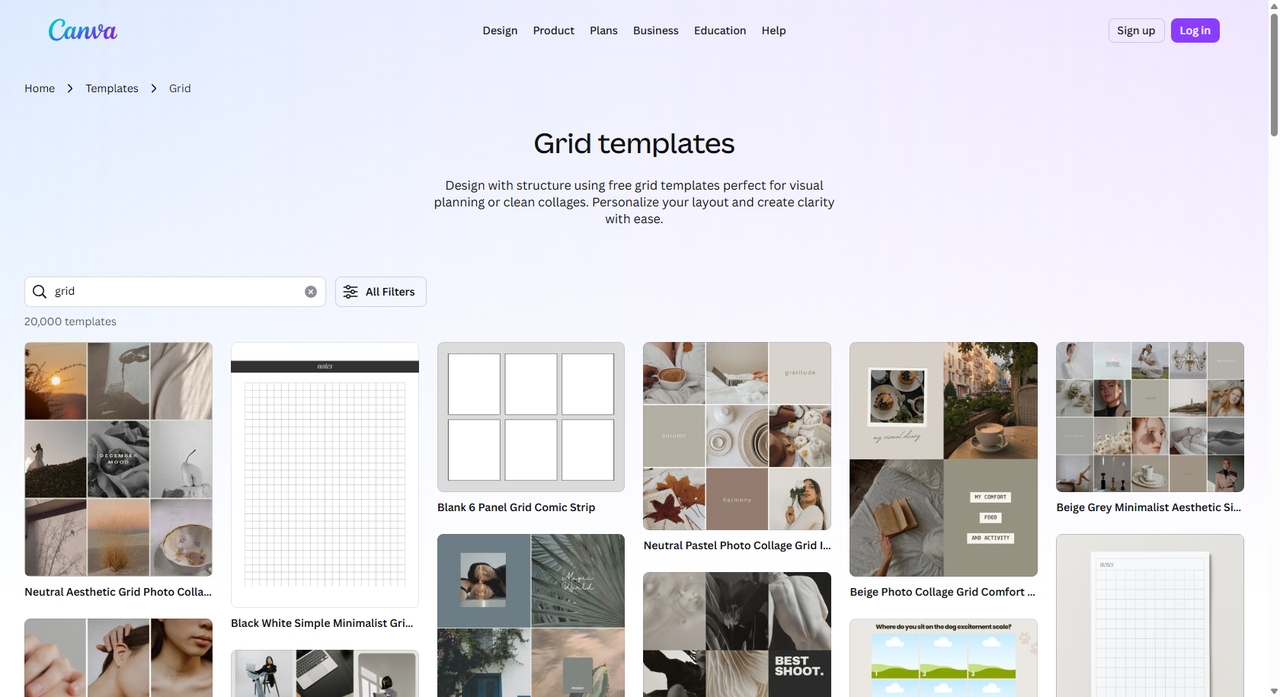
Canva is a tool that makes it easy to create an Instagram grid layout. It offers drag-and-drop grid templates to help you create consistent feed images quickly. You can customize images, colors, and fonts to suit your brand. It also provides ready-to-use social media templates to create faster. Canva lets you position and crop images to create a balanced grid.
Adobe Express
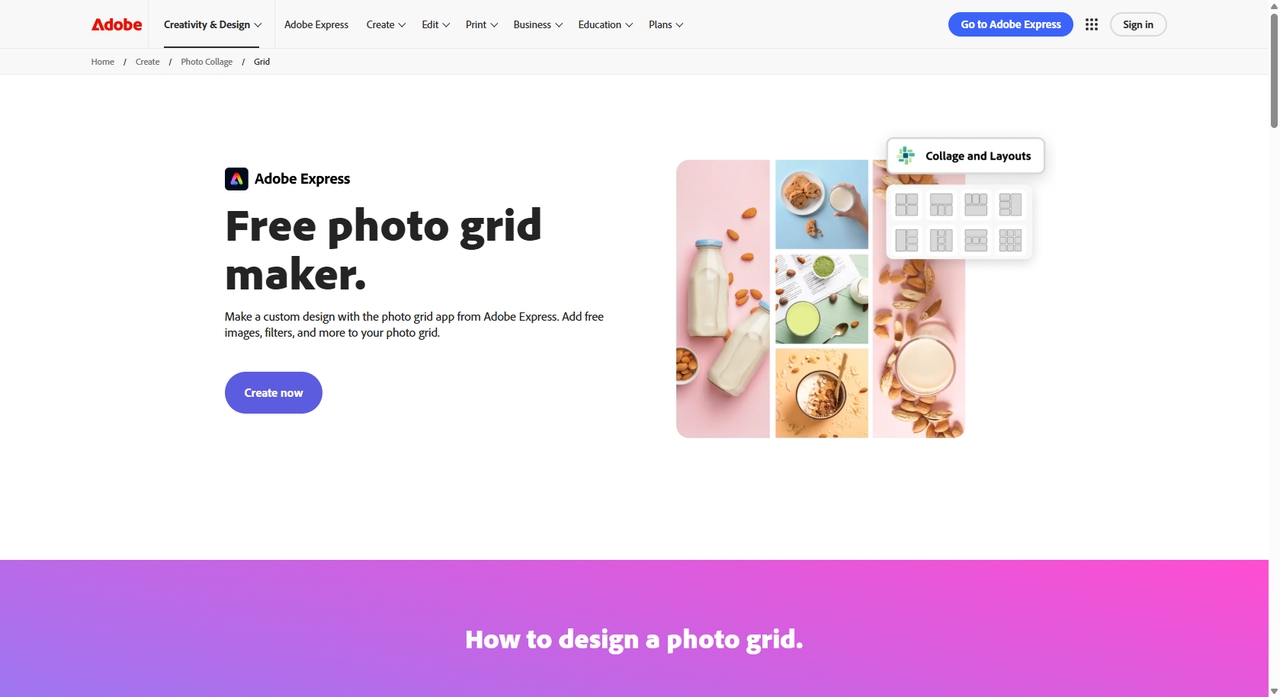
Adobe Express is a professional design tool for creating Instagram grid layouts efficiently. It provides templates that can be customized and editing capabilities to achieve professional results. You can resize, overlay, and position objects accurately to ensure visual consistency across posts. The cloud-based system lets you easily design and edit grids on any device, anywhere.
Mistakes to avoid when creating an Instagram grid Story
-
Overcrowding images: Crowded pictures reduce clarity and make the Instagram grid appear disorganized. Balance the spacing so that all posts look good visually.
-
Poor image quality: Bad image quality reduces engagement and significantly lowers Instagram's visual impact. Always take high-quality photos to ensure a clean and professional grid look and feel.
-
Misaligned grid: The misaligned grid disrupts the visual flow, making the profile appear unorganized at a glance. Plan before posting to ensure posts are uniform and the design is balanced.
-
Too much text: Excessive text on pictures distracts viewers and makes the message less clear. Make captions for pictures concise to draw attention to the key design aspects in sight.
-
Ignoring safe zones: Disregarding safe zones may conceal valuable information within the margins of the Instagram interface, including when cropping. Always maintain important elements at a safe margin to prevent unwanted cropping.
-
Inconsistent branding: Poor branding misleads the audience and makes the brand less recognizable within the Instagram grid's overall identity. Maintain uniformity in color, font, and style to create a strong brand image in the long run.
Conclusion
To sum up, how to make a grid on Instagram Story in 2026 all comes down to the balance, creativity, and clever design decisions. Starting with Layout, stickers, and layering techniques to preventing typical errors, every step will make you create visually powerful and attractive stories. The process can be simplified and made more professional with tools such as Canva, Adobe Express, and Zawa. Regular grids enhance storytelling and participation, whether you are a creator or brand. Use these techniques frequently to improve your Instagram.
FAQs
How to create a collage in an Instagram story?
Open the Instagram Story and select the layout or sticker features to create a collage. Choose several photos from the gallery and place them in grid-like frames. Next, add text and stickers to the design and share your collage story.
How many pictures can I add to an Instagram story?
The maximum number of photos in an Instagram Story is 10, and this can vary depending on the layout. You can easily combine several pictures in a story using sticker or layout features. But the precise limit is determined by the format and design method used.
How to set a new grid on Instagram?
Open Instagram preferences or the Story setup tool to begin grid arrangement. Select a layout, followed by the number of cells in your grid. Then, add photos, change gaps, and save the new Story design successfully.
How to make an Instagram photo grid that looks professional and aesthetic?
Apply uniform color, high-quality images, and consistent grid spacing. Plan the layout before posting and match photos to achieve visual harmony. Use filters to edit, maintain branding, and preview the overall appearance of the Instagram feed first.
How to make a 3 layout in an Instagram story?
Open Story mode and choose the three-grid layout in the Instagram options. Add three photos or take photos directly into the frame segments. Filter, adjust positioning, and share your finished three-panel Instagram Story easily on Instagram.
Can I add more than one photo at a time?
Yes, Instagram offers the option to use multiple photos with layout or sticker features. You can select multiple pictures from the gallery and instantly arrange them. This will assist you in making interesting Story content without publishing photos individually to connect better.
You May Be Interested
100+ Good Quotes for Instagram Bio (Copy & Paste Ideas)

100+ Instagram Bio Ideas for Moms: Make Your Profile Attractive

Most Liked Instagram Post Guide - Insights, Top Posts, and Process

How to Craft the Perfect Instagram Bio in 2026: Tips, Mistakes & Tools
How to Get into Real Estate Photography
