Beverage Photography: Lighting and Styling Tips for Drinks
Learn beverage photography with practical tips for lighting glassware, controlling reflections, styling ice and garnishes, choosing the right setup, and editing color, exposure, glare, and background distractions for polished drink photos.

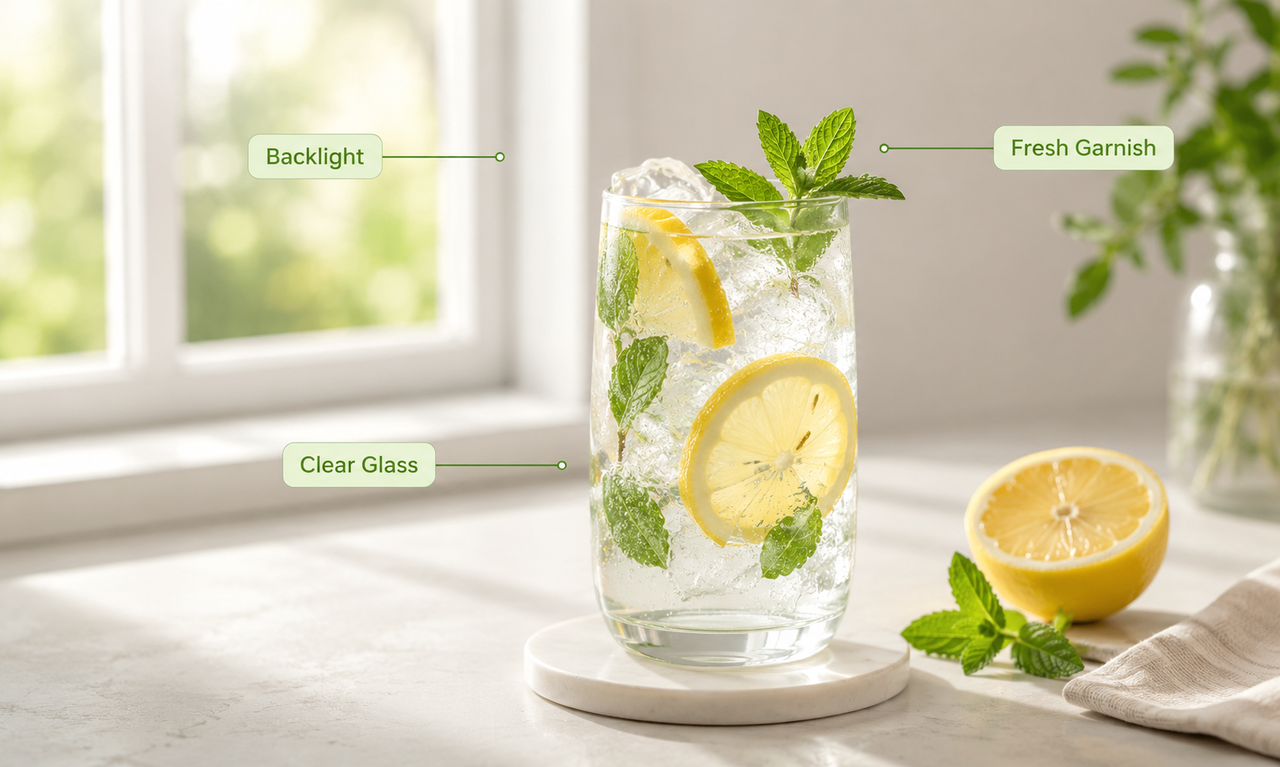
Strong beverage photos depend on more than an attractive drink. The camera needs to capture accurate color, a clear glass shape, fresh-looking ice or foam, and styling that supports the product without overwhelming it. Since many of these details change quickly, the lighting, composition, and props should be ready before the drink is poured.
Why Do Drinks Photograph Differently Than Food
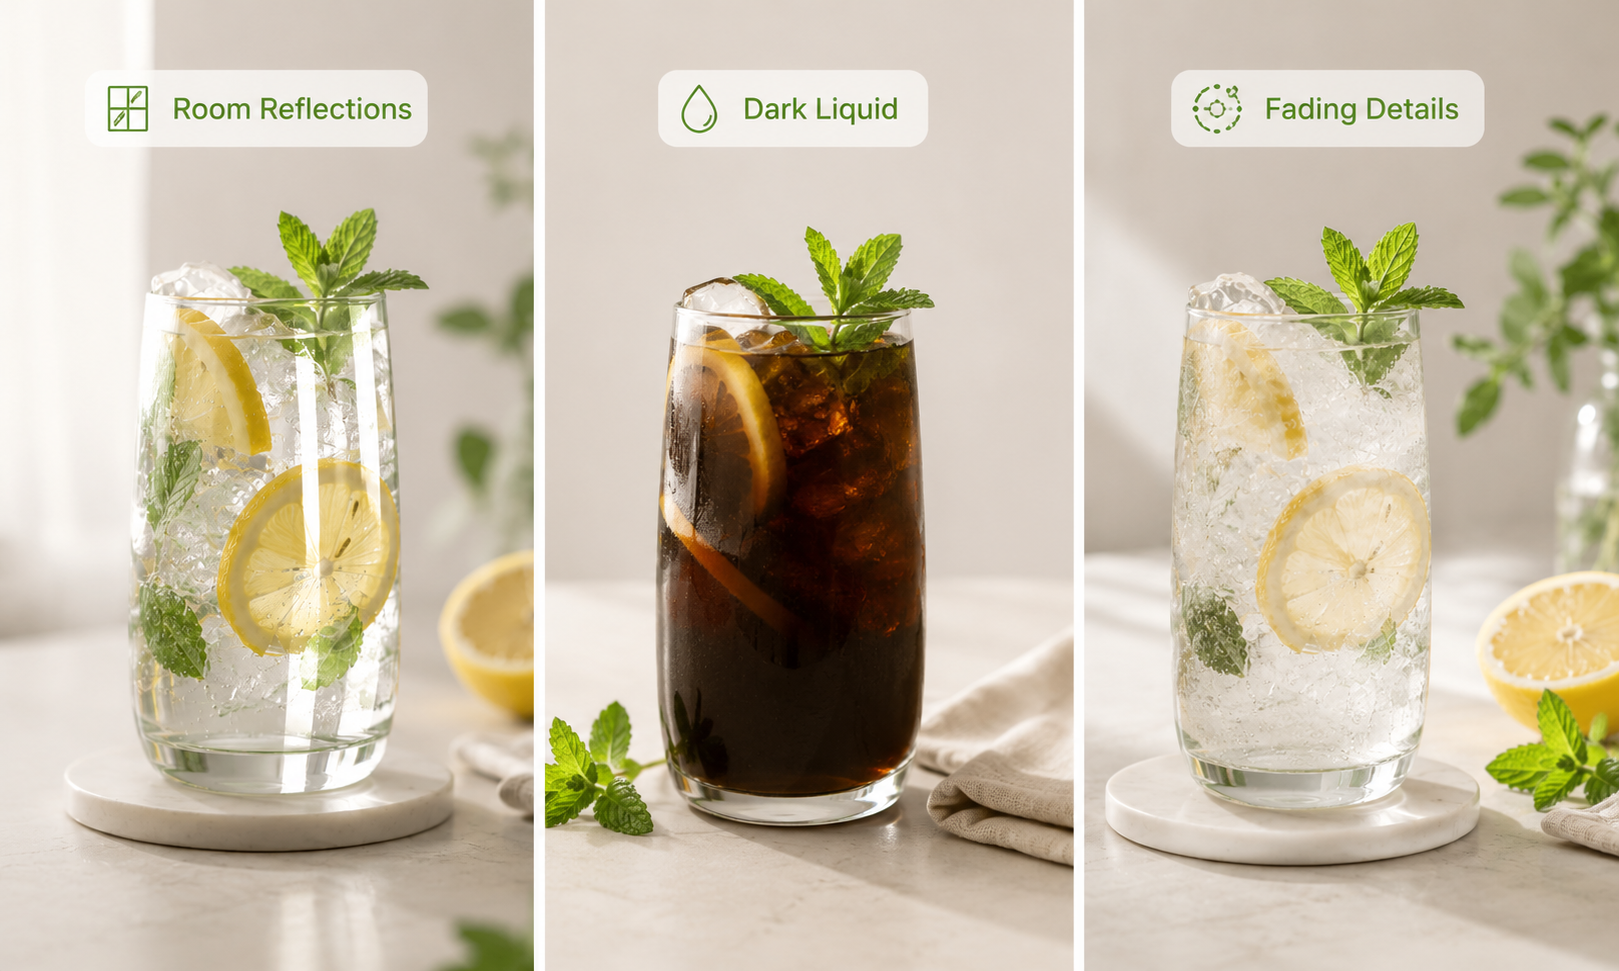
Drinks react to light in ways that solid food usually does not. The camera must record the glass, the liquid, the surface, and short-lived details at the same time. A small change in angle or timing can make the drink look darker, flatter, or less fresh.
Glass and Bottles Reflect the Room
Glass and polished bottles reflect things around them. The lights, the camera, and the photographer may appear on the surface. The reflections can cover the liquid, hide a label, or break up the outline of the glass. Curved bottles make the problem harder because they stretch and bend reflected shapes.
Liquids Need Light to Show Color and Clarity
Many drinks depend on transmitted light to show their real color. Without enough light, juice may look muddy, wine may appear too dark, and clear drinks may lose their depth.
Ice, Foam, and Bubbles Fade Fast
Drinks can change within minutes. Ice melts and dilutes the liquid, foam collapses, bubbles disappear, and fresh garnish begins to dry.
Condensation also changes over time. A glass may look freshly chilled at first, then become covered with drops that hide the surface and the drink.
What Do You Need for Beverage Photography?
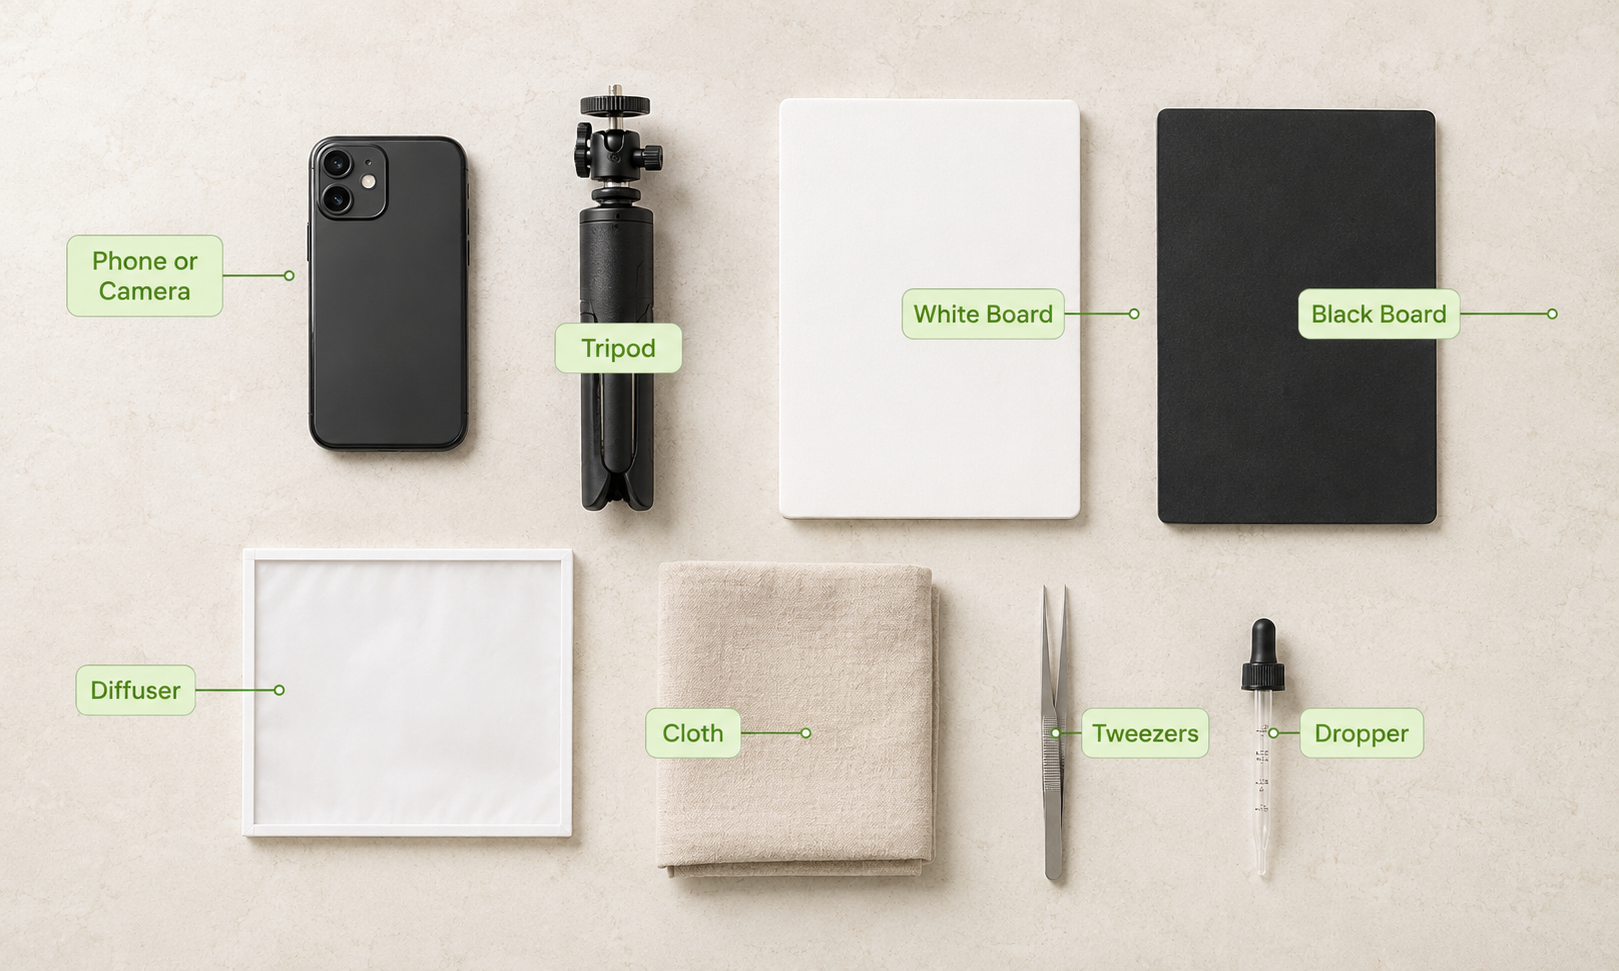
For beverage photography, a large studio kit is optional. You need one steady light source, simple tools that shape it, and a clean surface. A tripod keeps the frame fixed while you adjust the set.
Shape Light With Simple Boards
The white foam board brightens the dark side. Black foam board deepens the edge of clear glass or blocks light from the background. A thin white curtain or photo diffuser can soften direct window light. This basic product photography setup also works well for bottles because it gives you separate control over the bright and dark edges of the glass.
Start with one board. Add another only when needed.
Keep a Drink Styling Kit Ready
Keep a microfiber cloth, cotton swabs, paper towels, tweezers, a small pitcher, and a medicine dropper nearby. The cloth removes fingerprints. Tweezers turn herbs or fruit without touching the rim. A dropper tops up the drink without splashing the glass.
Pick the Right Glass for the Drink
A tall glass shows layers and bubbles, while a short glass keeps the frame compact. Thin glass creates lighter edges. Textured glass creates more reflections.
Check the rim for chips and the bowl for cloudy marks. Test two shapes before building the final composition. Keep the glass in proportion with any bottle beside it.
How Do You Light Different Types of Drinks?
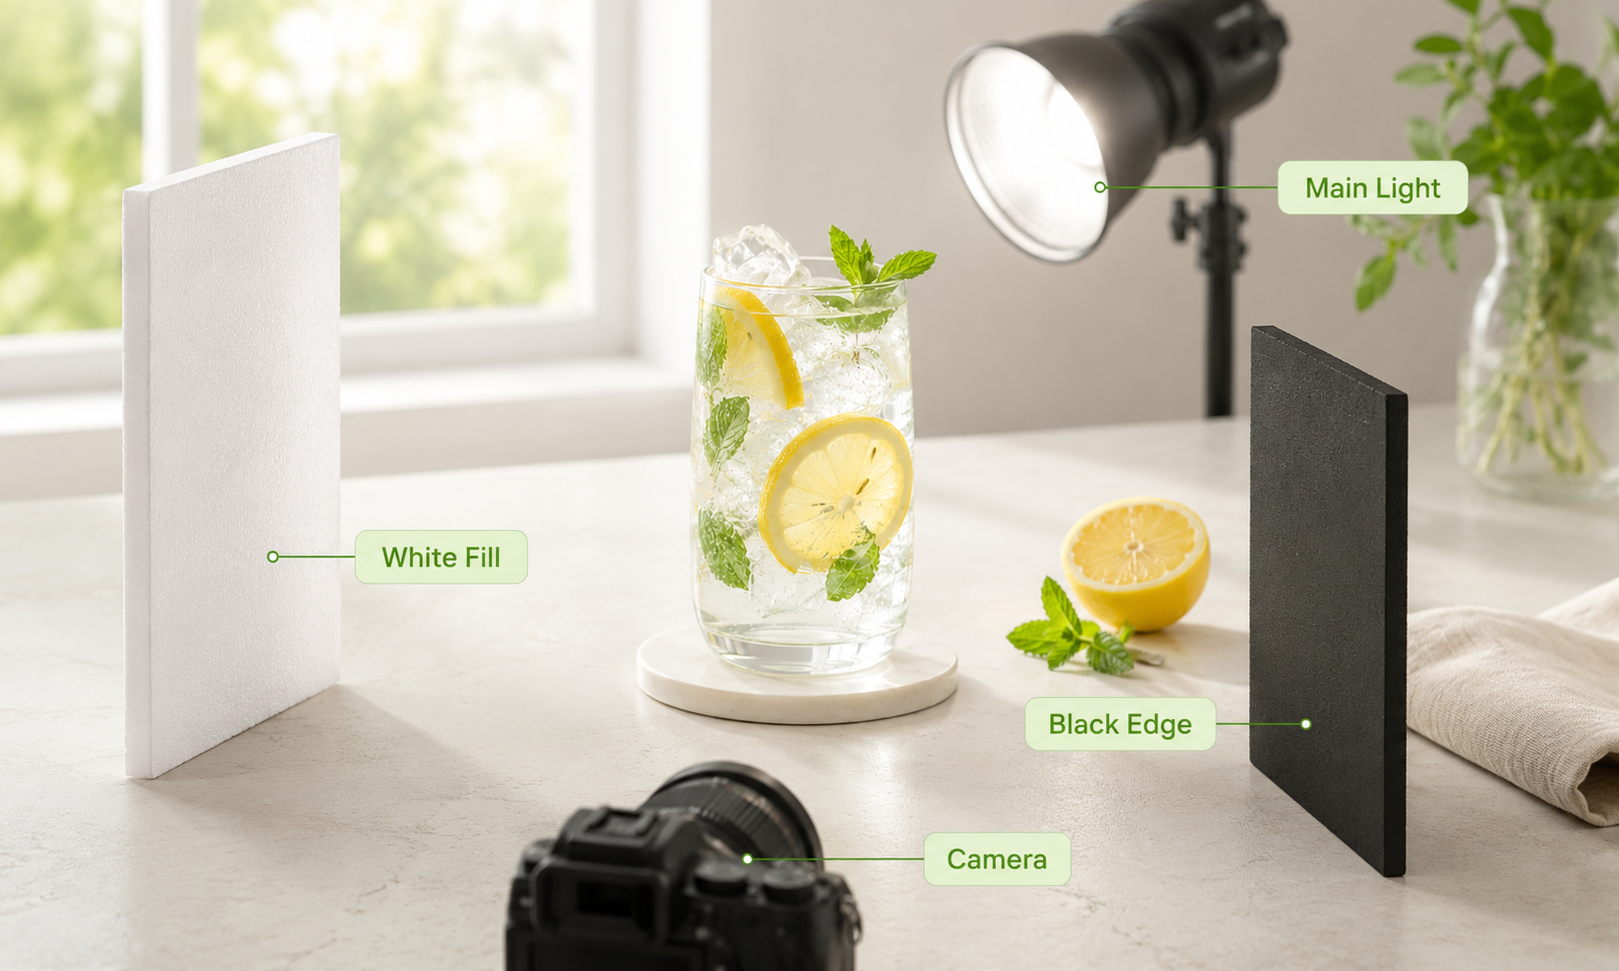
In beverage photography, the best light direction depends on how much light passes through the drink. Begin with one main light and change its position before adding another lamp.
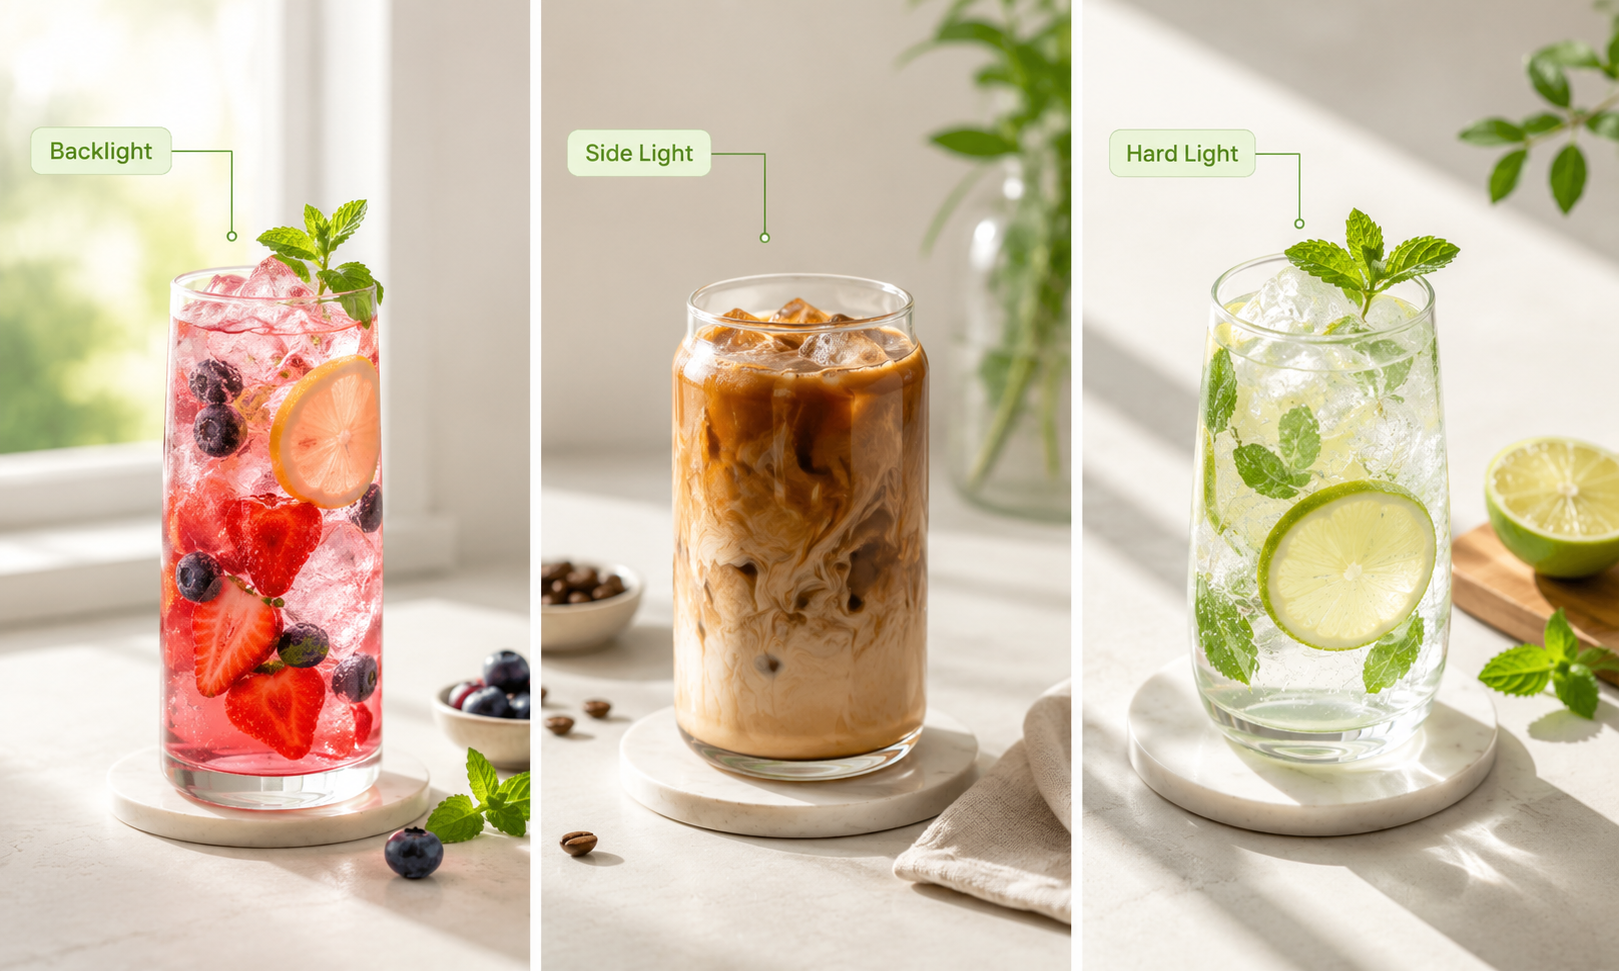
Backlight Cocktails, Wine, Beer, and Juice
Place the light behind the drink and off to one side. This helps liquids keep their color and moves the largest reflection away from the front.
Use a white card if the liquid becomes too dark. For bottles, shift the light until the label stays readable and both glass edges remain visible.
Side-Light Coffee and Creamy Drinks
Put the light beside the cup and slightly behind it. This approach is common in coffee photography because side light shows the curve of the cup, foam texture, and steam against a darker background.
Move the light farther to the side if the coffee looks flat. Prepare the foam last and wipe the rim before shooting.
Use Hard Light for Summer Drinks
Direct sun or a small bare light creates sharp shadows and bright ice. It works well for lemonade, soda, and other cold drinks with a fresh daytime look. Expose for the brightest part of the glass. Lower exposure if highlights lose detail. Clean the glass before every final shot because hard light makes dust and water marks more visible.
How to Shoot and Edit Drink Photos
A fixed order protects the short period when the drink looks fresh. The process works with a phone or camera. Finish every setup decision before preparing the final drink.
Step 1: Choose the Right Format
Use vertical for phone screens and stories. Choose horizontally when you need space beside the drink. A square crop suits a centered glass but gives tall bottles less room.
Remember to leave space around the rim and base for later cropping.
Step 2: Build and Light the Set
Place the background, surface, empty glass, and one main prop. Set the light behind or beside the drink, then add a white or black board. Take a test image to remove anything that competes with the glass.
Step 3: Check Glare and Camera Settings
Check the rim, label, stem, base, and every bright reflection. Move the camera or light before trying to repair a large glare spot later. Use a tripod in low light. On a phone, tap the drink to lock focus and lower exposure slightly when glass highlights are too bright.
Clean the glass before every final shot because hard light makes dust and water marks more visible. A preview that looks sharp on a small phone screen may still contain soft label text or motion blur.
These settings are starting points. Faster shutter speeds freeze a pour, while smaller apertures keep more of a label or bottle sharp.
| Shot | Shutter speed | Aperture | ISO |
| Clean still | 1/125 to 1/200 sec | f/5.6 to f/8 | 100 to 400 |
| Pour or splash | 1/1000 sec or faster | f/5.6 to f/8 | Raise as needed |
| Label or garnish detail | 1/160 sec or faster | f/4 to f/8 | 100 to 400 |
Step 4: Prepare the Drink
Chill the glass so that the drink looks cold. Leave room below the rim for ice or foam, and cut fresh garnish with clean edges. Carry the finished drink to the set. Wipe the outside once and place it on the mark used for the test shot.
Step 5: Shoot the Clean Still
Photograph the finished drink before adding motion. Take one full image and one closer crop. Check focus at full size around the label, garnish, and front rim. If a highlight crosses an important detail, turn the glass a few degrees.
Step 6: Capture Pours and Details
Use a small pitcher with a clean pouring edge. Capture one close detail, such as foam, bubbles, condensation, or garnish. Ask another person to pour when possible so you can watch focus and timing. Shoot short bursts. Stop when the drink looks watered down.
Step 7: Fix Color and Exposure
Once the composition is set, correct white balance before pushing saturation or contrast. The drink should still match its real color, with bright glass highlights controlled rather than erased. For a faster workflow, you can refine your beverage photos online by adjusting color and lighting, cleaning up distracting elements, improving clarity, or preparing the image for a new background.
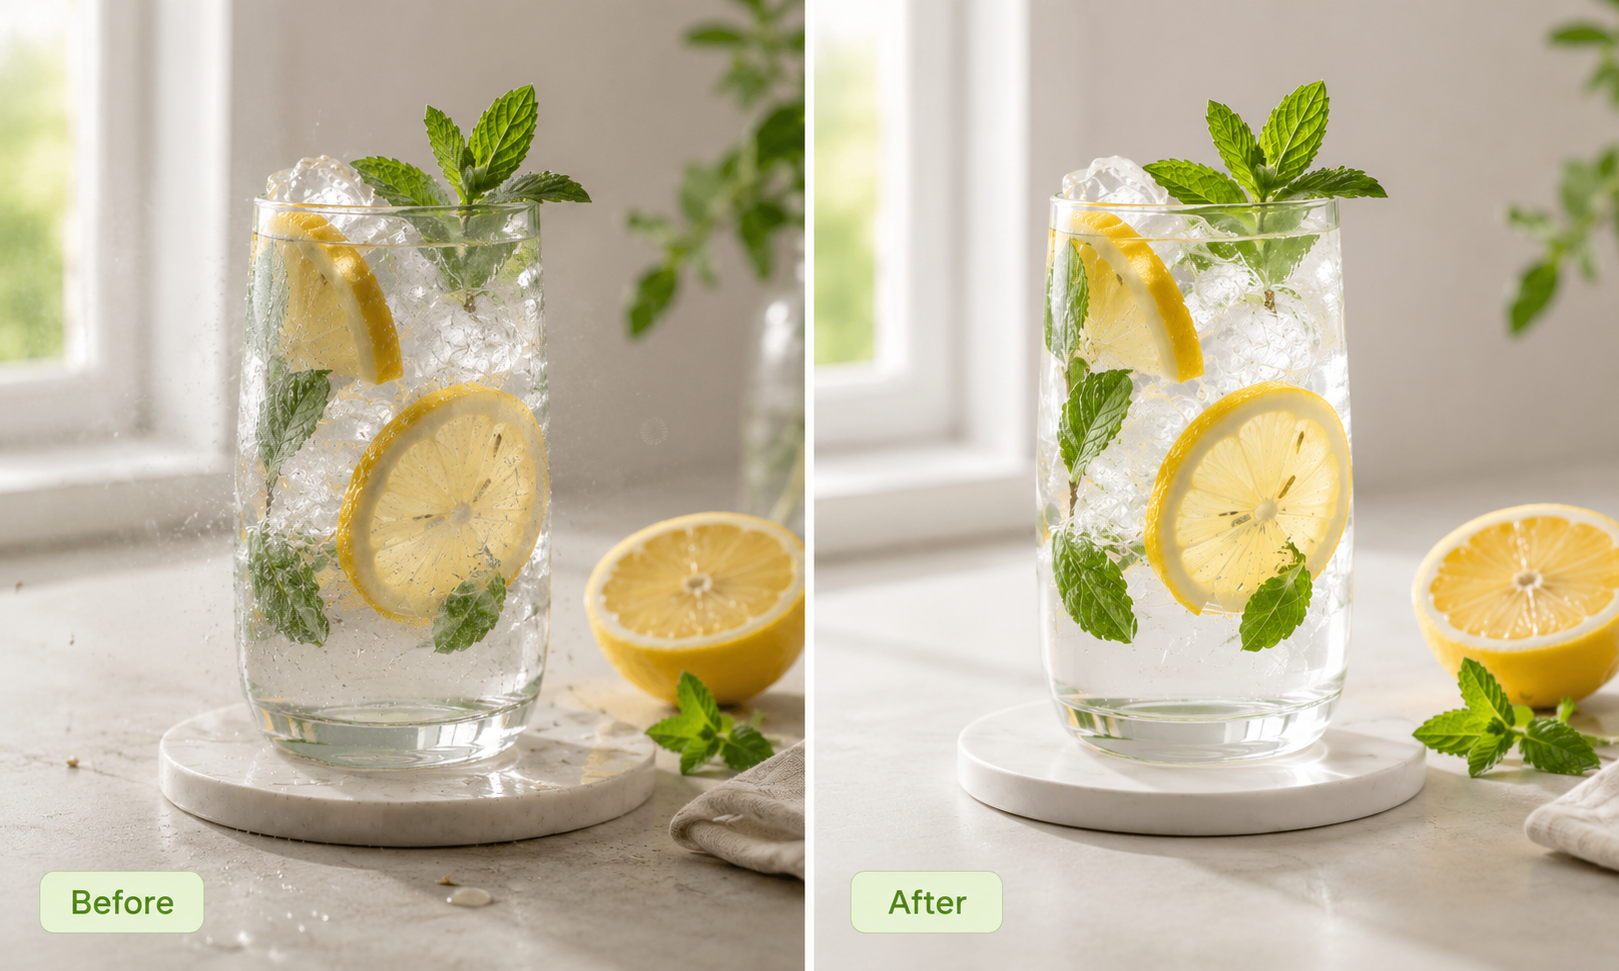
Step 8: Clean Up Dust and Glare
Remove dust, fingerprints, small splashes, and isolated bright spots from the pictures. Small background distractions can also be cleaned up in Photoshop when they draw attention away from the drink. Keep the main highlight when it shows the shape of the glass. Check the rim and base last, and avoid smoothing the entire surface until the glass looks flat.
What Makes Drink Photos Stand Out?
A strong image makes one detail clearly dominant. Color, contrast, motion, and props should support the drink. Remove details when several parts compete for attention.
Bring Out the Drink Color
Choose a background that separates from the drink. Pale liquids often need a darker background, while dark coffee may need a lighter surface.
Use light through the liquid before trying to fix weak color in editing. This is also a useful rule in food photography: correcting white balance and exposure usually reduces the need for extra saturation.
Use Contrast Around the Glass
Clear glass needs visible edges. Place a white card beside a dark background or a black card beside a light one. Contrast can also come from focus. Keep the drink sharp and let distant props soften.
Keep One Clear Focal Point
Choose the label, garnish, foam, or liquid as the main detail. Focus there and reduce nearby clutter. A bottle label should face the camera and remain free from glare. Keep bright props away from the rim.
Add Motion With Pours and Splashes
A pour shows the texture of the liquid. Use a fast shutter speed for separate droplets and a slower speed only when you want visible blur.
Complete the cleaning still first. Protect the surface and keep towels nearby for a quick reset.
Match the Scene to the Drink
Use props that connect to the drink. Coffee may need a simple mug and a quiet surface. A summer soda can use stronger light and a brighter background. Fruit, herbs, or spices that are actually present in the drink are good stage properties.
FAQs
What Lens Is Best for Beverage Photography?
A 50mm lens is flexible. An 85mm to 105mm macro lens can reduce distortion and capture labels, ice, bubbles, and garnish details. Leave enough camera distance to keep tall glasses straight.
How Much Does a Beverage Photoshoot Cost?
Prices vary widely. A simple U.S. session may cost several hundred dollars, while styled shoots can reach several thousand. Image count, styling, retouching, location, and usage rights affect the quote.
Can You Use Fake Ice in Drinking Photography?
Yes. Fake ice gives you more setup time and does not melt. Real ice often looks more natural for quick home shoots, while quality fake cubes suit longer sessions.
How Do You Keep Bottle Labels Sharp?
Keep the label facing the camera. Use a tripod, focus directly on it, and choose a smaller aperture, such as f/8, when more depth is needed. Move glare away before shooting.
Conclusion
Better beverage photography starts before the drink enters the frame. Set the light, control the glass edges, confirm focus, and prepare every prop first. Add the drink, capture the clean still, then move to pours and details.
Start with one light and two boards. That setup teaches you how reflections and liquid color change when the light moves, which matters more than adding expensive gear.
You May Be Interested
130+ Independence Day Quotes for Instagram
133 Independence Day Captions for Social Media
What Is 1440p Resolution? QHD Explained (2026)

15 Top AI Art Generators to Create the Best Masterpieces
50 Father’s Day Bible Verses to Honor Dad with Faith

7 Ways to Use an AI Topic Generator