How to Take Good Food Photography
Learn how to take better food photos with fresh styling, soft light, clean composition, smart angles, and natural editing. The article also explains how ai can turn clear food shots into menu, social media, and brand-ready visuals.

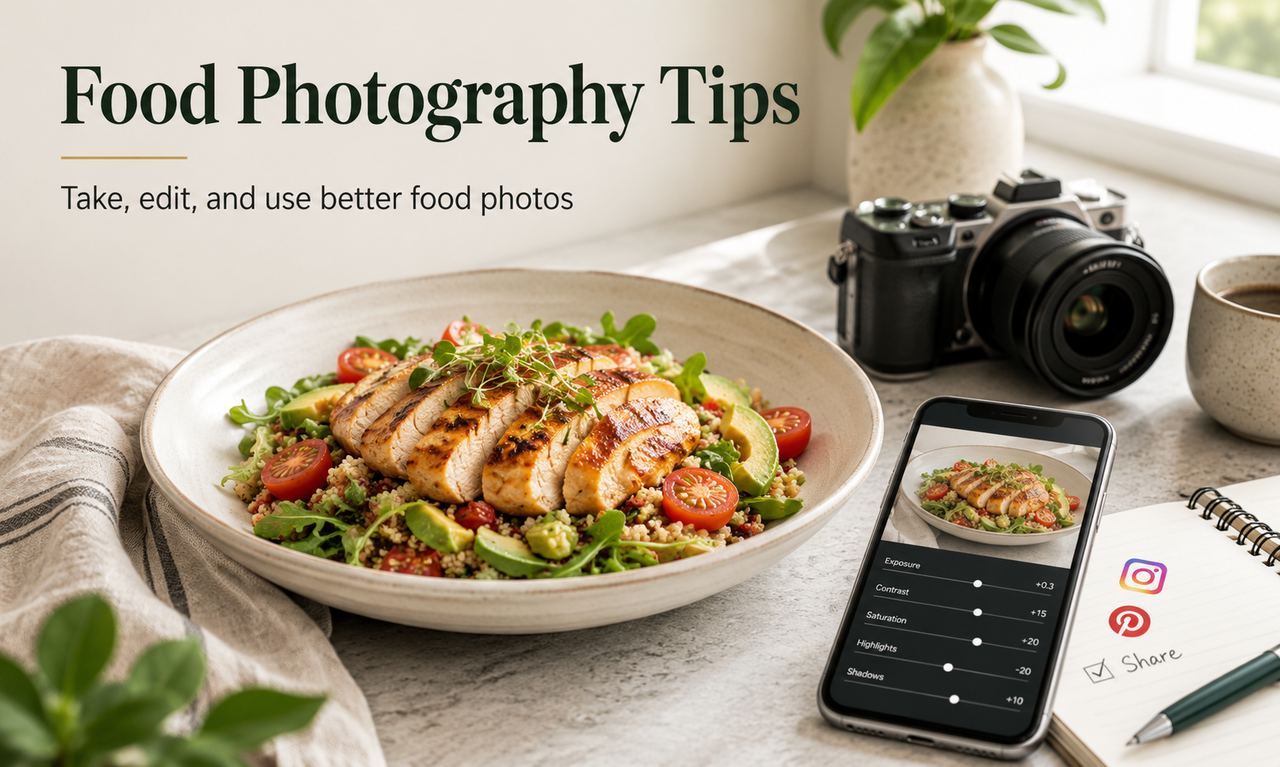
Good food photography should make dishes look clear, fresh, and natural. Whether you run a restaurant, café, bakery, or food blog, better photos help your food stand out on menus, websites, and social media. The key is simple: use fresh food, soft light, clean composition, and light editing. This guide shows how to take better food photos and turn them into usable visuals with AI.
Start With Food That Looks Camera Ready
Before thinking about camera settings or editing tools, start with the food itself. A well-prepared dish is easier to photograph, easier to crop, and easier to reuse later for menus, posters, delivery listings, and social media posts.
Choose Fresh Texture for Better Food Pictures
Freshness and texture are two of the biggest factors in appetizing food photography. Crispy foods need visible crunch, sauces should look smooth and glossy, vegetables should feel bright and fresh, and drinks should appear clear and clean instead of flat or cloudy.
Shoot the food soon after it is prepared. Steam, gloss, sauce texture, melted cheese, fresh herbs, and cut surfaces all lose their visual appeal over time. If you are shooting several dishes, prepare the most delicate items last and photograph them first.
Keep the Main Dish Visually Clear
Every strong food photo needs one clear subject. The viewer should know what the dish is within the first second. Avoid adding too many side items, messy tableware, napkins, random ingredients, or extra plates that compete with the main dish.
This is especially important if the image will be edited or redesigned later. A clean main subject gives you more flexibility when cropping, removing background distractions, changing layouts, or turning one food photo into a menu or social media asset.
Style Food Based on Its Shape
Different foods need different styling choices. A tall burger, layered cake, or stacked sandwich usually looks better when the camera can show height and layers. Flat foods, such as pizza, pancakes, salads, bowls, or charcuterie boards, often work well from above because the shape and arrangement are easier to understand.
Use the food’s natural form as your guide. If the best feature is inside the food, such as a wrap, burger, or pastry, cut it open neatly to show the filling. If the dish depends on pattern or color, keep the top view clean and organized.
How to Take Better Food Photos
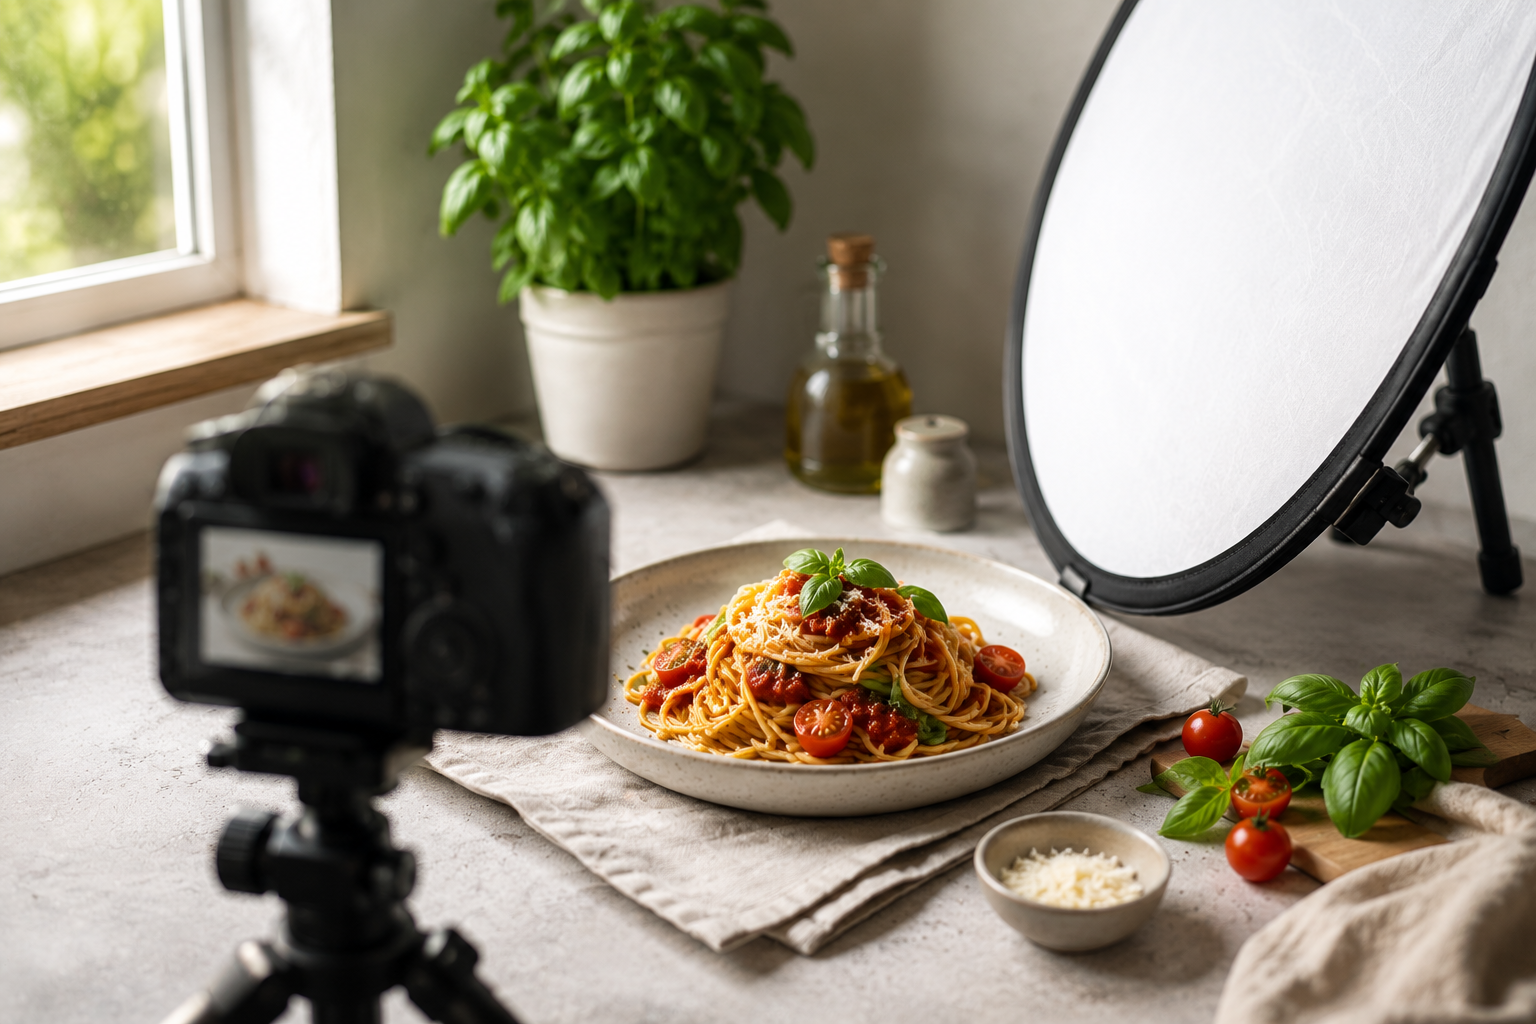
Once the food is ready, focus on the shoot. You do not need an expensive studio to take better food photos, but you do need control over light, angle, background, and framing.
Set Up Your Camera Before Shooting
Clean your lens first, especially if you use a smartphone. A small fingerprint can make food pictures look soft or foggy. Turn on grid lines so you can keep the plate straight and place the food with intention.
Tap to focus on the most important part of the dish. For burgers, focus on the front edge and filling. For desserts, focus on the texture or topping. For drinks, focus on the glass rim, foam, or garnish. If the light is low, use a tripod or stable surface to reduce blur.
For more general image setup advice, Zawa’s guide on how to take good product photos is also useful because many product photography basics, such as clean backgrounds, lighting, and consistent framing, apply to food visuals too.
Use Soft Light for Natural Food Pictures
Soft light usually makes food look more natural. A window with indirect daylight is a simple option for home kitchens, cafés, and small restaurants. Place the dish near the window, but avoid harsh direct sunlight because it can create strong glare, deep shadows, and washed-out highlights.
If the scene is too dark, move the dish closer to the light rather than trying to lift the exposure aggressively in post.
Adjust Shadows With Simple Reflectors
Shadows help food look dimensional, but heavy shadows can hide important details. A simple white card, white foam board, or light-colored plate can bounce light back into the darker side of the dish.
Place the reflector opposite the window and move it closer or farther away until the shadows look natural. If the photo looks too flat, move the reflector away slightly so the image still has depth.
Use Color and Props With Purpose
Props should support the food, not overpower it. Choose plates, napkins, utensils, and backgrounds that match the mood of the dish. A rustic pastry may work well with wood or linen, while a modern drink may look better with a clean surface and simple glassware.
Limit the color palette to two or three main colors when possible. This keeps the photo easier to read and makes the dish feel more intentional. If you add ingredients around the plate, use them to explain the dish, not just to fill space.
Pick the Angle Based on the Food
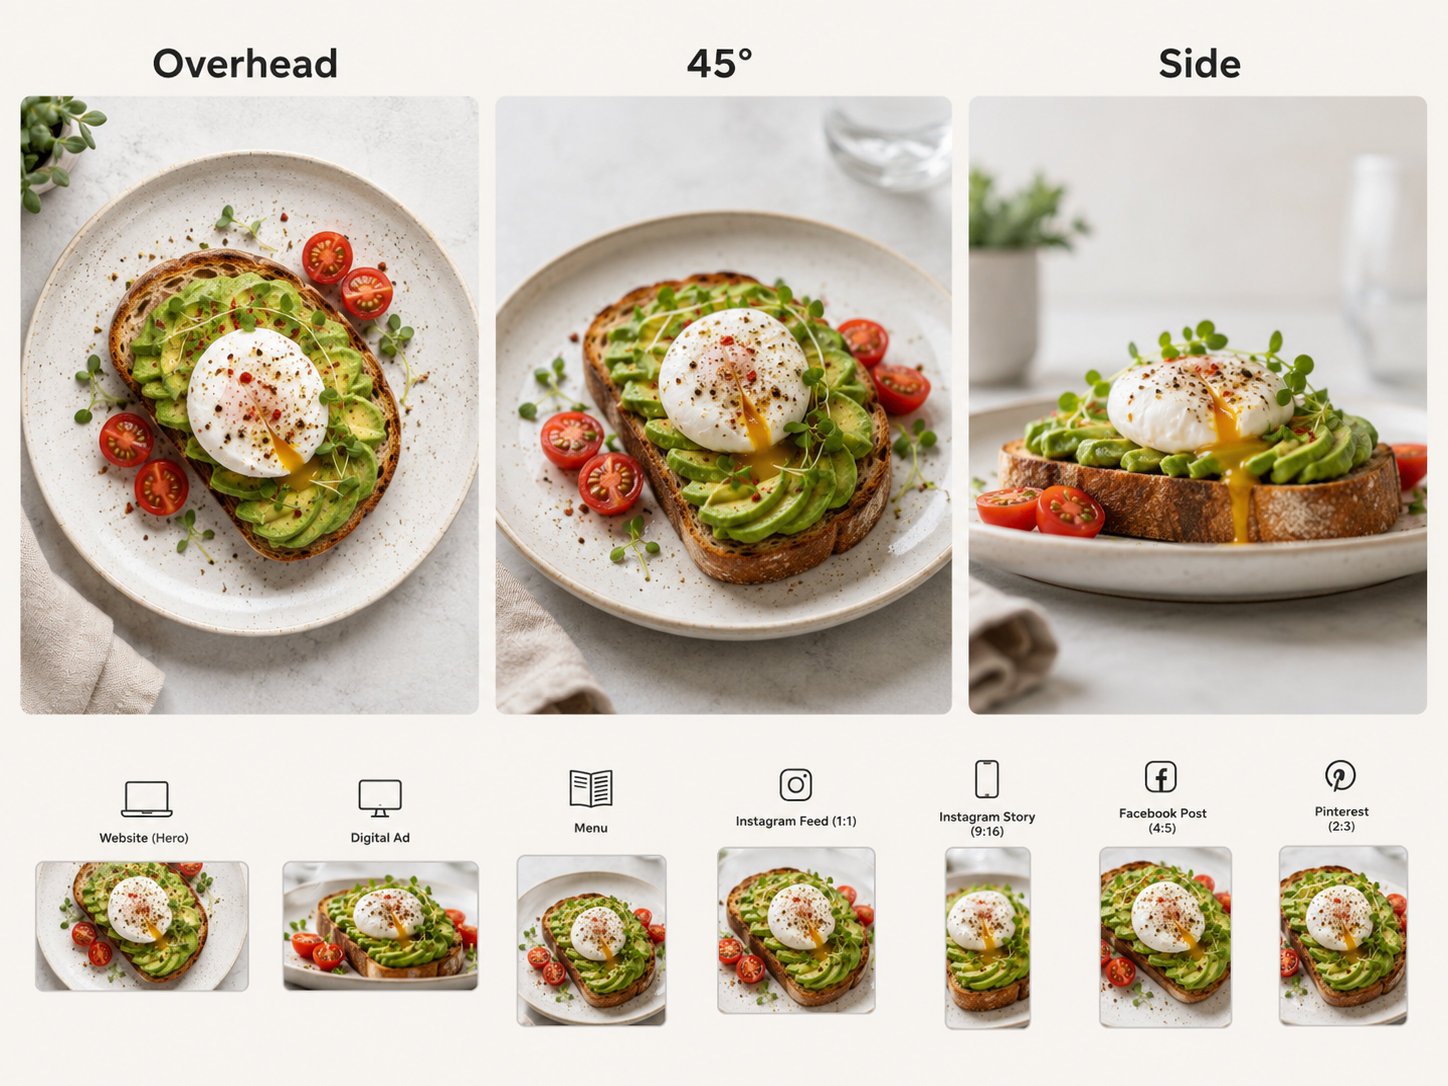
The best angle depends on what you need to show. Use an overhead angle for flat dishes, bowls, spreads, table layouts, and foods with strong shapes. Use a 45-degree angle for most plated meals because it feels close to how people naturally see food at a table. Use a lower side angle for tall foods, layered desserts, stacked sandwiches, drinks, and anything with visible height.
Take several shots from different angles before moving the dish. This gives you more choices for websites, ads, menus, and social media crops.
Leave Space for Text and Cropping
If the photo may be used in a menu, flyer, social post, or ad, leave some clean space around the dish. Negative space gives designers room to add dish names, prices, offers, or calls to action without covering the food.
Avoid placing the dish too close to the edge of the frame. A slightly wider shot is easier to crop into square, vertical, horizontal, or menu-style formats later.
How to Edit Food Photos Into Better Visuals
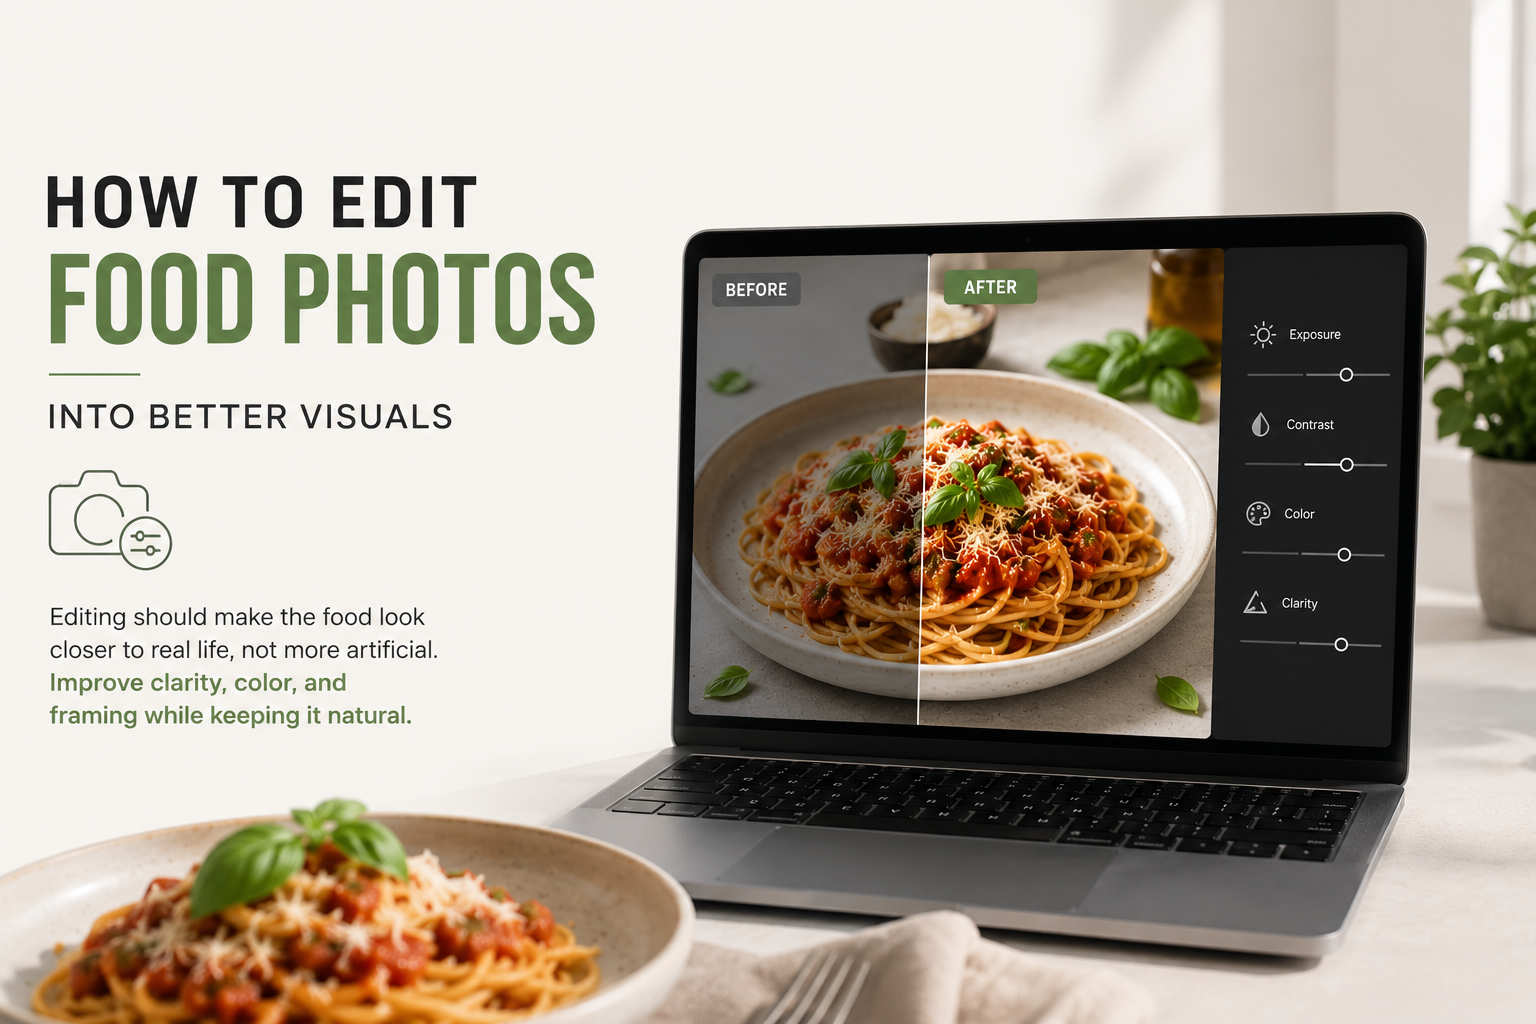
Editing should make the food look closer to real life, not more artificial. The goal is to improve clarity, color, and framing while keeping the dish believable.
Start With Crop, Straighten, and Framing
Begin with the basics. Straighten the table line, crop out empty distractions, and make sure the dish feels balanced in the frame. If the plate is slightly tilted, fix that before adjusting color or contrast.
A good crop can immediately make a food photo feel more professional. Keep the dish large enough to be clear, but leave enough breathing room for platform crops and possible text placement.
Correct Exposure and White Balance First
A practical starting order is: crop, straighten, adjust exposure, correct white balance, refine contrast, recover highlights, lift shadows, and adjust saturation. Exposure controls how bright the image feels. White balance controls whether the food looks too yellow, too blue, or too green.
Fix these before making creative changes. If the white balance is wrong, the food may look stale, cold, or unrealistic even if the composition is strong.
Restore Natural Food Color and Texture
Food color should look appetizing but still real. Increase saturation carefully. Over-saturated greens, reds, and yellows can make food look artificial, especially on delivery menus or product pages.
Focus on texture too. Sharpening can help show crisp edges, crumb detail, sauce texture, or fresh toppings, but too much sharpening can create harsh lines and an unnatural look. Aim for clear, clean, and realistic.
Remove Background Distractions
Small distractions can make a food photo feel messy. Look for crumbs that do not support the scene, stains, dirty cutlery, uneven napkins, harsh reflections, or background objects that pull attention away from the dish.
Removing distractions is especially useful when preparing food photos for menus, ads, or social content. A cleaner background helps the viewer focus on the dish and makes the image easier to combine with brand elements.
Fix Blurry or Low-Quality Food Images
Slightly blurry, soft, dark, or low-resolution food photos may still be usable after enhancement, especially if the composition and subject are strong. Still, this should not replace good shooting habits. Take the clearest photo possible first, then use editing to improve the final result. If your main issue is a dark image, you can also read Zawa’s guide on how to brighten an image before editing food photos for menus or social posts.
Turn Food Photography Into Brand-Ready Visuals With AI
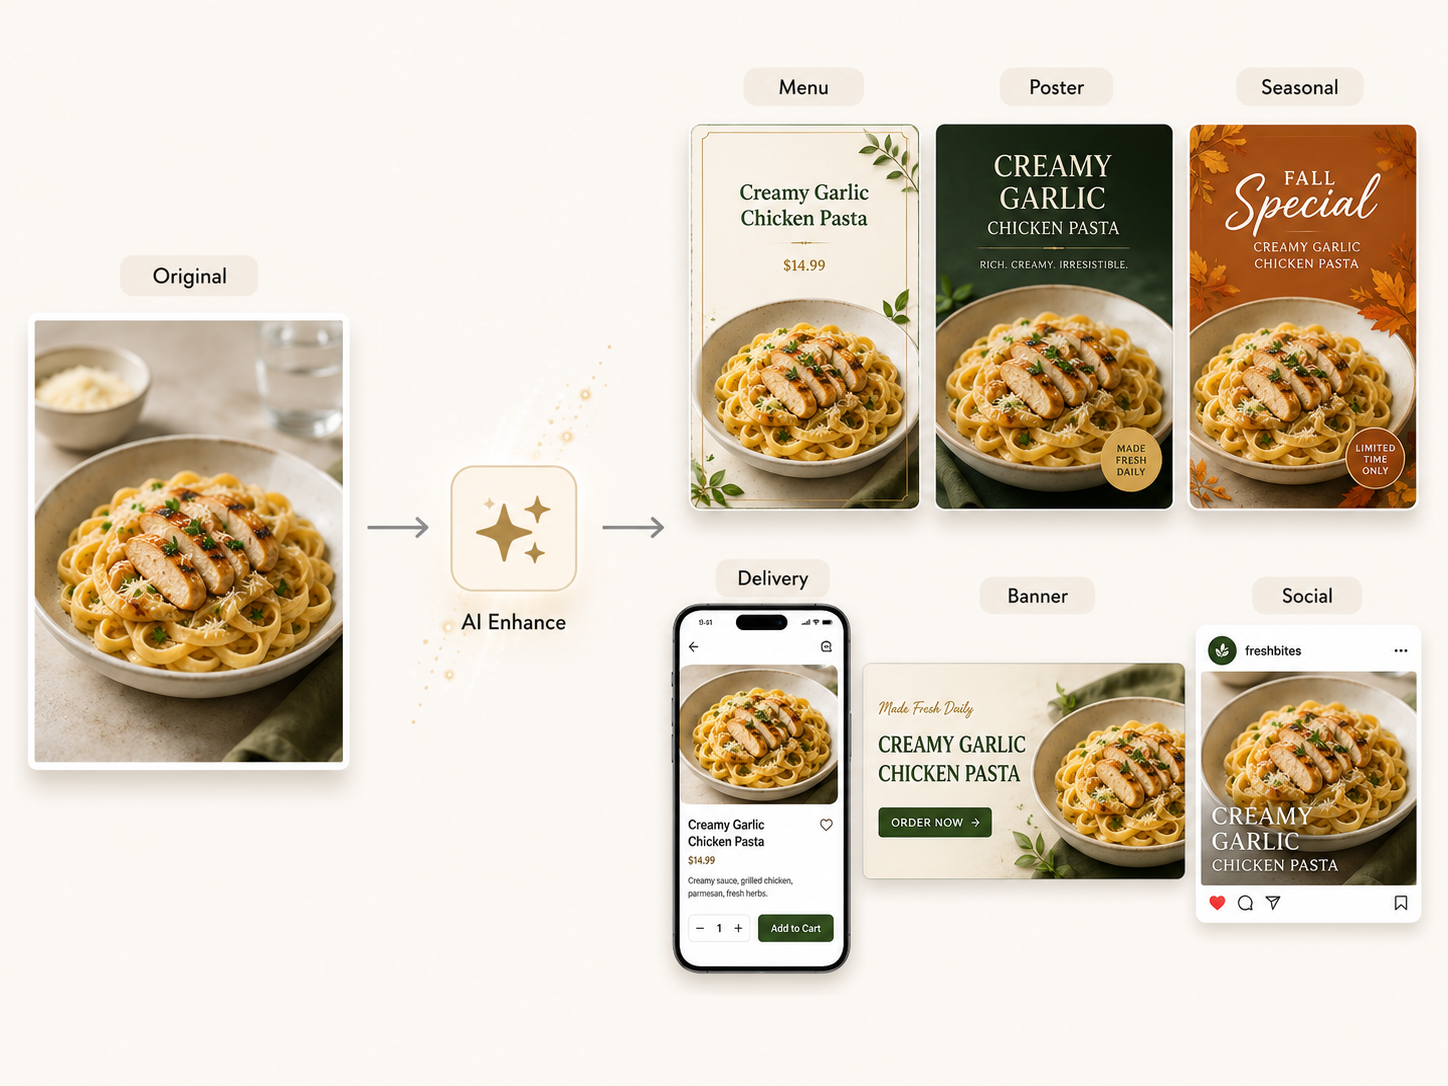
A clear food image is only the starting point. Restaurants, cafés, bakeries, and food brands often need the same dish photo in multiple formats: menu images, posters, seasonal promotions, delivery visuals, website banners, and social media posts.
After capturing a clear image with good lighting and composition, Zawa AI Food Photography can help enhance photo quality, refine the visual style, and make the image ready for marketing use without requiring advanced editing skills.
Turn Food Photos Into Menu and Social Media Assets
One strong food photo can become many different assets. For example, a café can use one drink photo for a menu update, an Instagram post, a seasonal flyer, and a promotional story. A bakery can reuse a dessert photo for a product page, printed sign, and holiday campaign.
Zawa helps turn food photos into more polished visual materials. If you need a menu layout, the AI Menu Maker can help create ready-to-use restaurant menus from dish photos, descriptions, and brand assets. If you need social content, the AI Social Media Post Generator can help create platform-ready posts from uploaded product or food images.
Maintain Consistent Food Branding Across Visuals
As your food photos are used across menus, social media, and promotional materials, maintaining a consistent visual style becomes increasingly important. When customers encounter your brand in different places, they should feel a sense of familiarity and coherence.
For example, if your menu images appear warm and natural, but your social media posts look overly edited or use a completely different tone, it can create a disconnected brand experience. Keeping a unified look helps reinforce your brand identity and builds trust with your audience.
By using a consistent workflow, businesses can adapt the same food photo into multiple formats while preserving a cohesive visual style. This approach makes it easier to produce menu visuals, social media content, and promotional materials that feel aligned, professional, and instantly recognizable.
Common Food Photography Tips and Mistakes to Avoid
Small mistakes can make even a good dish look less appealing. Check these issues before you finish the shoot or publish the final image.
Shooting Under Harsh Overhead Light
Harsh overhead light often creates strong shadows, glare, and flat-looking food. It can make sauces look oily, desserts look dry, and white plates look too bright. Move the dish near soft side light or diffuse the light before shooting.
Adding Too Many Props Around Food
Props can tell a story, but too many props create visual noise. If the viewer notices the spoon, napkin, flowers, extra sauces, and background before the food, the image is too crowded. Remove anything that does not support the main dish.
Overediting Colors Until Food Looks Fake
Overediting is one of the fastest ways to make food look untrustworthy. Avoid extreme saturation, heavy filters, waxy-looking surfaces, unnaturally smooth textures on baked goods, or unrealistic sauce colors. Customers should feel that the photo represents the real dish they will receive.
Conclusion
Great food photography isn't created by one perfect shot or a single editing trick. It's the result of every step working together—from fresh, well-prepared food and thoughtful styling to good lighting, the right angle, clean composition, and natural editing. Each element supports the next, creating images that look authentic, appetizing, and engaging. By focusing on the entire process instead of just one technique, you'll be able to capture food photos that not only look beautiful but also tell the story behind every dish.
FAQ
What is the best angle for food photography?
The best angle depends on the dish. Overhead works well for flat foods, bowls, pizzas, and table spreads. A 45-degree angle works for most plated meals because it feels natural. A side angle is best for tall foods such as burgers, cakes, drinks, and layered desserts.
Why does my food photography look dull?
Food photography often looks dull because of poor light, wrong white balance, weak contrast, or food that sat too long before shooting. Start with fresher food, use soft side light, clean the background, and correct exposure and white balance before adding saturation.
Can AI help improve food photography?
Yes. AI can help enhance clarity, improve lighting, sharpen details, remove background distractions, and turn food photos into marketing-ready visuals. However, AI works best when the original photo has a clear subject, good composition, and enough image quality to improve.
How can restaurants use food photos online?
Restaurants can use food photos on websites, online menus, delivery platforms, Google Business Profile, social media posts, digital ads, flyers, and seasonal promotions. The most useful food photos are clear, realistic, and easy to crop for different formats.
How to do food photography at home?
Use a clean surface, place the food near soft window light, choose one main subject, and avoid clutter. Use a phone or camera with a clean lens, tap to focus, and take several angles before the food loses freshness. Edit lightly so the final image still looks natural.
Can AI food photos be used on delivery apps?
AI-enhanced food photos may be useful if they still represent the real menu item accurately and follow the platform’s image rules. Avoid misleading edits, fake ingredients, heavy filters, text overlays, watermarks, or changes that make the dish look different from what customers will receive.
You May Be Interested

How to Make Instagram Reels Viral: Step-by-Step Guide

How to Remove White Background in Illustrator (Simple Methods)
How to Remove an Object from a Photo on an iPhone (2026)
How to Remove Watermark in Photoshop (7 Methods)

How to Remove Objects in Photoshop in 2026 (Easy Guide)
[2026 Updated] Best Apps to Remove Person From Picture
Hidden Tricks to Remove Getty Watermarks Using AI & Photoshop (2026 Guide)

Facebook Cover Photo Size Guide - Specs, Upload, and Design Process

How to Change Thumbnails on YouTube Shorts

LinkedIn Ad Specs 2026: Complete Guide for All Ad Formats
Instagram Profile Picture Size - Complete Specs & Design Guide
Top 30 Instagram Post Ideas: Grow Your Page Fast
How to Make a Grid on Instagram Story - Best Methods in 2026
New Instagram Grid Size Guide - Optimization, Benefits, Design, Tips
How to See Who Shared Your Instagram Post to Maximize Engagement
How to Post Multiple Photos on Instagram - A Step-By-Step Guide

10 Best AI Photo Enhancers to Try in 2026

How to Fix Pixelated Photos and Enhance Quality Instantly
How to Increase Resolution of Image Without Losing Quality

Canva Image Upscaler 2026: Full Review & Alternative

Pixelcut Image Upscaler: 2026 Review & Better Alternative

PicWish Unblur Review: Full Guide & Best AI Alternative 2026
How to Upscale an Image in Photoshop (Step-by-Step)

How to Add Link to Instagram Post

13 Best Fonts for YouTube Thumbnails

Most Liked Instagram Post Guide - Insights, Top Posts, and Process

10 Best YouTube Thumbnail Ideas to Skyrocket Your Views

How to Fix Grainy Photos: Causes, Fixes, and Prevention Guide
How to Fix Unfocused Pictures and Restore Image Clarity

Noise Reduction Software: 10 Top Tools for Cleaner Photos
Remove Fold of Scanned Image: Best AI Restoration Guide

Fotor Photo Enhancer: Full Review & Best Alternative 2026
How to Sharpen an Image in Photoshop: 2026 Guide & Top AI Alternative
Best YouTube Thumbnail Size - Create Perfect Thumbnails
How to Make a Picture Less Blurry and Restore Sharpness
How to Remove Glare From Photos

How to Remove the Kling AI Watermark

12 Nano Banana Prompt Guide for Stunning Visual Creation with Zawa
How to Upscale Images Without Losing Quality

How to Take Professional Headshot Images
How to Restore Old Photos-The Complete Guide
How to Resize an Image Without Losing Quality: A Beginner’s Guide
The Complete Guide: How to Make a Picture Bigger Without Losing Quality
How to Fix Overexposed Photos Without Losing Quality

How to Create 3D Figurines From Photos For Free With Nano Banana AI

How to Brighten an Image: A Step-by-Step Guide
How Big Is An 8x8 Photo
How Big is an 8x10 Photo? Everything You Need to Know
How Big Is a Wallet-Size Photo? Complete Size Guide
How Big Is a 4x4 Photo-Sizes, Format & Use Cases
How Big Is a 4x6 Photo- Size, Dimensions & Uses Explained
How Big Is a 5x7 Photo? Exact Dimensions Explained

How to Remove Gemini Watermark?
Try the 10 Best Image Upscalers for Your Photos in 2025
13 Best Free Photo Editors for Mac in 2025 to Enhance Your Photos
Standard Photo Print Size: A Guide to Choosing the Right Size
What is a PNG and How to Convert It?
12 Best Free Photoshop Alternatives – AI Photo Editor Tools
How to Remove Background in Figma: 4 Effective Methods You Should Know

How to Remove People From Pictures