Coffee Photo Tips for Cafes
Learn practical coffee photography tips for lighting, styling, angles, composition, and editing. The article also shows how cafés, coffee brands, and creators can turn one strong coffee photo into menu, social, delivery, and campaign visuals.


A great coffee photo does more than show a cup. It suggests flavor, texture, warmth, and atmosphere in a single frame. Whether you run a cafe, manage a coffee brand, create social content, or run a food blog, strong coffee photography can help attract customers, increase engagement, and build a more recognizable visual identity. In this guide, you will learn practical coffee photography tips for lighting, composition, styling, editing, and turning one good photo into useful marketing content.
How to Prepare for Coffee Photography
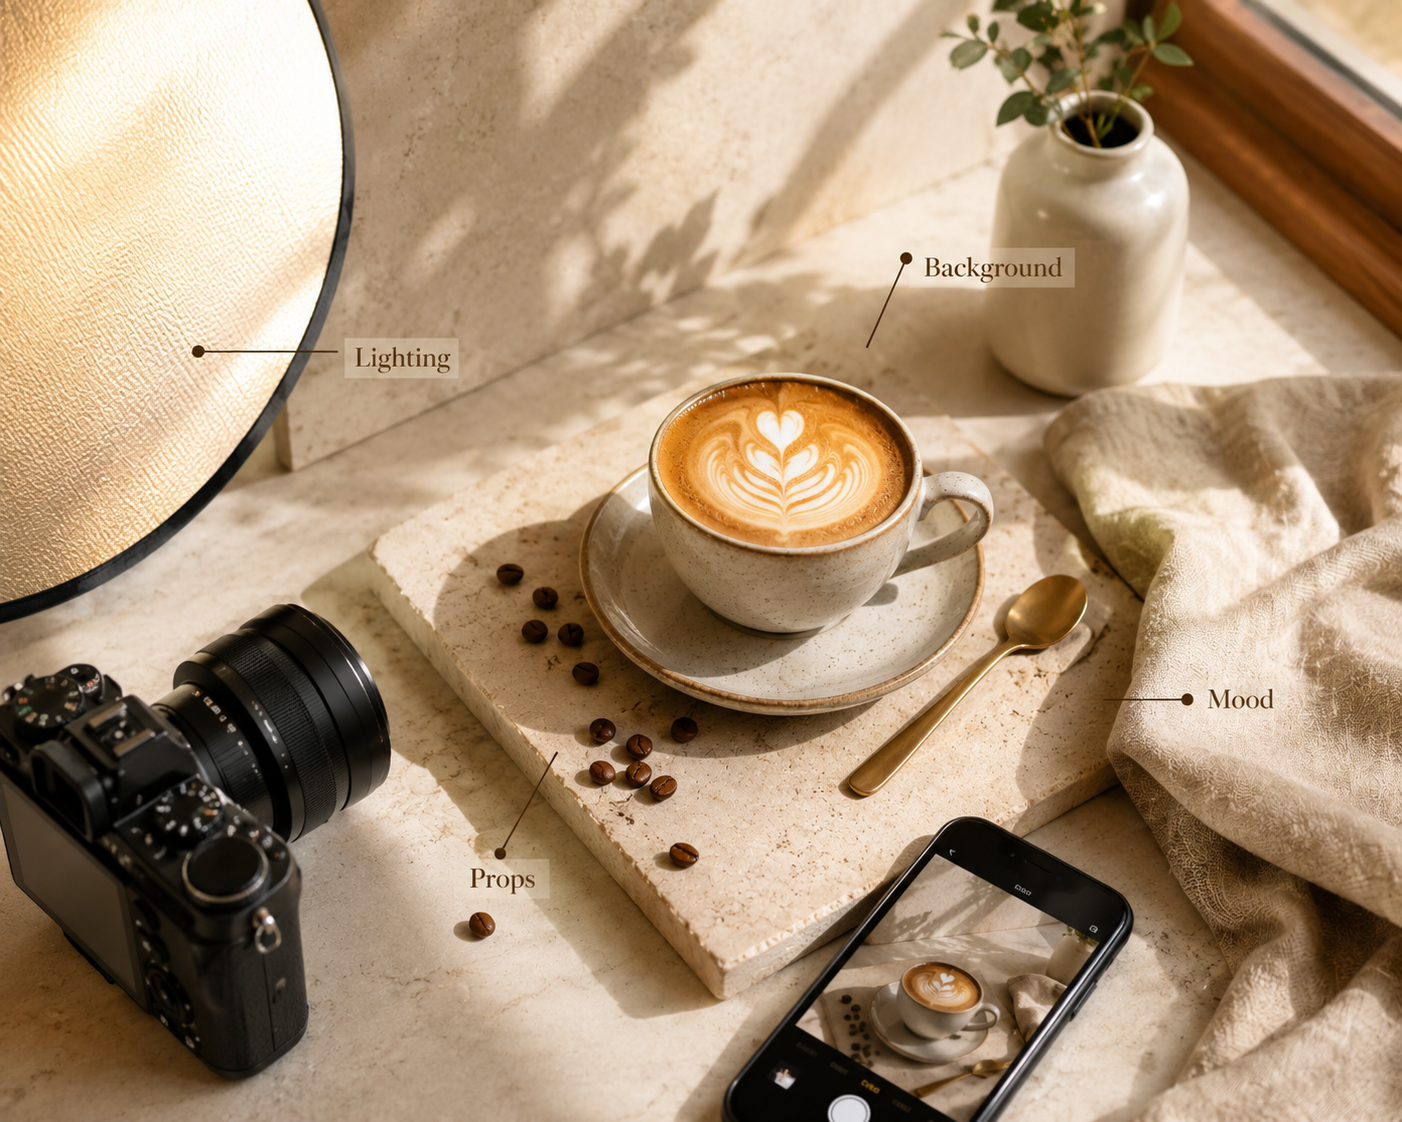
Good coffee photography starts before you press the shutter. A clear setup, clean styling, and a defined mood make the shooting process faster and help the final image look more intentional.
Choose the Right Coffee Setup
Start with the type of coffee you want to feature. A latte needs a setup that shows foam and shape. An iced coffee needs glass, condensation, and light passing through the drink. A bag of beans may need a cleaner product style with fewer lifestyle elements. Match the setup to the main detail you want people to notice first.
Select Props with Intention
Props should support the coffee instead of competing with it. Use simple items such as beans, spoons, napkins, pastries, books, or a laptop only when they add mood, scale, texture, or context. If the cup stops being the main focus, remove something from the scene.
Define the Mood and Style
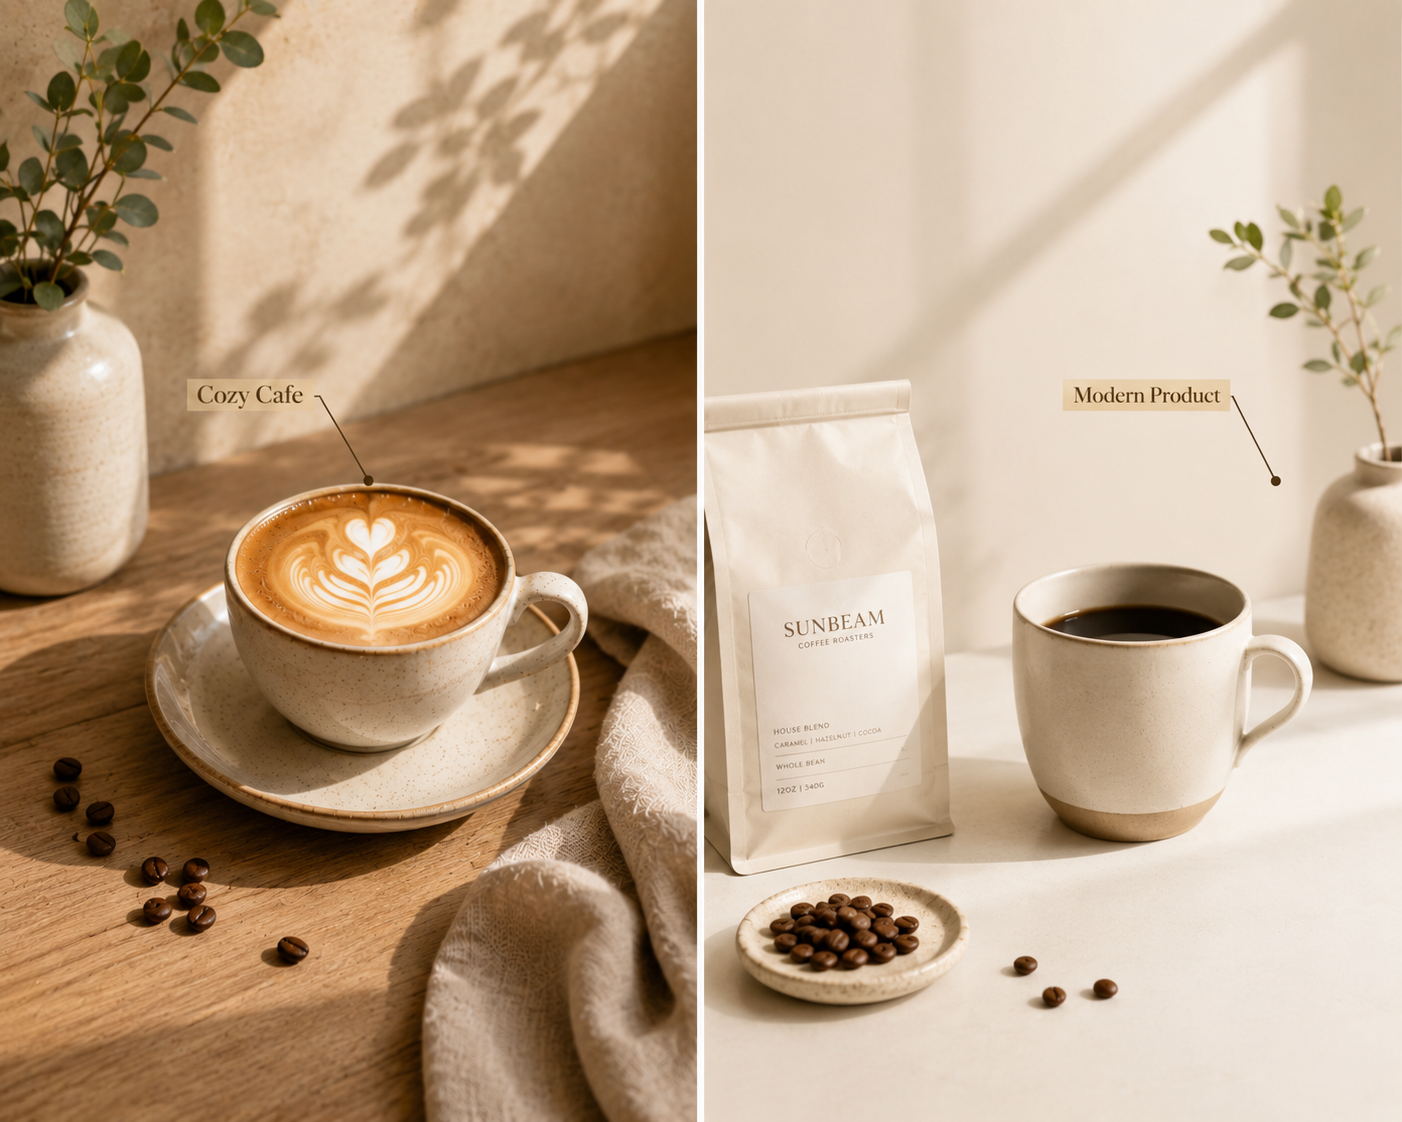
Decide the mood before shooting so every choice feels connected. A cozy cafe image may use warm light, wood textures, and soft shadows. A modern product photo may use clean lines, a brighter setup, and more open space. This early decision helps your coffee photos stay consistent across menus, websites, and social posts.
Select Backgrounds That Match the Drink
The background should fit the drink’s personality. A cappuccino may look natural on a cafe table. Cold brew can work well against stone, glass, or a bright summer surface. A simple background is often better for menu photos, while a textured surface can make lifestyle shots feel more real.
Shoot Before the Coffee Starts to Change
Coffee changes quickly. Foam settles, ice melts, cream blends, and steam disappears. Set up your props, background, camera angle, and lighting before the drink is ready. Then shoot as soon as the coffee is poured, especially if you want to capture foam, bubbles, steam, or condensation.
How to Take the Perfect Coffee Photo
Once the scene is ready, focus on the elements that make a coffee photo look professional: light, angle, composition, texture, and space.
Master Lighting for Coffee
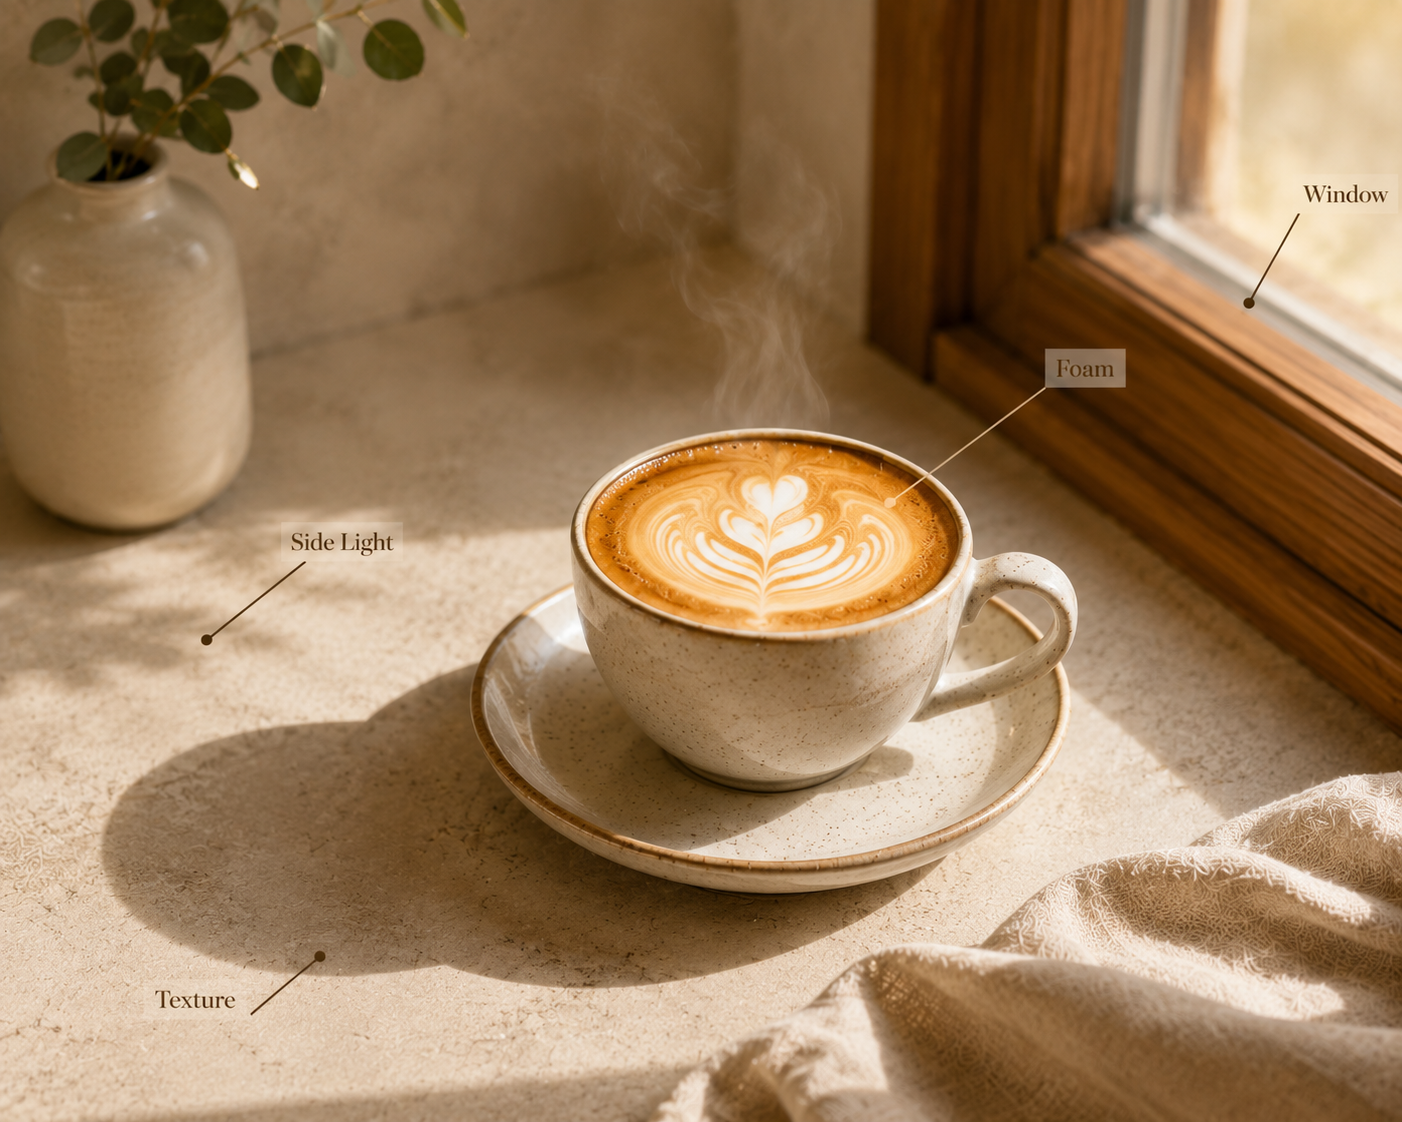
Natural light is usually the easiest starting point. Place the coffee near a window and use side light to bring out foam, steam, glass reflections, and table texture. Avoid harsh direct sunlight unless strong shadows are part of the visual style.
Use Angles That Match the Coffee Type
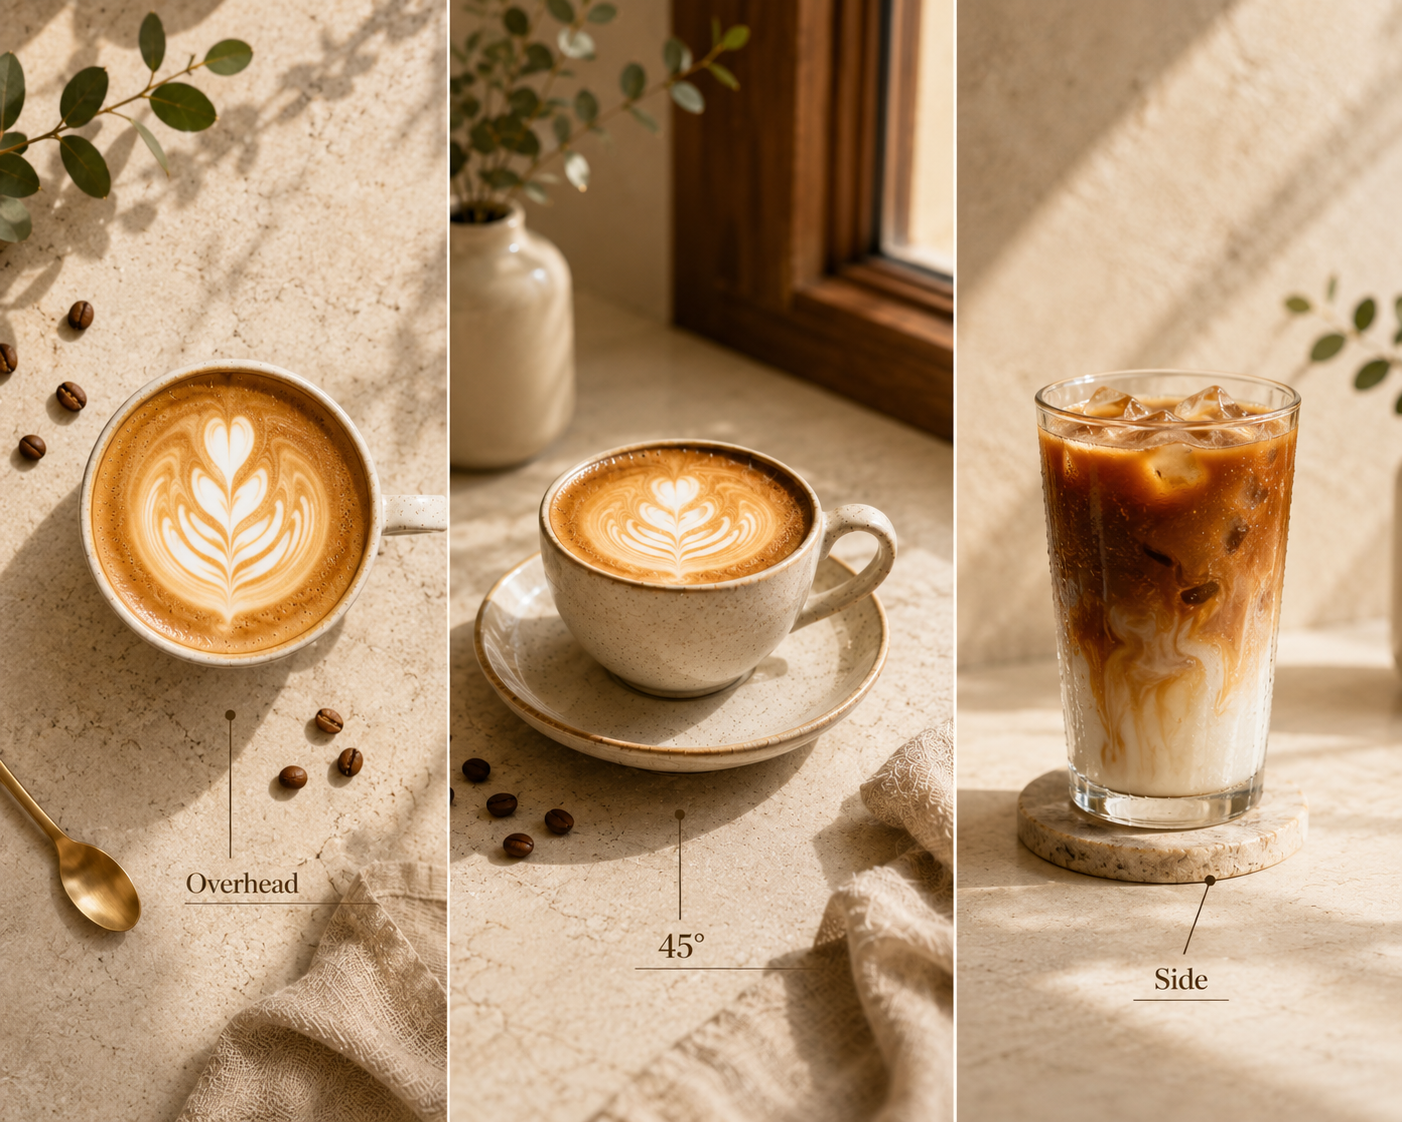
Choose the angle based on what you need to show. Use an overhead angle for latte art, table spreads, and multiple drinks. Shoot from around 45 degrees for most cafe scenes because it feels close to how people naturally see a cup. Use a side angle for iced coffee, layered drinks, or glass cups where height and texture matter.
Build a Clean and Intentional Composition
A strong composition tells the eye where to look first. Place the cup slightly off center, use lines from spoons or table edges, and keep the main subject clear. The rule of thirds can help, but do not force it. The goal is a balanced frame that keeps attention on the coffee.
Keep Coffee Images Natural and Realistic
Coffee photos should feel polished, but still believable. Keep the cup, foam, table, and surrounding details close to what customers would actually see in person. A small drip on the glass, a few beans near the cup, or a soft shadow can make the image feel more natural and inviting.
Capture Coffee Texture, Steam, Foam, and Small Details
Texture creates appetite appeal. Focus on the smooth foam, the swirl of milk, the shine of crema, the ice in a glass, or the steam rising from a hot drink. These small details help viewers imagine the taste, warmth, and freshness of the coffee.
Leave Negative Space
Negative space gives the image room to breathe. It is especially useful for menus, posters, Instagram graphics, and website banners because you may need space for text, prices, logos, or a call to action. Do not fill every corner of the frame just because you can.
How to Enhance Coffee Photos
Editing should improve what is already there. The best coffee edits make the image clearer, warmer, and more appetizing without making the drink look fake.
Correct Lighting for a More Professional Look
If the photo looks too dark, start with exposure and shadows. If it looks flat, adjust contrast carefully. Brightness should make the coffee easier to see without washing out the foam, glass, or background. Keep highlights under control, especially on white cups, metal spoons, and reflective surfaces.
Make Coffee Look Richer and More Appetizing
Coffee often looks better when the color feels rich but not heavy. Bring out warm brown tones, creamy foam, and smooth texture without pushing the image into an artificial look. AI food photography can help refine a coffee photo by improving the drink’s presentation, background, and overall visual balance while keeping the result realistic.
Adjust Color to Match Brand Style
Color should match your brand. A cozy cafe may prefer warm tones and soft contrast. A premium coffee brand may use deeper shadows and cleaner highlights. A bright seasonal drink may need a lighter, fresher palette. Apply color edits consistently so your photos feel connected across platforms.
Remove Visual Distractions Without Losing Atmosphere
Clean up anything that pulls attention away from the drink, such as stains, clutter, messy counters, or awkward background objects. Keep enough context to preserve atmosphere. A cafe photo can still feel lived in, but the cup should remain the clear visual focus.
How to Turn Coffee Images Into Marketing Content
A strong coffee shot can do more than sit in a gallery. With the right editing and formatting, one photo can become a menu image, delivery listing, Instagram post, website banner, or seasonal promotion.
Prepare Coffee Photos for Menus
Menu images need clarity. Customers should quickly understand the drink, size, texture, and main appeal. Use a clean background, natural color, and enough space around the cup. AI can help make coffee photos for menus look cleaner and more polished by improving lighting, refining the background, and presenting the drink in a more appetizing way.
Instagram coffee content needs mood as much as clarity. With an AI social media post generator, creators can turn Instagram coffee photos into different formats, such as a cozy cafe post, a clean product shot, or a seasonal campaign visual. This helps keep the feed varied without arranging a new shoot for every post.
Adapt Coffee Cup Images for Delivery Platforms
Delivery platforms need images that are simple, accurate, and easy to recognize on small screens. Avoid busy props and dramatic shadows. Show the drink clearly, keep colors realistic, and make sure the cup does not blend into the background. A clean image can help customers make faster ordering decisions.
Build Seasonal Campaigns From One Coffee Photo
One strong original drink photo can support several seasonal campaigns, from a fall latte poster to a summer cold brew graphic or a holiday menu feature. AI can help transform the original image into several coffee shop branding visuals, making it easier for cafes and beverage brands to create campaign materials without reshooting every time.
Common Mistakes in Coffee Photography
Most weak coffee photos fail for simple reasons. Poor light, cluttered styling, heavy editing, and the wrong image size can make even a good drink look less appealing.
Using Poor Lighting for Coffee Photos
Bad lighting makes coffee look dull, flat, or muddy. Avoid shooting under mixed cafe lights if they create strange color casts. Move closer to a window, use softer light, and turn the cup until the foam, glass, or coffee surface catches light in a natural way.
Adding Too Many Props Around the Cup
Too many props make the photo feel busy. A pastry, spoon, book, or bag of beans can add context, but using all of them at once can distract from the drink. Keep the cup as the hero and let supporting elements stay secondary.
Making Coffee Photos Look Overly Edited
Overedited coffee photos can look unrealistic. Heavy saturation may make the drink look orange. Too much sharpening can make foam and crema look rough. Strong filters can hide the natural color of the coffee. Edit for clarity and appetite appeal, not a fake-looking finish.
Ignoring Platform Size and Image Use
A photo that works on Instagram may not work for a menu, delivery app, or website banner. Shoot with extra space around the cup when possible. This gives you more room to crop the image for square posts, vertical stories, horizontal banners, and menu layouts.
FAQ
How can I make coffee photos look professional?
Use soft natural light, keep the cup clean, choose a simple background, and focus on texture. The photo should have one clear subject, balanced composition, and realistic color. Small details like foam, steam, condensation, and shadows can make the image feel more polished.
How can cafes reuse one coffee photo across different platforms?
Cafes can reuse one coffee photo by cropping it for different platforms, changing the background, adding seasonal styling, or turning it into menu, poster, delivery, and social media formats. This helps small teams create more content without arranging a new photo shoot every time.
Can AI improve coffee photos after shooting?
Yes. AI tools can improve coffee photos by correcting lighting, cleaning up backgrounds, adjusting color, resizing images, and preparing visuals for menus or social media. The best results still start with a clear original photo that shows the coffee accurately.
What is the best angle for coffee photography?
The best angle depends on the drink. Use overhead shots for latte art and table spreads. Shoot from around 45 degrees for a natural cafe view. Use a side angle for iced coffee, glass cups, layered drinks, or any coffee where height and texture matter.
Conclusion
Coffee photography works best when the image feels clear, intentional, and true to the drink. Start with good light, a clean setup, the right angle, and a simple composition. Then use editing to refine brightness, color, texture, and background without making the coffee look unrealistic.
For cafes, coffee brands, bloggers, and creators, strong coffee images can support menus, social posts, delivery platforms, and seasonal campaigns. Tools like Zawa can help you get more use out of one good photo by turning it into polished visuals for menus, social posts, delivery platforms, and seasonal campaigns.
How to Get a Perfect Coffee Photo

How to Make Instagram Reels Viral: Step-by-Step Guide

How to Remove White Background in Illustrator (Simple Methods)
How to Remove an Object from a Photo on an iPhone (2026)
How to Remove Watermark in Photoshop (7 Methods)

How to Remove Objects in Photoshop in 2026 (Easy Guide)
[2026 Updated] Best Apps to Remove Person From Picture
Hidden Tricks to Remove Getty Watermarks Using AI & Photoshop (2026 Guide)

Facebook Cover Photo Size Guide - Specs, Upload, and Design Process

How to Change Thumbnails on YouTube Shorts

LinkedIn Ad Specs 2026: Complete Guide for All Ad Formats
Instagram Profile Picture Size - Complete Specs & Design Guide

Top 30 Instagram Post Ideas: Grow Your Page Fast
How to Make a Grid on Instagram Story - Best Methods in 2026
New Instagram Grid Size Guide - Optimization, Benefits, Design, Tips

How to See Who Shared Your Instagram Post to Maximize Engagement

How to Post Multiple Photos on Instagram - A Step-By-Step Guide

10 Best AI Photo Enhancers to Try in 2026

How to Fix Pixelated Photos and Enhance Quality Instantly
How to Increase Resolution of Image Without Losing Quality

Canva Image Upscaler 2026: Full Review & Alternative

Pixelcut Image Upscaler: 2026 Review & Better Alternative

PicWish Unblur Review: Full Guide & Best AI Alternative 2026
How to Upscale an Image in Photoshop (Step-by-Step)

How to Add Link to Instagram Post

13 Best Fonts for YouTube Thumbnails

Most Liked Instagram Post Guide - Insights, Top Posts, and Process

10 Best YouTube Thumbnail Ideas to Skyrocket Your Views

How to Fix Grainy Photos: Causes, Fixes, and Prevention Guide
How to Fix Unfocused Pictures and Restore Image Clarity

Noise Reduction Software: 10 Top Tools for Cleaner Photos
Remove Fold of Scanned Image: Best AI Restoration Guide

Fotor Photo Enhancer: Full Review & Best Alternative 2026
How to Sharpen an Image in Photoshop: 2026 Guide & Top AI Alternative
Best YouTube Thumbnail Size - Create Perfect Thumbnails
How to Make a Picture Less Blurry and Restore Sharpness
How to Remove Glare From Photos

How to Remove the Kling AI Watermark

12 Nano Banana Prompt Guide for Stunning Visual Creation with Zawa
How to Upscale Images Without Losing Quality

How to Take Professional Headshot Images
How to Restore Old Photos-The Complete Guide
How to Resize an Image Without Losing Quality: A Beginner’s Guide
The Complete Guide: How to Make a Picture Bigger Without Losing Quality

How to Fix Overexposed Photos Without Losing Quality

How to Create 3D Figurines From Photos For Free With Nano Banana AI

How to Brighten an Image: A Step-by-Step Guide
How Big Is An 8x8 Photo
How Big is an 8x10 Photo? Everything You Need to Know
How Big Is a Wallet-Size Photo? Complete Size Guide
How Big Is a 4x4 Photo-Sizes, Format & Use Cases
How Big Is a 4x6 Photo- Size, Dimensions & Uses Explained
How Big Is a 5x7 Photo? Exact Dimensions Explained

How to Remove Gemini Watermark?
Try the 10 Best Image Upscalers for Your Photos in 2025
13 Best Free Photo Editors for Mac in 2025 to Enhance Your Photos
Standard Photo Print Size: A Guide to Choosing the Right Size

What is a PNG and How to Convert It?
12 Best Free Photoshop Alternatives – AI Photo Editor Tools

How to Remove Background in Figma: 4 Effective Methods You Should Know

How to Remove People From Pictures