How to Make the Background White in a Photo
Learn how to make a background white in a photo using AI, manual editing, or a plain white backdrop. This guide covers clean cutouts, natural shadows, edge fixes, pure white versus off-white, and export tips for product, portraits, and social images.

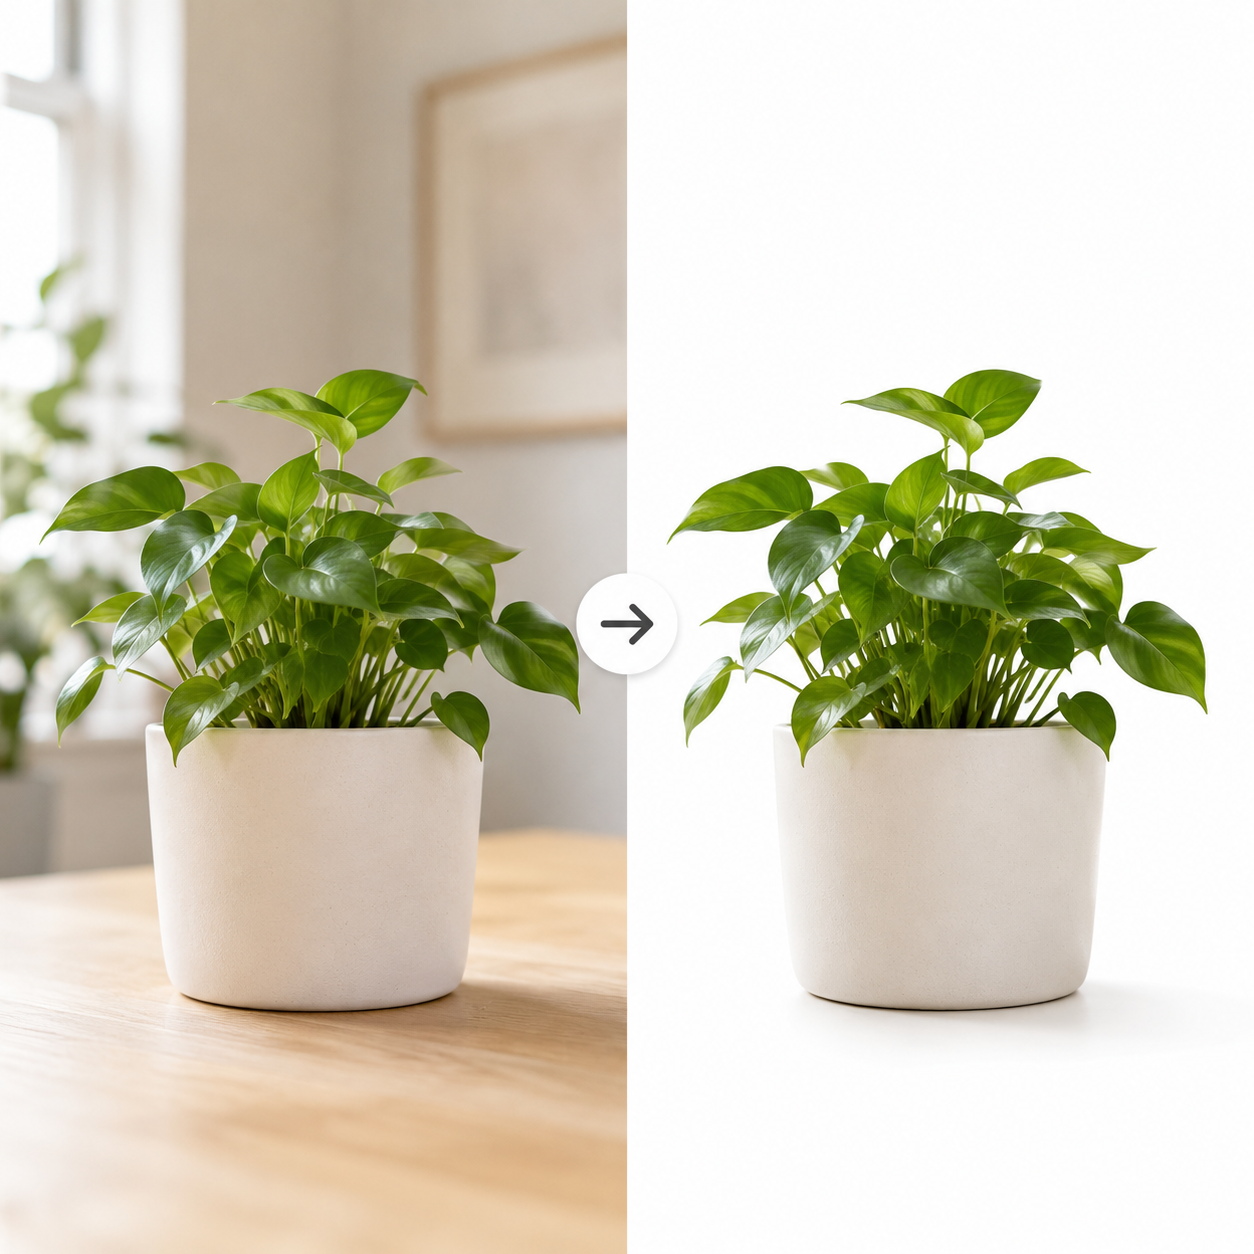
A white background can make a photo look cleaner, brighter, and more professional. You can create one with an AI tool, manual editing software, or a white backdrop during shooting.
This guide covers all three methods, compares pure white with off-white, and explains how to fix gray backgrounds, rough edges, and unnatural shadows.
Why Do You Need to Make a Photo Background White?
A white background removes distractions and creates a consistent look across websites, marketplaces, profiles, and social media.
Create Professional Product Photos
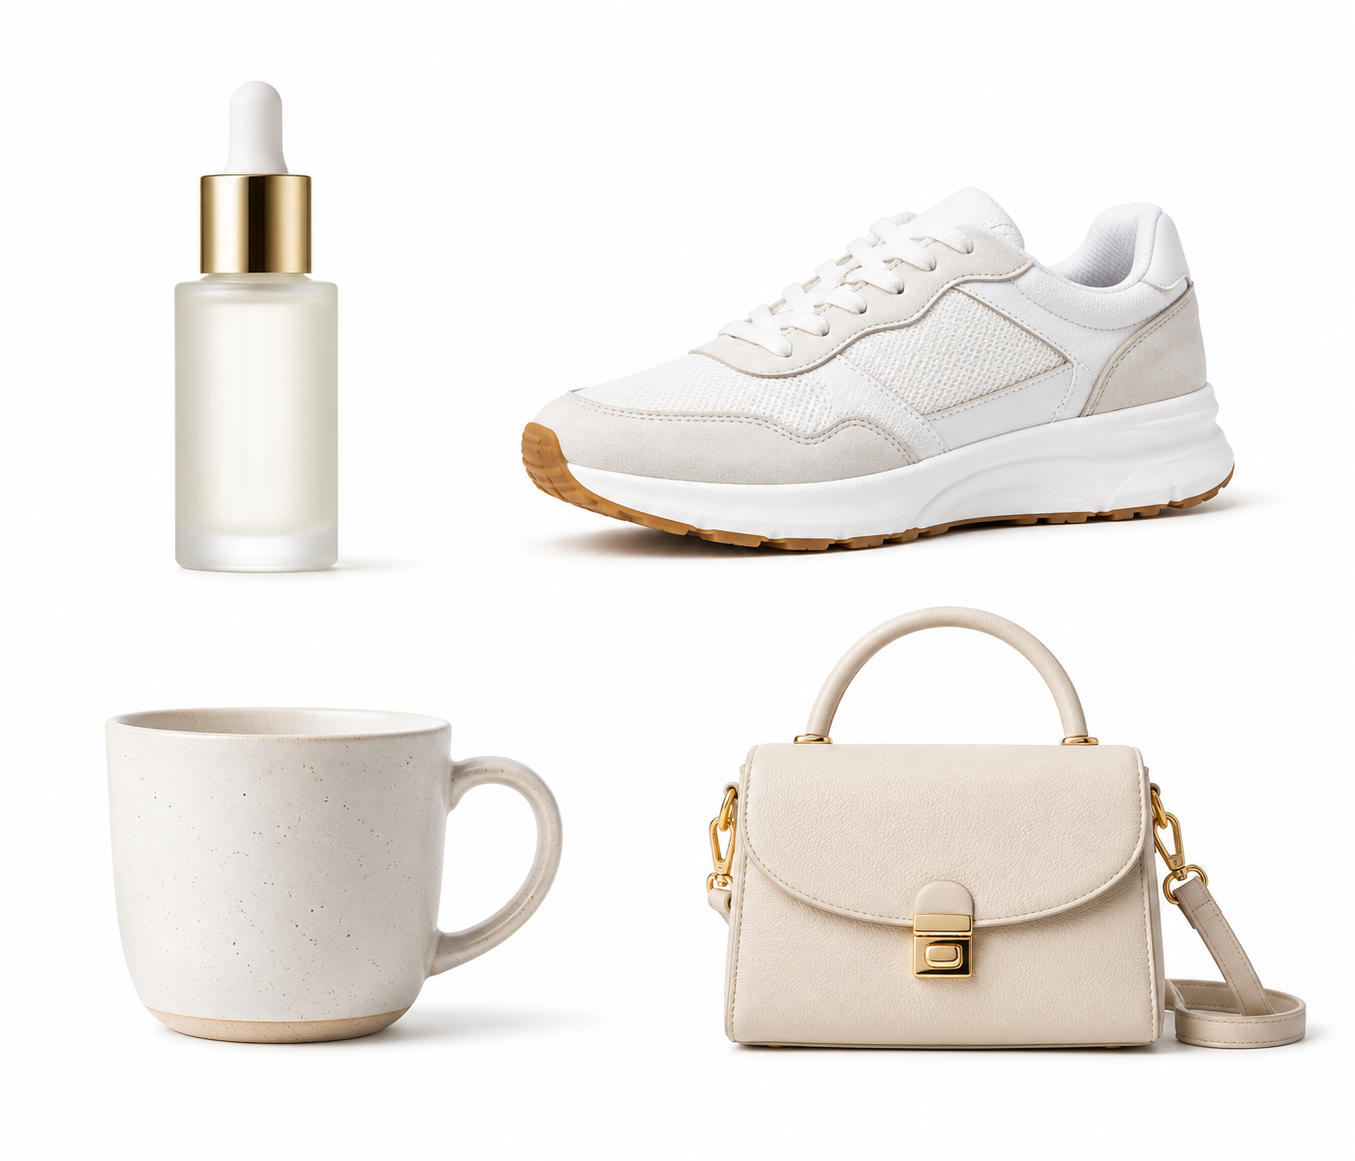
A plain background keeps attention on a product’s shape, color, texture, and details. Pure white is especially useful for online marketplaces, catalogs, and product comparison pages because it gives every item a consistent appearance. Following a reliable product photography setup also helps maintain similar framing and lighting across an entire catalog.
Improve Portrait and Profile Photos
Removing furniture, signs, and other people from the frame can make a portrait look more focused. Pure white suits formal headshots, resumes, company directories, and ID-style photos, while off-white feels warmer and more approachable. When preparing professional headshot images, a light ivory background can look polished without creating the clinical feel of an ID photo.
Enhance Visual Consistency for Social Media
Using the same background color helps photos from different locations or photo sessions feel connected. White also leaves open space for prices, captions, or graphic elements. An Zawa can help creators prepare consistent product, portrait, and promotional images without rebuilding every post from the beginning.
How to Make Background White in a Photo
You can use an AI background remover, edit the image manually, or photograph the subject against white from the start.
Before choosing a method, decide which shade of white fits the final use:
| Background color | Best for | Visual effect |
| Pure white | E-commerce, marketplaces, IDs, catalogs | Crisp, clean, and standardized |
| Off-white | Portraits, food, beauty, handmade products | Soft, warm, and natural |
Method 1: Use an AI Background Remover
An AI background remover is usually the fastest option. It can identify the main subject, remove the original scene, and create a clean cutout without requiring manual selection. This approach works particularly well for product photos, portraits, profile pictures, and batches of e-commerce images.
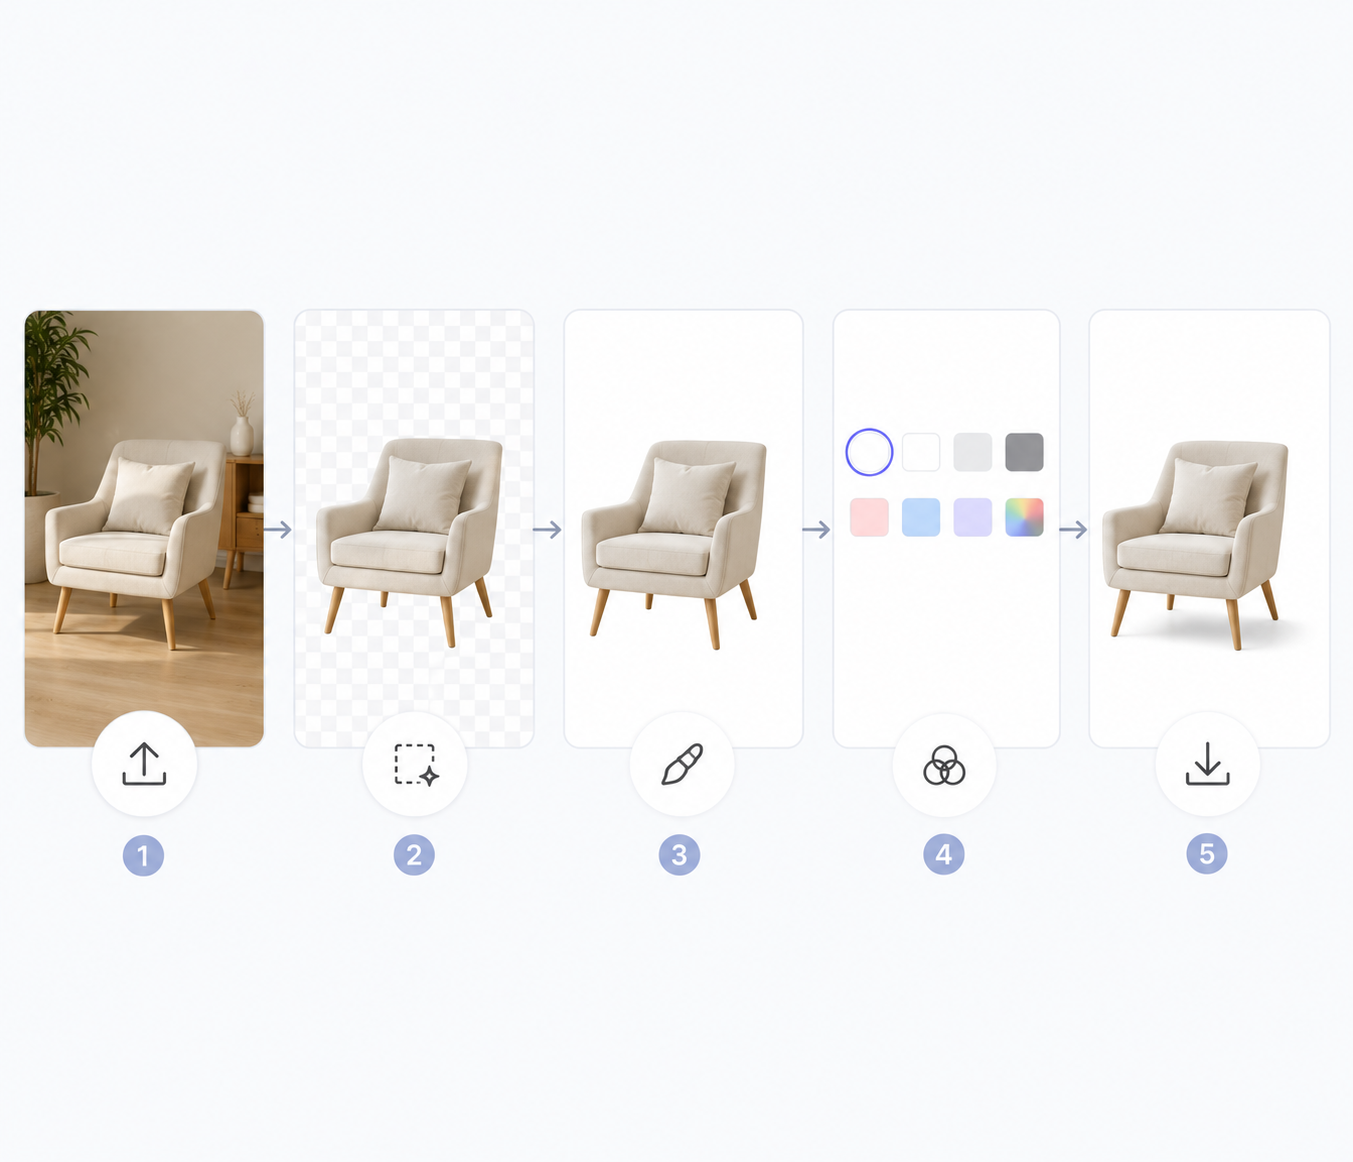
Step 1: Upload Your Photo to an AI Background Remover
Start with the highest-resolution original rather than a screenshot or compressed social media image. Clear contrast between the subject and its surroundings usually produces a cleaner cutout. A dark backpack against a pale wall, for instance, is easier to separate than a white shirt photographed in front of light curtains.
Step 2: Remove the Original Background Automatically
Once the image is uploaded, the AI detects the subject boundary and removes the surrounding area. Zoom in to check difficult details such as hair, fur, jewelry chains, bicycle spokes, and transparent packaging. Simple objects may need no extra work, but complex edges can benefit from small erase or restore adjustments.
Step 3: Replace the Background With White
Choose pure white when the photo must blend into a white webpage or follow marketplace image standards. Off-white is often better for portraits, wooden products, food, ceramics, and fabric because it creates less contrast. It can also match photos taken under warm indoor light more naturally.
Step 4: Download Your White Background Photo
JPG works well for listings, profile photos, and social posts, while PNG is useful when you also need a transparent version for future designs. Before publishing, view the image on both light and dark screens. Pale halos and rough edges may be difficult to notice on the editing canvas but obvious elsewhere.
Method 2: Make a Photo Background White Manually
Manual editing provides more control over edges, shadows, transparency, and color spill. It is a better option for glass, lace, smoke, loose hair, reflective products, or any image where an automatic result looks flat. These methods for changing the background of a picture can also help you choose between detailed desktop editing and a faster online workflow.
Step 1: Select the Background Area
Open the photo in an editor that supports layers and masks. Use an automatic selection tool, selection brush, or Pen tool to isolate the subject. A layer mask is safer than permanently deleting pixels because missing details can be restored during later adjustments.
Step 2: Remove the Existing Background
Inspect the mask around fingers, handles, chair legs, fabric, and hair. Not every outline should be perfectly sharp, since real photos contain natural softness. Hard products such as phones and boxes need clean edges, while fur, feathers, and hair should keep a softer boundary.
Step 3: Add a White Background Layer
Place a solid-color layer beneath the cutout. Pure white works well for standardized store images, while ivory or warm white can preserve depth in portraits and natural materials. When the subject itself is pale, a slight off-white tone may prevent its outline from disappearing into the background.
Step 4: Adjust Lighting and Export the Image
Compare the subject’s brightness and color temperature with the replacement background. Remove colored reflections left by the original scene and keep a believable contact shadow where needed. Save an editable layered file first, then export the finished image in the required dimensions and format.
Method 3: Take Photos With a White Background
Photographing against white can reduce editing and preserve natural shadows. Paper, fabric, foam board, a curved sweep, or a small lightbox can all work. Leave some distance between the subject and the backdrop to reduce wrinkles, uneven lighting, and hard shadows.
A backdrop may still appear gray if it receives less light than the subject, so light the two areas separately when possible. If the physical backdrop remains uneven, an AI background generator can replace it with a consistent solid color afterward. Pure white suits commercial products, while off-white is often more flattering for portraits, food, flowers, crafts, and lifestyle photography.
AI Background Remover vs Traditional Photo Editing
AI tools are faster, while traditional editing offers more control over complex details and shadows.
| Feature | AI Background Remover | Traditional Photo Editing |
| Best for | Simple products, portraits, bulk edits | Hair, glass, reflections, premium images |
| Speed | Usually completed in seconds | Requires manual refinement |
| Skill level | Beginner-friendly | Moderate to advanced |
| Edge control | Mostly automatic | Precise masking |
| Shadow control | May simplify shadows | Full control over shadow shape and opacity |
| Batch processing | Efficient for many images | Slower for large image sets |
A store processing dozens of straightforward product photos will usually save time with AI. Jewelry, clear glassware, and campaign photography may require manual editing. A practical workflow is to create the initial cutout with AI and refine only the difficult areas by hand.
Common Mistakes When Making a Background White
Most problems come from the wrong color, rough masking, or lighting that does not match the new background.
The Background Looks Gray Instead of White
A background may look gray because it was underexposed, the replacement color was not truly white, or shadows remain around the corners. For a pure white result, use #FFFFFF and confirm the color with a picker tool. When the subject is pale or softly lit, off-white may be more suitable because it keeps the outline visible.
Edges Look Unnatural After Background Removal
Jagged outlines, white halos, and missing strands usually mean the mask needs more refinement. Solid products require cleaner edges, while hair, fur, feathers, and knitwear need softness and partial transparency. Avoid excessive feathering, since it can make a sharp subject appear blurry.
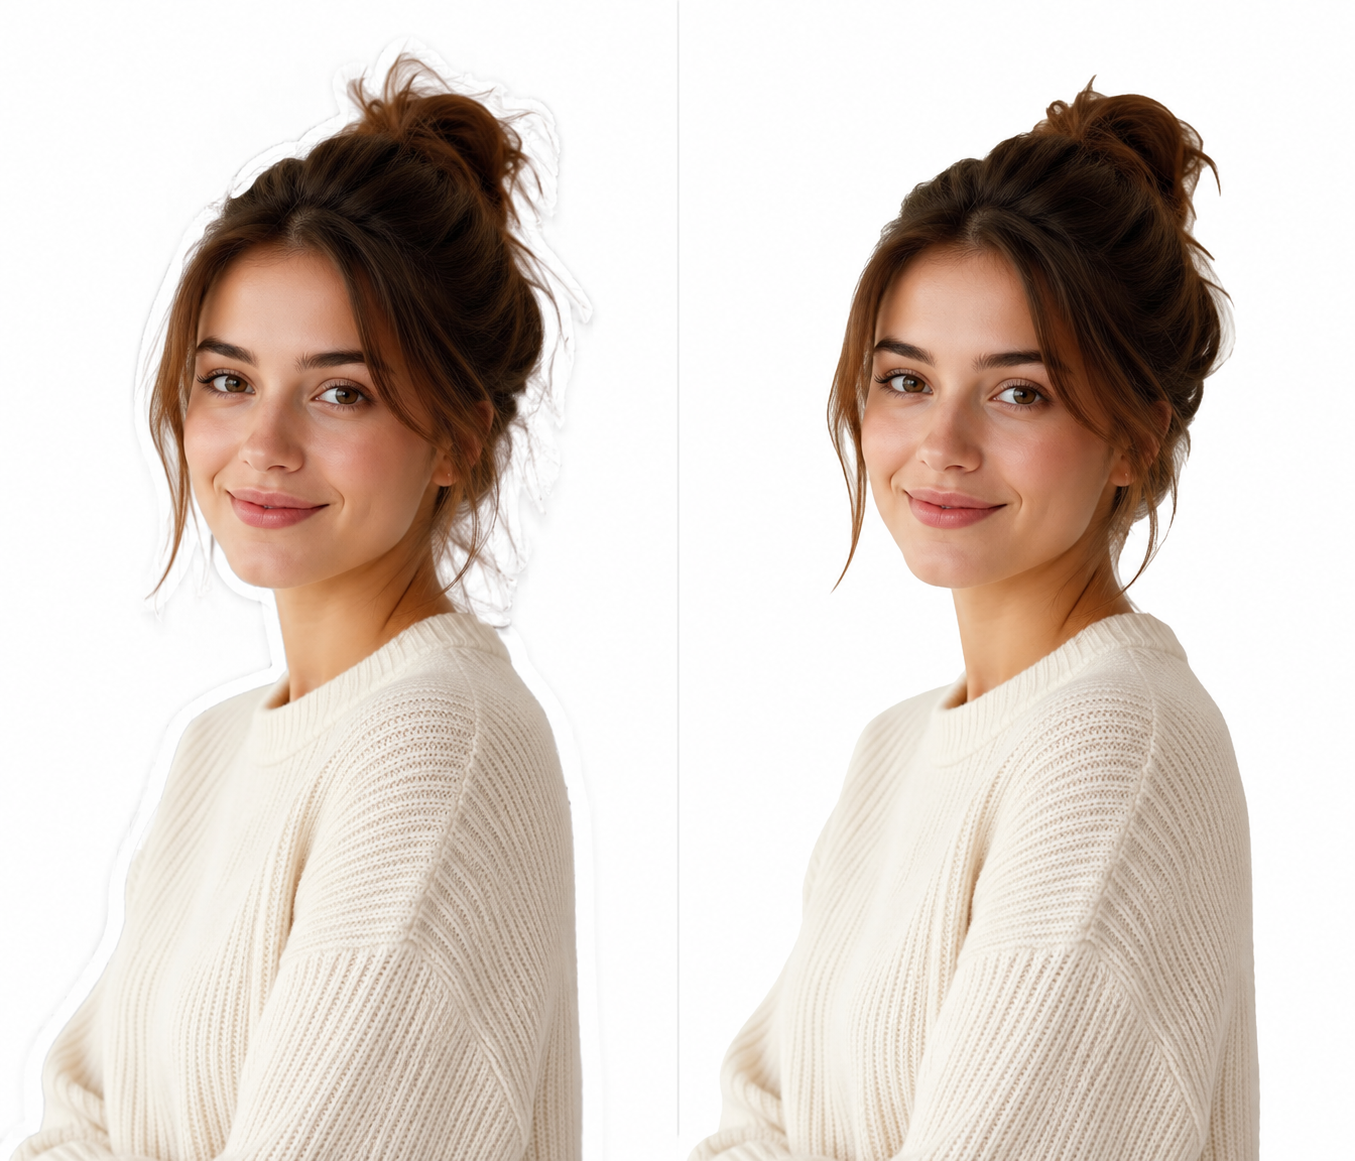
The Subject Looks Cut Out
A subject often looks pasted onto the background when every shadow has been removed or the original lighting no longer matches. Keep a soft contact shadow beneath shoes, furniture, bottles, or products so they remain visually grounded. Portraits may also look more natural with gentle tonal variation near the shoulders instead of a completely flat white field.
Conclusion
You can make a photo background white with an AI tool, manual editing software, or a prepared white backdrop. AI is the most efficient choice for simple products and portraits, while manual editing gives better control over transparency, detailed edges, and realistic shadows.
Pure white is ideal for marketplaces, catalogs, ID photos, and clean web layouts. Off-white works better for portraits, food, beauty, lifestyle images, and natural materials. Whichever shade you choose, balanced lighting and clean edges are essential for a professional result.
FAQ
Can AI Remove a Background Without Losing Image Quality?
AI background removal does not normally reduce the original resolution, but the final quality still depends on the uploaded file and export settings. Use the original image, avoid repeated compression, and select the highest available output resolution. Fine details may need refinement when the subject blends into its surroundings.
How Do I Make a Pure White Background for Product Photos?
Remove the original background, add a solid #FFFFFF layer, and inspect the edges for gray pixels or color spill. Keep the product correctly exposed instead of brightening the entire image. Pure white is most useful for marketplace listings, store category pages, catalogs, and comparison grids.
How Do I Keep Natural Shadows After Changing a Photo Background to White?
Preserve the original contact shadow when it is clean, or recreate a soft shadow beneath the subject on a separate layer. Its direction should match the existing light, and its edges should remain softer than the subject outline. A subtle shadow helps products and people feel connected to the surface.
Can I Change Any Photo Background to White Automatically?
Most photos can be processed automatically, but the result depends on contrast, sharpness, and edge complexity. Solid products and clearly photographed portraits usually work well. Glass, smoke, lace, fur, transparent packaging, and low-contrast subjects may still require manual adjustments.
You May Be Interested

140+ Facebook Bio Ideas: Short, Professional, Unique, and More

100 Short Success Quotes to Inspire Your Creative Journey

100+ Free Stable Diffusion Prompts to Generate Amazing AI Art

150+ Instagram Bio Ideas to Catch Eyes at a Glance in 2026
215+ Thoughtful Father’s Day Ideas for Dad