Dessert Photography Tips for Stunning Food Photos
Learn dessert photography techniques for lighting, styling, backgrounds, camera angles, and action shots. Capture tempting cakes, cookies, pastries, chocolate, and ice cream with a camera or phone while keeping each image fresh, polished, and natural.

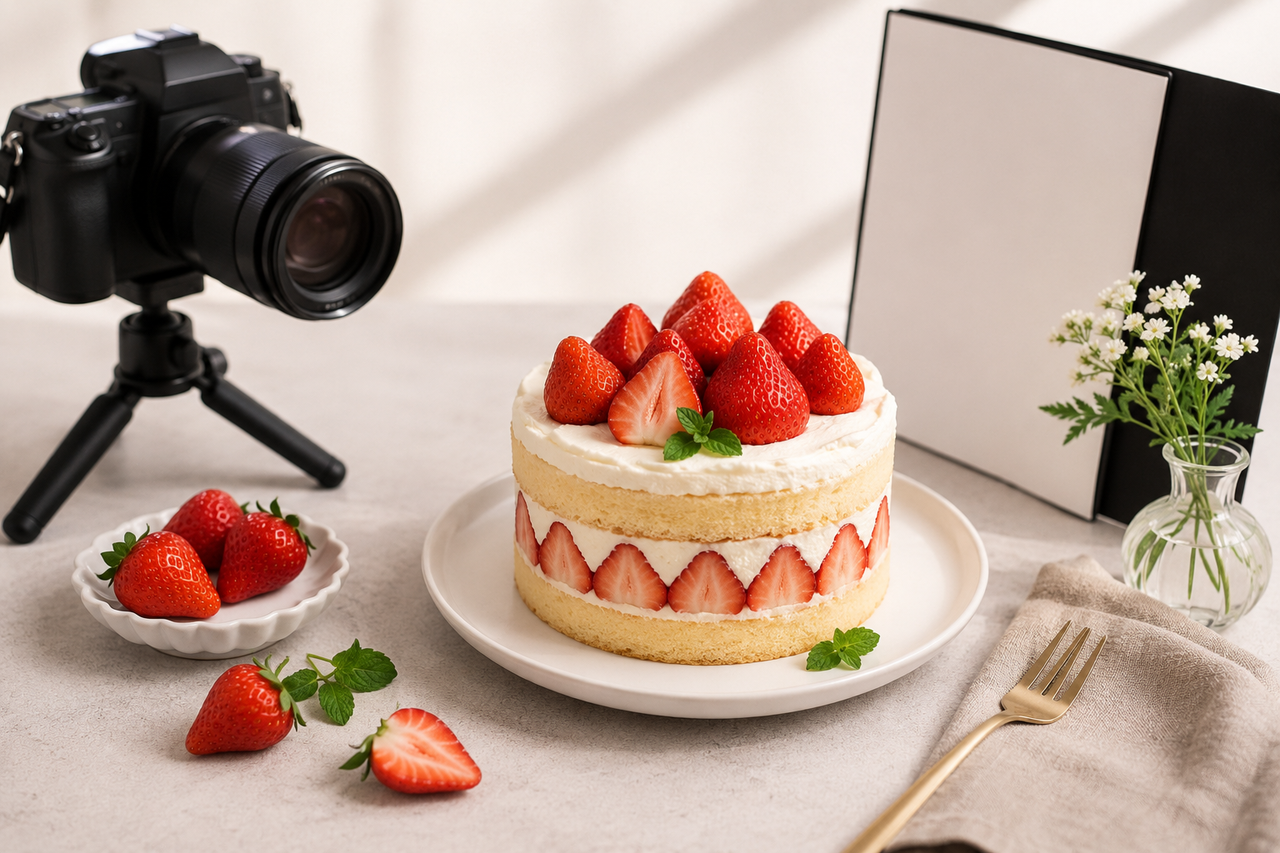
Desserts are naturally eye-catching, but their best qualities do not always translate automatically to the camera. Frosting can lose definition, chocolate may reflect too much light, and pale pastries can look flat without enough contrast. Strong dessert photography highlights the details that make the food appealing, from flaky layers and glossy sauces to fresh fruit and creamy fillings.
Much of the work begins before the dessert reaches the set. When the lighting, camera position, background, styling tools, and shot order are prepared in advance, the food can be photographed while it still looks fresh. From there, the composition and camera angle can be adapted to the shape, texture, and behavior of each dessert.
How to Prepare for a Dessert Photography Shoot
Good dessert photography starts before the camera comes out. Desserts can melt, dry out, lose their shine, or collapse under warm lights. A practical setup should therefore protect the food’s texture and appearance while allowing the photographer to work efficiently.
Decide How You Want the Photos to Look
The dessert’s strongest visual feature should determine the camera angle and lighting direction. An overhead view suits cookies and arranged pastries, while plated desserts often look natural at 45 degrees. Tall cakes usually benefit from a lower viewpoint that keeps their layers visible. Before the finished dessert enters the set, an empty plate can be used to test the lighting, shadows, background, and prop placement.
Pick the Best-Looking Dessert
Among several available portions, the best choice is usually the one with clean edges, even frosting, and clearly defined layers. Its strongest side can be found by slowly turning it under the light and checking the camera frame. A second portion is useful for slicing, spoonfuls, and other destructive shots. Fragile details such as cream, fruit, sauce, and powdered sugar should be added only after the framing and focus are ready.
Gather the Gear You Actually Need
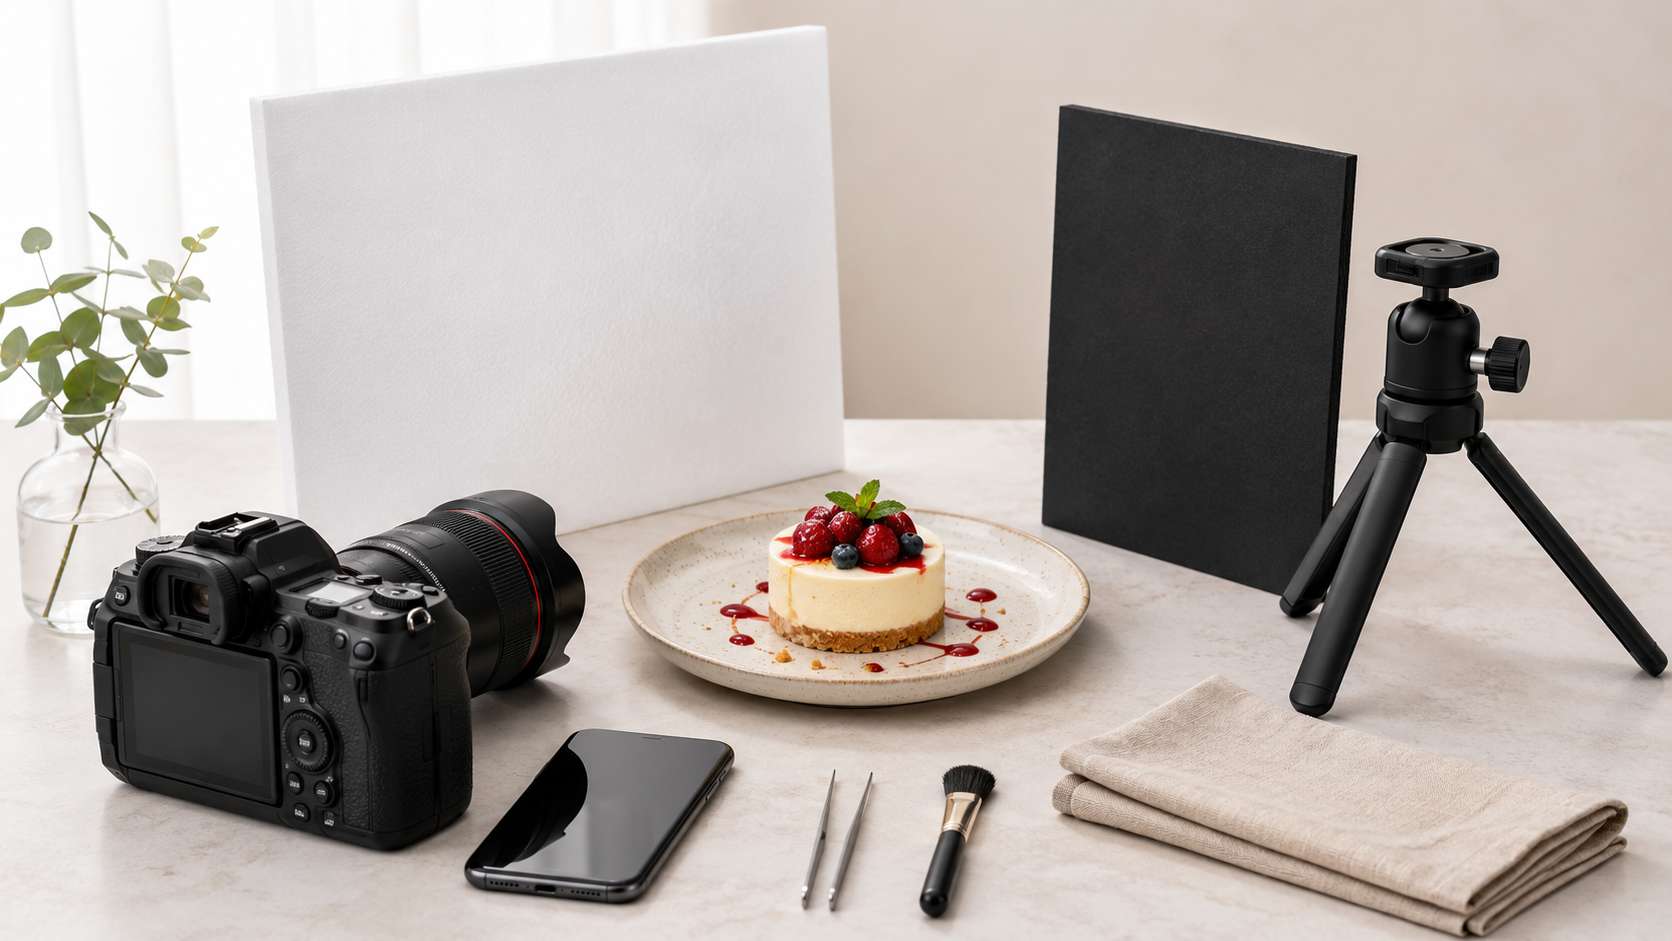
A camera or phone, tripod, diffused window light or one soft light, and white and black foam boards are enough for a basic food photography setup. Together, these tools provide control over camera movement, brightness, shadows, and contrast.
| Tool | How It Helps |
| Tweezers | Move small garnishes without touching the dessert |
| Cotton swabs | Clean sauce, frosting, and crumbs from plate edges |
| Small brush | Remove loose crumbs or redistribute powdered toppings |
| Palette knife | Smooth or repair frosting before the final shot |
| Piping bag | Refresh cream, icing, and decorative details |
| Dropper | Position sauces and small liquid highlights precisely |
| Paper towels | Clean spills and moisture around the set |
Plan the Photos You Want to Take
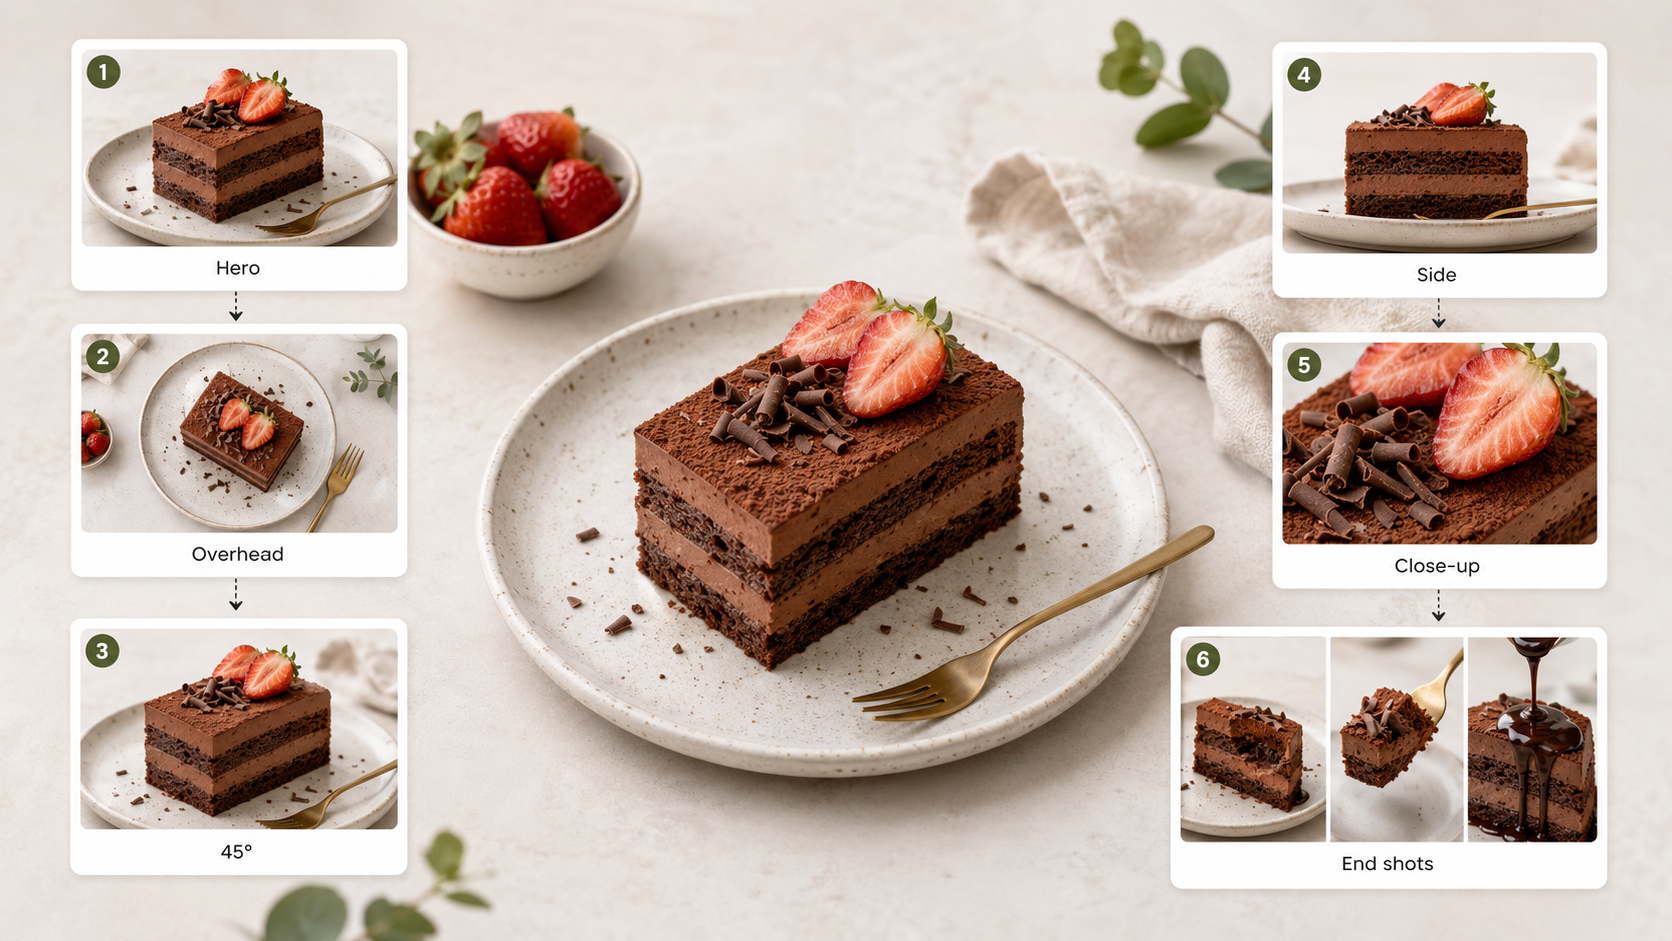
A useful shot list follows the order in which the dessert will change. The complete hero image should come first, followed by overhead, 45-degree, side, and close-up views. Slices, forkfuls, sauce pours, and melting shots belong near the end because they cannot easily be reversed. Each intended use should also be considered when framing so there is enough negative space for menu layouts, website banners, food ads, or social media text.
Find the Best Light for Dessert Photos
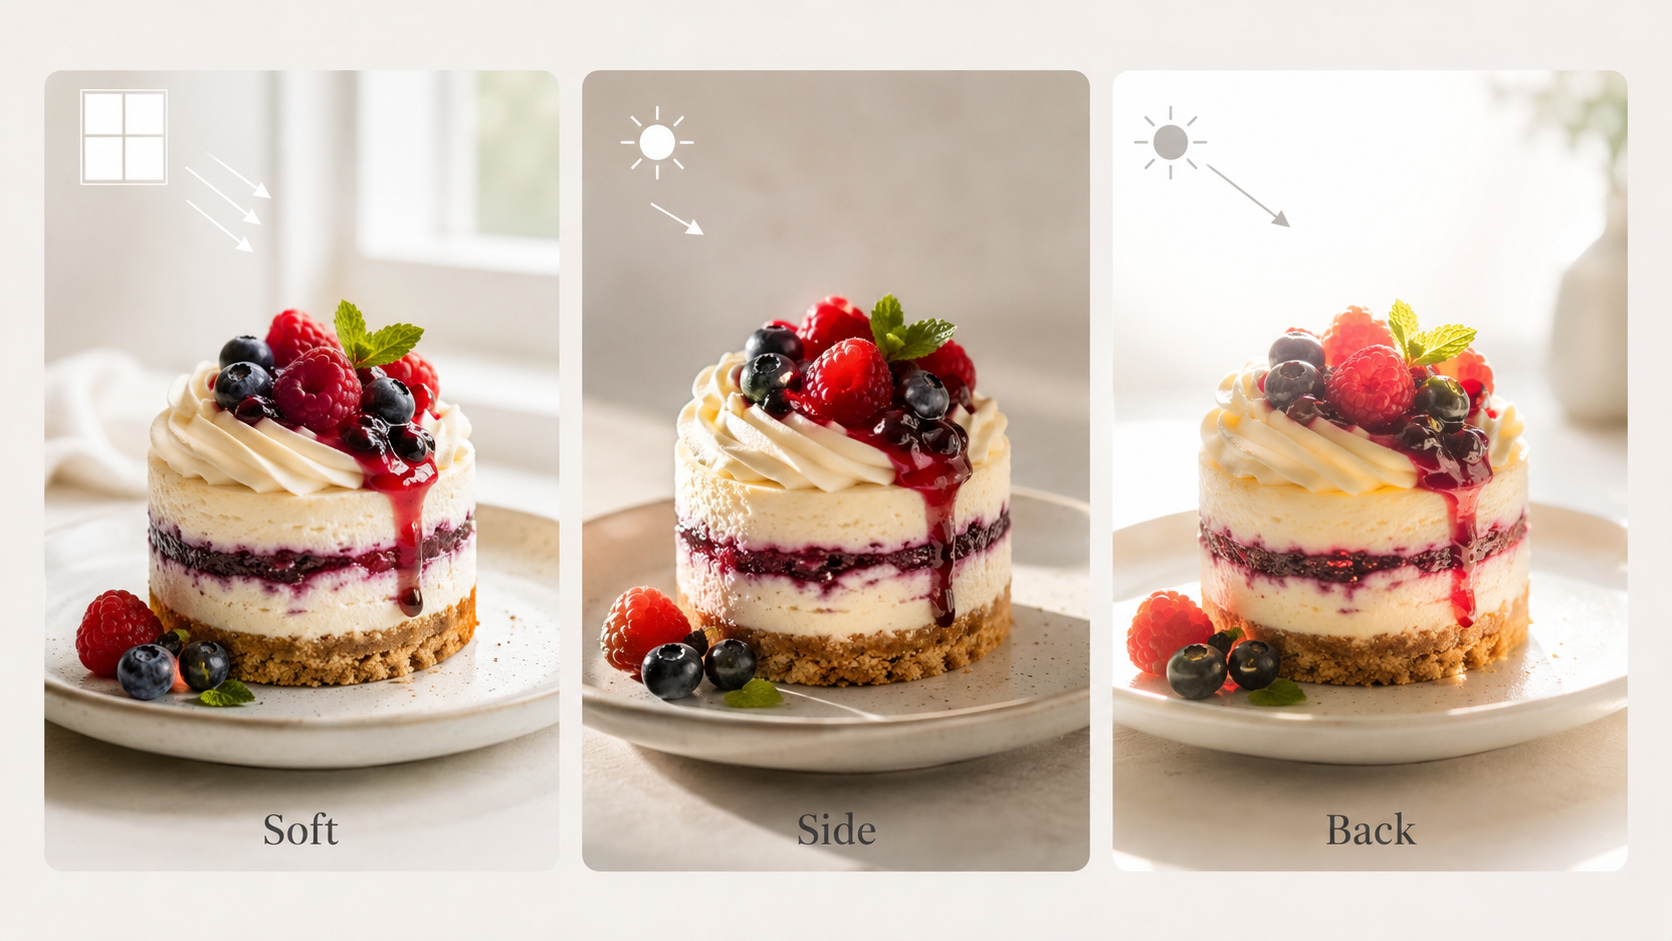
Lighting determines whether a dessert appears soft and fresh or flat and unappetizing. Before the final plate is styled, a stand-in dessert can be used to test the direction, distance, and intensity of the light. The setup is ready when the frosting, layers, and toppings remain visible without blown highlights or muddy shadows.
Start With Soft Window Light
A large window with indirect daylight provides a practical starting point for dessert photography. Nearby indoor lights should remain off because different light sources can create uneven color. A position closer to the window produces brighter, softer illumination, while greater distance increases contrast. When direct sunlight enters the room, a sheer curtain or diffusion fabric can soften it before the camera exposure is set.
Use Side Light to Show Texture
When texture is the main feature, the window or softbox can sit at roughly 90 degrees to the camera. Light moving across the dessert creates small shadows around flaky pastry layers, piped frosting, cookie edges, and cake crumbs. Instead of repeatedly moving the light, the plate can be rotated until its most detailed surface is clearly defined without looking overly dark.
Try Backlight for Sauces and Glazes
Glossy icing, translucent jelly, syrup, and sauce pours often look more luminous when the main light comes from behind. This position allows light to pass through or reflect along the liquid, making its color and shine more visible. A dark card beside the plate can strengthen reflective edges. If highlights on glaze or glass begin to lose detail, a slightly lower exposure will help preserve them.
Soften Harsh Shadows and Glare
A white foam board placed opposite the main light can return detail to shadows without removing all contrast. The amount of fill depends on distance, with a closer board producing a brighter result. Strong glare on icing, chocolate, or plates usually calls for a larger piece of diffusion placed closer to the subject. If unwanted reflections remain after shooting, you can also remove glare from photos during editing. Some shadow should remain because gentle contrast preserves the dessert’s depth and shape.
Simple Ways to Style Pictures of Desserts
Effective dessert styling makes the food look fresh, balanced, and immediately recognizable. The dessert’s color, shape, and texture should guide every choice that follows. Backgrounds, props, and garnishes work best when they support those features instead of competing with them.
Keep the Colors Simple
The dessert itself should establish the main color palette. One or two shades drawn from the frosting, filling, fruit, or garnish can be repeated subtly in a plate or napkin. A pale dessert may need berries or a darker surface for contrast, while a colorful tart usually benefits from neutral surroundings. This restrained approach creates separation without relying on excessive saturation during editing. It also helps maintain a consistent visual style when using the dessert image to create an Instagram post.
Choose a Background That Fits
The right background complements the dessert without becoming the most noticeable part of the image. Light, neutral surfaces suit colorful cakes, fruit tarts, and airy pastries, while darker backgrounds bring out the richness of chocolate, caramel, and coffee flavors. These principles are also useful when learning how to take good product photos, where a clean background keeps attention on the main subject. Matte materials can also reduce distracting reflections from glossy icing and plates.
When the original setting looks cluttered or clashes with the food, an AI Food Photography Agent can create a cleaner scene. After uploading the dessert photo, the desired background, lighting, and mood can be described in simple language. The resulting images can then be adapted for menus, delivery apps, websites, and social media.
Add Props Without Overdoing It
Props should suggest how the dessert is made, served, or enjoyed. A simple arrangement might include:
A dessert fork or cake server
A folded napkin
One or two featured ingredients
A cup of coffee or tea
Slightly behind or beside the plate is usually the best position for these supporting elements. Enough open space should remain around the dessert to keep it as the clear focal point.
Show Off Layers, Texture, and Freshness
Layers, fillings, and toppings should face the camera whenever they are the main source of visual appeal. For clean slices, a warm knife works well when the blade is wiped between cuts. Sauces, powdered sugar, whipped cream, and fresh fruit are best added immediately before shooting. This timing helps them retain the shape, color, and shine that signal freshness.
Which Camera Angle Works Best for Desserts?
The best camera angle depends on the dessert’s shape and the detail viewers should notice first. Front views emphasize height, overhead images organize flatter arrangements, and a 45-degree perspective shows both the top and side. Rather than forcing every dessert into the same composition, the camera position should respond to what makes each subject distinctive.
Shoot Tall Desserts From the Front
Layer cakes, parfaits, sundaes, and stacked pastries usually photograph well from a straight-on or slightly lower angle. With the camera level near the dessert’s center, the layers remain visible and the overall shape avoids distortion. Straight vertical lines help the image feel balanced, while a little space above the dessert prevents its height from appearing cramped.
Use Overhead Shots for Flat Desserts
Cookies, brownies, tarts, and pastry arrangements benefit from an overhead view when their shape and placement matter more than their height. The camera sensor should remain parallel to the table so plates and dessert edges do not appear uneven. Across the frame, consistent but slightly varied spacing creates order without making the arrangement feel rigid or artificial.
Try a 45-Degree Angle for More Detail
A 45-degree angle offers a natural view of plated cake slices, pie, pancakes, and desserts served in shallow bowls. Both the topping and side texture remain visible, along with enough of the plate to provide context. Small changes in camera height can prevent an excess of empty plate or background from weakening the composition.
Capture Close-Ups and Action Shots
Once the complete dessert has been photographed, closer frames can draw attention to crumbs, frosting, fruit, and flaky layers. Movement adds another level of interest through a lifted forkful, falling powdered sugar, a sauce pour, or a slice being served. A faster shutter speed helps freeze these actions, while the focus point should remain where the movement meets the dessert.
FAQ
Can You Take Dessert Images With a Phone?
Yes, you can take high-quality dessert images with a modern smartphone. Use the main rear camera, clean the lens, avoid digital zoom, and tap the dessert to set focus and exposure. A tripod and soft window light can further improve sharpness, color, and consistency.
What Lens Is Best for Dessert Food Photography?
A 50mm lens is a practical choice for most dessert food photography because it produces a natural perspective with limited distortion. A 35mm lens works well for overhead arrangements and wider restaurant scenes, while a 90mm or 100mm macro lens is better for close-ups of frosting, crumbs, fruit, and layered textures.
How Do You Photograph Ice Cream Before It Melts?
Prepare the lighting, composition, camera settings, and props before removing the ice cream from the freezer. Chill the bowl or glass, keep backup scoops frozen, and photograph the complete serving first. Melting drips, spoonfuls, and other action shots can be captured afterward.
How Do You Make Brown Desserts Look Good in Photos?
Create contrast with lighter plates, neutral backgrounds, cream-colored linens, or bright garnishes such as berries and powdered sugar. Side lighting helps define the texture of brownies, chocolate cake, and caramelized pastries, while careful white balance prevents brown tones from looking dull or orange. Avoid heavy saturation that makes the dessert appear unnatural.
Conclusion
Strong dessert photography comes from matching the setup to the food rather than relying on one lighting style or camera angle. Preparation protects delicate details, soft directional light reveals texture, and restrained styling keeps attention on the dessert. The shooting order matters just as much, especially when working with melting, sliced, or freshly garnished foods. With a simple set of tools and a clear plan, even a phone can produce polished dessert photos for blogs, menus, websites, and social media.
You May Be Interested
Apowersoft Watermark Remover: Review, Pricing & Alternatives

7 Best Background Remover Apps

35 AI Image Prompt Examples: How to Get Outstanding AI Images

2026 Facebook Group Cover Photo Size & Design Guide

How to Create Iconic Wedding Logos with AI