Pizza Photography: 9 Tips for Mouthwatering Food Photos
Learn how to photograph pizza with soft side light, flattering angles, simple camera settings, and fast styling. These tips help capture crisp crust, melted cheese, fresh toppings, and natural color for menus, delivery apps, and social media.

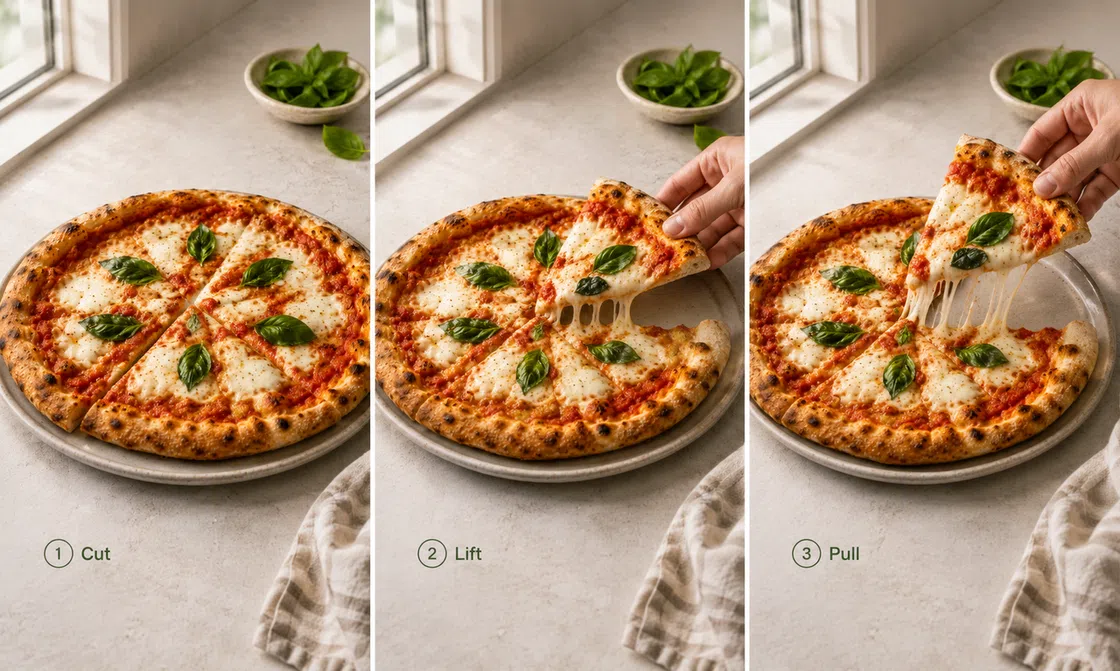
The best way to photograph pizza is to use soft side light to shoot it fresh, and choose an angle that shows its strongest feature. A phone, a window, and a clean surface are enough for most people. Learning how to photograph pizza mainly comes down to timing, light, focus, and restraint during editing.
What Makes Pizza Hard to Photograph?
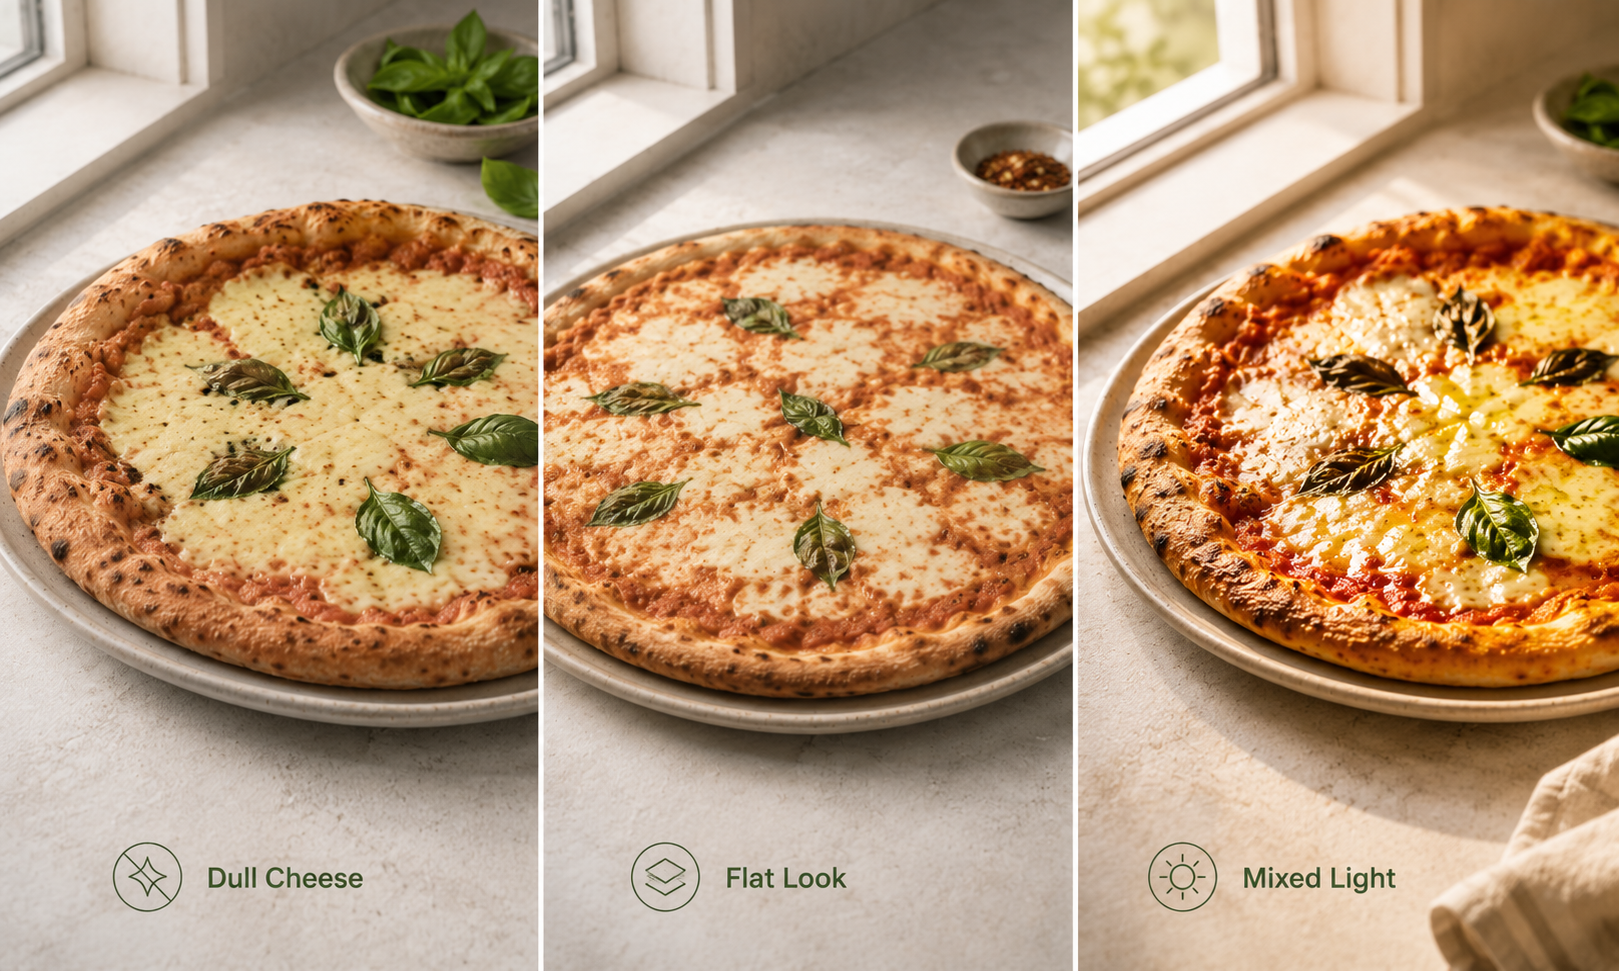
Pizza may look simple, but its appearance changes quickly after it leaves the oven. Cheese, grease, crust, and toppings also respond differently to light and camera angles. As with most food photography, getting an appetising result depends on capturing the right texture, colour, and freshness before they begin to fade.
Melted Cheese Loses Its Shine Fast
After the pizza leaves the oven, the cheese begins to firm up, the surface loses its smooth shine, and oil can collect into bright patches.
Moisture, fat content, and the cheese protein structure also change how smooth or broken the surface appears. Whole milk mozzarella may stay smooth and elastic longer than lower-fat or pre-shredded cheese, which can brown faster or form a firmer surface.
A Round Pizza Can Look Flat
A pizza has little height compared with its width, so the camera may record toppings as one flat layer. The problem becomes more noticeable on pizzas with pale toppings or an even surface. Without clear shadows between the crust, cheese, and ingredients, those parts can blend and lose their shape.
Grease and Mixed Light Can Ruin the Color
Melted cheese reflects light easily. A bright lamp can turn small oil spots into white glare. Mixed lighting creates another problem. Cameras can struggle to balance both colors in one image, leaving uneven color across the pizza. If the glare remains visible after shooting, these methods for how to remove glare from photos can help reduce reflective spots without flattening the cheese texture.
How to Photograph Pizza in 9 Easy Tips
You do not need expensive equipment to take a good pizza photo. These nine steps cover the full process, from preparing the shot and choosing the light to capturing a cheese pull and making simple edits.
1. Shoot the Pizza While It Is Fresh
Finish every preparation step before the pizza comes out. Clean the camera lens, choose the angle, test the exposure, and remove anything that should not appear in the frame.
Start shooting as soon as the pizza reaches the table. Capture several frames without moving it. Small changes in steam, cheese, and oil can make one image look much fresher than the next.
Keep fresh basil, grated cheese, or other delicate toppings aside until the final moment. Add the ingredients when needed.
2. Use Soft Light From the Side
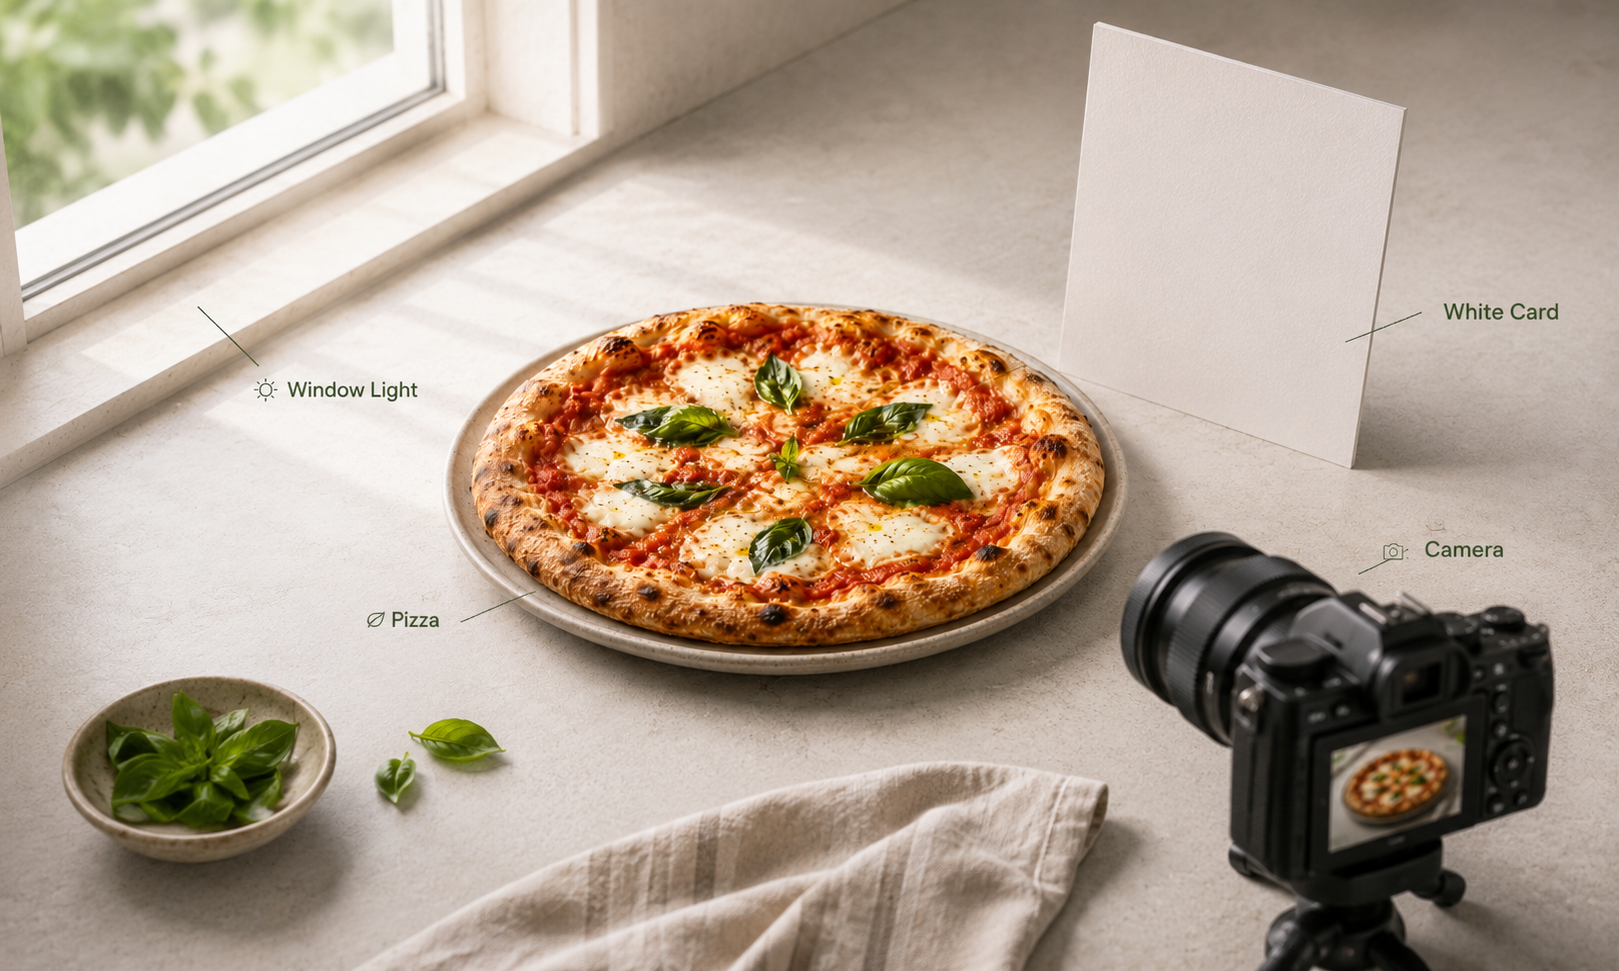
Place the pizza near a window and let the light come from the side. Side light creates small shadows around the crust and toppings, helping the surface look more detailed. Direct sunlight is usually too strong. It can remove texture from pale cheese and produce dark shadows around the tray.
Set a piece of white card opposite the window when one side looks too dark. The card can reflect some light toward the pizza. Move it closer for more fill or farther away for stronger shadows.
3. Pick the Best Pizza Photo Angle
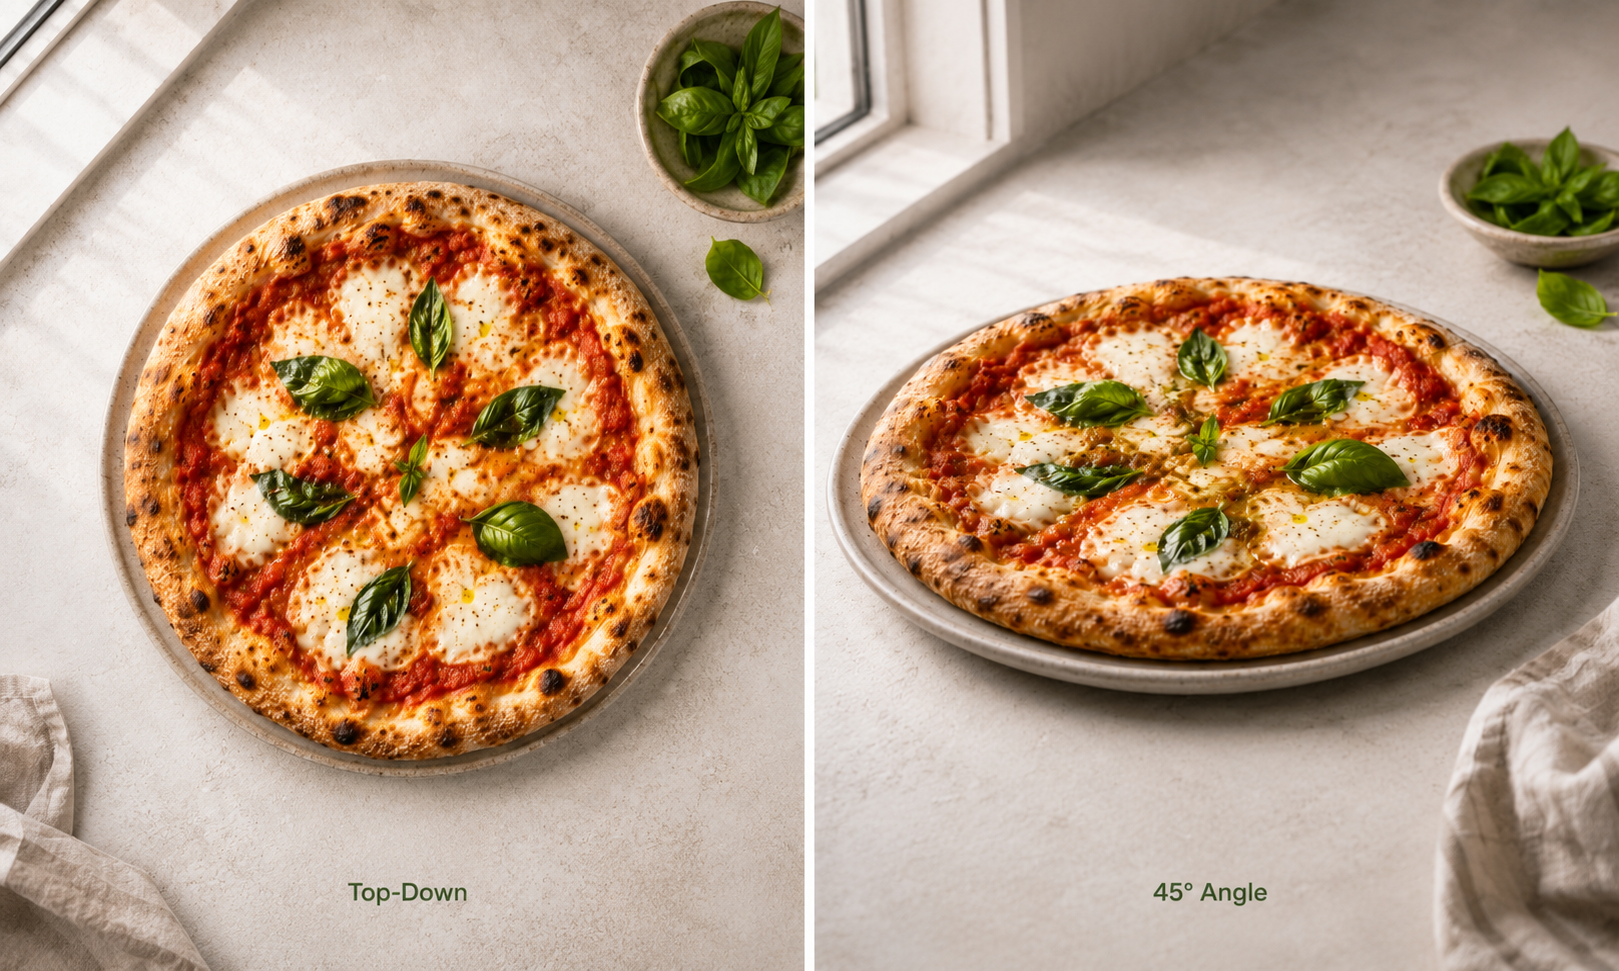
Top-down pizza photography works well when the goal is to show the complete pie. Hold the camera directly above the center and keep it level. Check that the pizza stays round instead of becoming stretched toward one side.
A 45-degree pizza photography angle is better for a raised crust, thick toppings, or a lifted slice. Keep the camera slightly above table height and point it toward the center of the pizza.
Take both angles before changing the pizza. The overhead image can cover the full shape, while the lower image shows texture and depth.
4. Keep the Crust and Toppings in Focus
The crust and toppings should be the main visual details in a pizza photo. Position the pizza so the browned crust, melted cheese, and key toppings are easy to see.
Choose a focus point where the crust meets the toppings. This area usually shows the crisp edge, cheese texture, sauce, and ingredient layers in one frame.
For a whole pizza, keep most of the surface clear and sharp. For a closer shot, focus on one strong detail, such as crust bubbles, browned cheese, or a group of visible toppings.
5. Style the Toppings Before You Shoot
Move hidden toppings into visible areas before baking. Pepperoni, mushrooms, olives, and herbs should be easy to recognize without being covered by the cheese. Remove burnt herb pieces and wipe the sauce. Keep a few natural crumbs if they make sense, but clear away random grease marks and food scraps.
Use props carefully. A pizza cutter or a folded napkin can add context, but too many decorations make the frame a muddle. Always keep food as the main focus when adding props.
6. Use Simple Phone or Camera Settings
A phone usually needs fewer changes. Turn off the flash, tap the pizza to focus, lower the exposure slightly when the cheese looks too bright, and use the standard lens rather than an ultra-wide lens.
These camera settings are starting points. Light levels and camera models will change the final exposure. If you are using a camera with manual controls, the same principles covered in how to take good product photos can help you refine exposure, focus, and framing.
Shot | Aperture | Shutter speed | ISO |
Handheld 45 degree photo | Around f/3.5 | At least 1/125 second | Keep as low as the light allows |
Overhead whole pizza | Start near f/5.6 | At least 1/125 second handheld | Raise only when needed |
Full pizza on a tripod | f/11 to f/16 | Use the speed required for correct exposure | Low ISO |
Moving cheese pull | Use enough depth for the slice and strands | Faster than a still pizza shot | Raise ISO if motion is blurred |
7. Get Close Without Cropping Too Much
Move closer until the pizza fills most of the frame, then leave a small space around the edge. This keeps the food easy to see without cutting away the crust. A tight detail photo can crop part of the pizza on purpose, but a full pizza image should normally show the entire circle, especially when the size, topping coverage, or crust shape matters.
Avoid digital zoom on a phone. Take the photo with the standard lens and crop a small amount during editing when necessary.
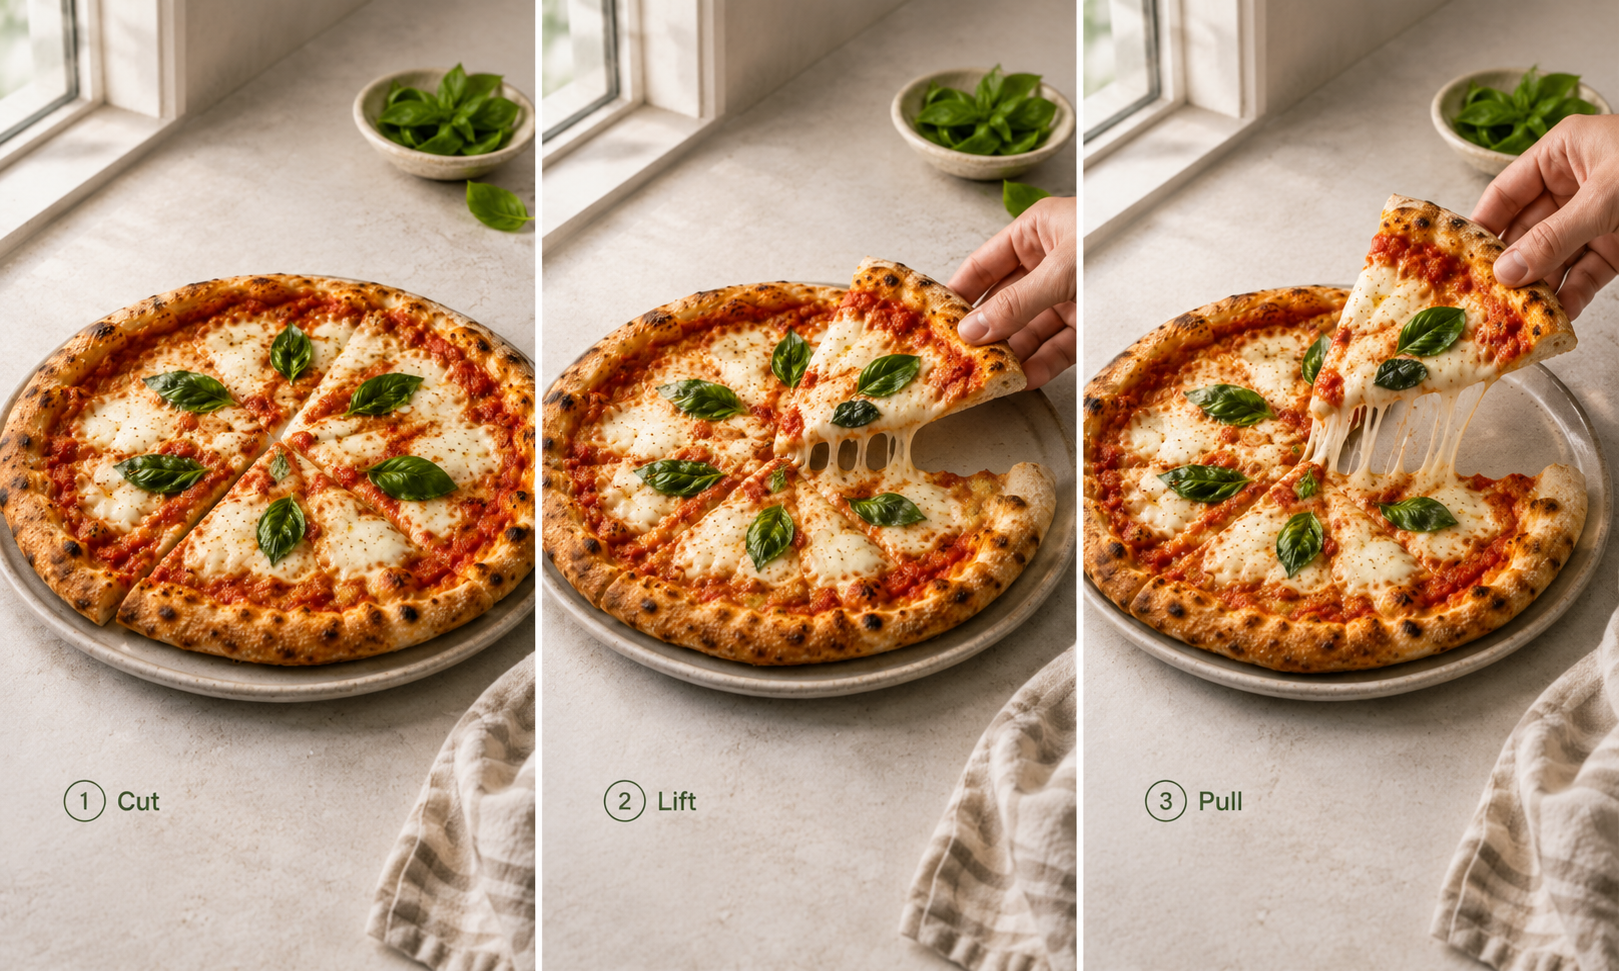
8. Capture a Better Pizza Cheese Pull
Cut the slice fully before lifting it. A partly cut crust can pull the rest of the pizza and break the cheese strands too early. Do not load the tip of the slice with heavy toppings, and keep toppings away from the cut line because they can interrupt the cheese stretch or bend the slice.
Use food movement, including a lifted pizza slice, to make food photos feel more active. Ask another person to lift the slice slowly upward and slightly away from the pizza. Use continuous shooting or burst mode to capture several stages of the cheese pull.
9. Edit Pizza Photos Without Overdoing It
Begin with white balance. The cheese should look warm and creamy without turning orange. Correct any green or yellow color left by indoor lighting. If the entire image is underexposed, start with these methods for how to brighten an image before increasing saturation or contrast.
Raise the exposure only when the pizza is too dark. Reduce highlights when oil spots or white cheese have lost detail. Add a small amount of sharpness to the crust, then check the full image for hard edges and noise.
Use saturation carefully. Strong red sauce and bright yellow cheese can look artificial. Make small color adjustments instead of applying a strong preset to every food image.
Which Pizza Photos Should You Take?
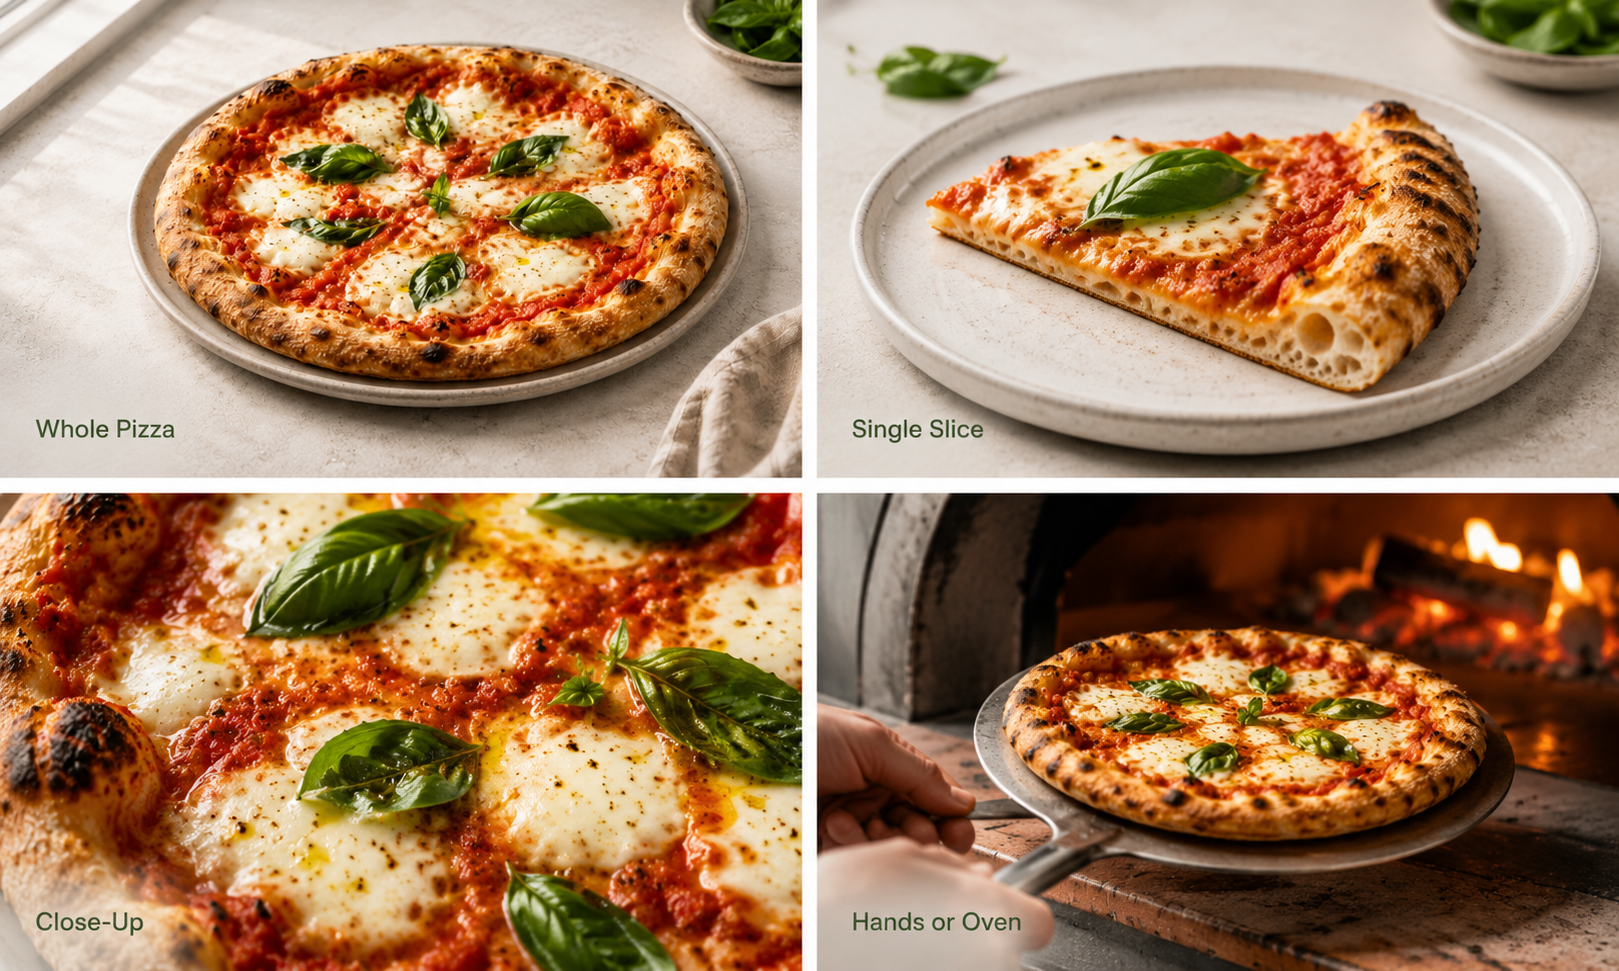
The right pizza photo depends on where it will appear. Menu images need to show the full product clearly, while ads and social posts can use closer or more active shots to attract attention.
Whole Pizza Photos for Menus and Delivery Apps
A full pizza photo works best for menus, ordering pages, and delivery apps. Customers can quickly see the size, crust shape, topping amount, and how evenly the ingredients are spread.
Slice Photos That Show the Crust and Layers
A single slice works well in paid ads, discount banners, and product promotions. It can show the thickness of the crust, melted cheese, and the amount of filling more clearly than a whole pizza photo.
Close Ups Highlight Toppings and Texture
Close-up photos are useful for Instagram posts, website banners, and ingredient-focused content. They help viewers notice browned cheese, crisp crust bubbles, fresh herbs, and detailed toppings. Choose one feature to highlight in each image. A close-up should support a clear message, such as a crispy crust or a generous pepperoni topping.
Hands and Oven Shots for Social Media
Photos with hands, pizza cutters, or oven action suit social campaigns and lifestyle advertising. They show how the pizza is prepared or served and make the content feel more active. These active frames are also useful when learning how to create an Instagram post that gets more likes, because movement and human interaction can help food content feel less staged.
Use these images as supporting content rather than the main menu photo. The pizza should remain easy to see, even when a person or cooking tool appears in the frame.
Common Pizza Photography Mistakes
Most weak pizza photos come from common problems. Poor light, slow preparation, crowded styling, and heavy editing can all make a fresh pizza look less appealing.
Using Flash or Harsh Overhead Light
A phone flash creates strong glare on the cheese and deep shadows behind the crust. Harsh overhead light can also flatten the toppings. Move the pizza near a window or use a diffused lamp from the side. Avoid direct flash because it produces reflections and unnatural light falloff on food.
Waiting Too Long to Take the Photo
Do not begin arranging props after the pizza arrives. The cheese may already be firm by the time the frame is ready. Use a plate or empty tray to test the shot, then replace it with the fresh pizza when shooting, and take the essential images first.
Adding Too Many Props Around the Pizza
Every object should support the food. Remove props that cover the crust, add an unrelated color, or create a second visual focus.
Check the corners of the frame before shooting. A partial glass, dirty utensil, or bright package can pull attention away from the pizza.
Making the Pizza Look Fake in Editing
Strong adjustments can create neon cheese, hard crust edges, and colors that mismatch the real pizza. A useful edit should improve visibility while keeping the original ingredients believable.
A high-quality AI editor can help refine lighting and color, sharpen useful details, and clean up small distractions. Review the result at full size and reduce any adjustment that changes the natural texture of the food.
FAQs
What Lens Is Best for Pizza Photography?
A 50mm lens is a versatile starting point. It works for overhead pizzas and natural table views without strong distortion. An 85mm or macro lens is useful for tighter topping details.
Can You Take Good Pizza Photos at Night?
Yes. Use one large, diffused light from the side and turn off other room lights. Keep the phone steady and avoid direct flash, which creates glare on the cheese.
How Do You Photograph a White Pizza?
Protect the highlights. Lower exposure slightly until the cheese keeps a visible texture, then add contrast with the crust, herbs, or a darker neutral background.
How Many Pizzas Do You Need for a Photo Shoot?
Plan for two pizzas. Use the first to test lighting and composition. Bring in the second pizza for the final fresh images and cheese pull.
What Is the Best Background for Pizza Photos?
Use a simple surface such as wood, stone, or a neutral table. The background should separate the crust from the frame without competing with the toppings.
Conclusion
Good pizza photography depends more on preparation than expensive equipment. Set the light and camera position before the pizza arrives, capture the whole pie first, and move to slice and detail photos while it is still fresh. Soft side light and a suitable angle solve most beginner problems. Keep the editing light so the final photo still matches the pizza you photographed.
You May Be Interested

How to Use Nano Banana?-Next-Gen AI Image Generator

Create Stories With a Text Story Maker

Fantasy Plot Generator: How to Write Unique Fantasy Story Plots Using AI
How to Upscale an Image in Photoshop (Step-by-Step)

Product Photography-How to Take Product Photos