How to Add Your Logo to a Photo on Any Device
Learn how to add your logo to a photo on any device using a transparent PNG or SVG. This guide covers logo size, placement, opacity, contrast, export quality, and batch branding so your images stay clear, consistent, and professional across platforms

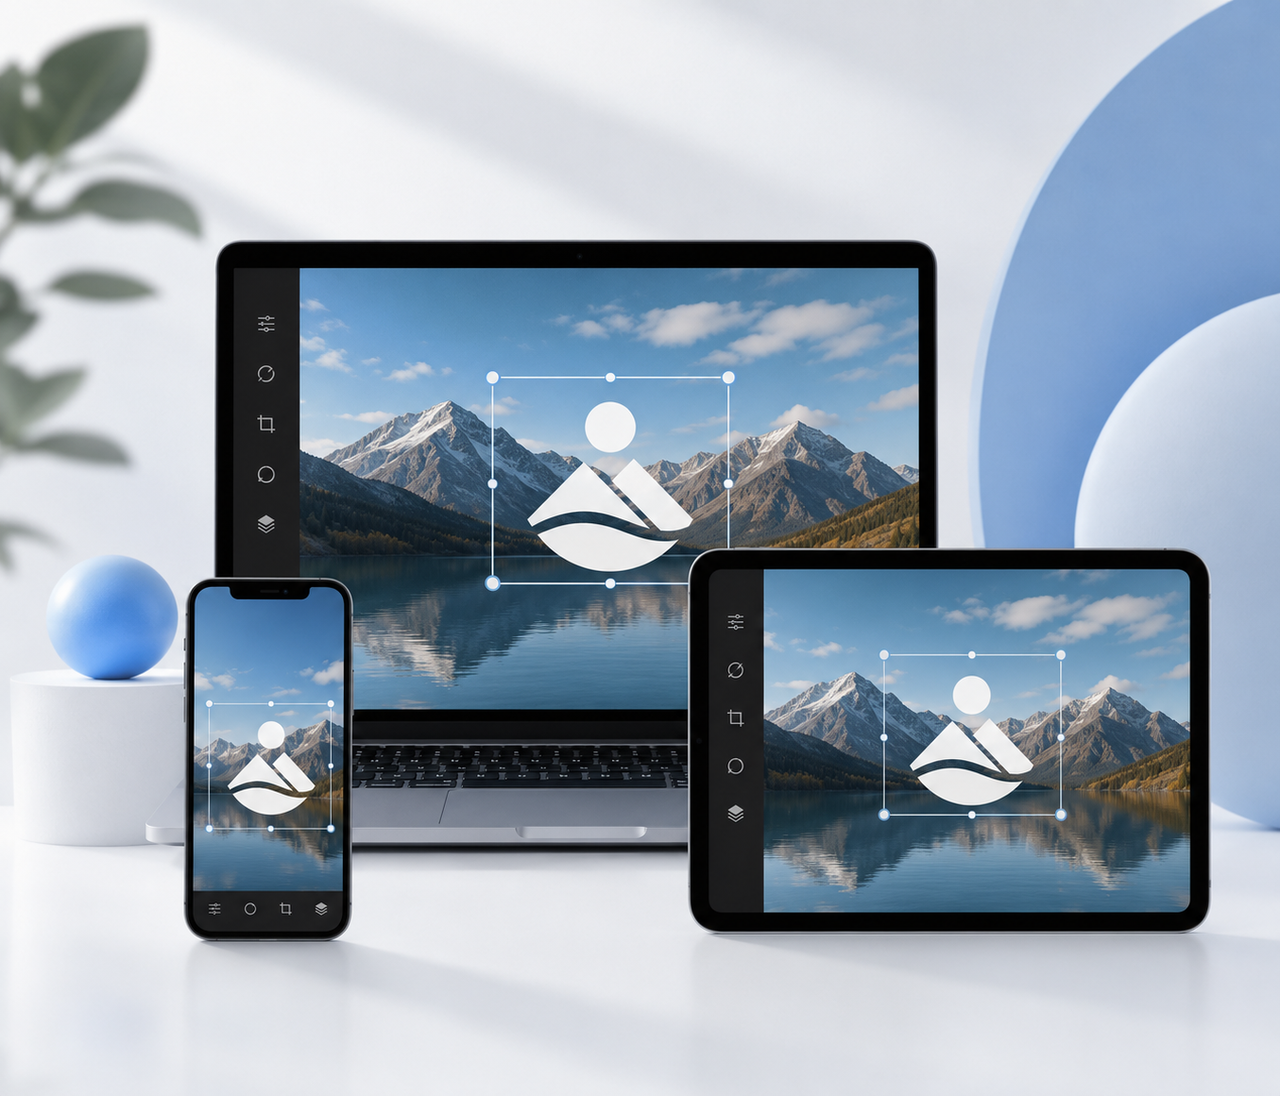
To add your logo to a photo, open the picture in an editor, place the logo on a separate image layer, adjust its size and position, then export a new copy. The same workflow works on a phone, tablet, Mac, or Windows computer, although each app names its controls differently. A clean result depends more on the source logo and final layout than on advanced editing skills. For social posts, product photos, marketplace listings, and other personal-brand images, the goal is simple. Keep the mark easy to recognize while protecting the part of the photo people need to see.
What to Check Before Adding Your Logo
A few checks before editing can prevent most quality problems later. Begin with an asset that can be placed over another image without unwanted edges or distortion. Good preparation also reduces repeated corrections after the photo has already been arranged, especially when the same logo will appear in several layouts.
Use a Logo With a Transparent Background
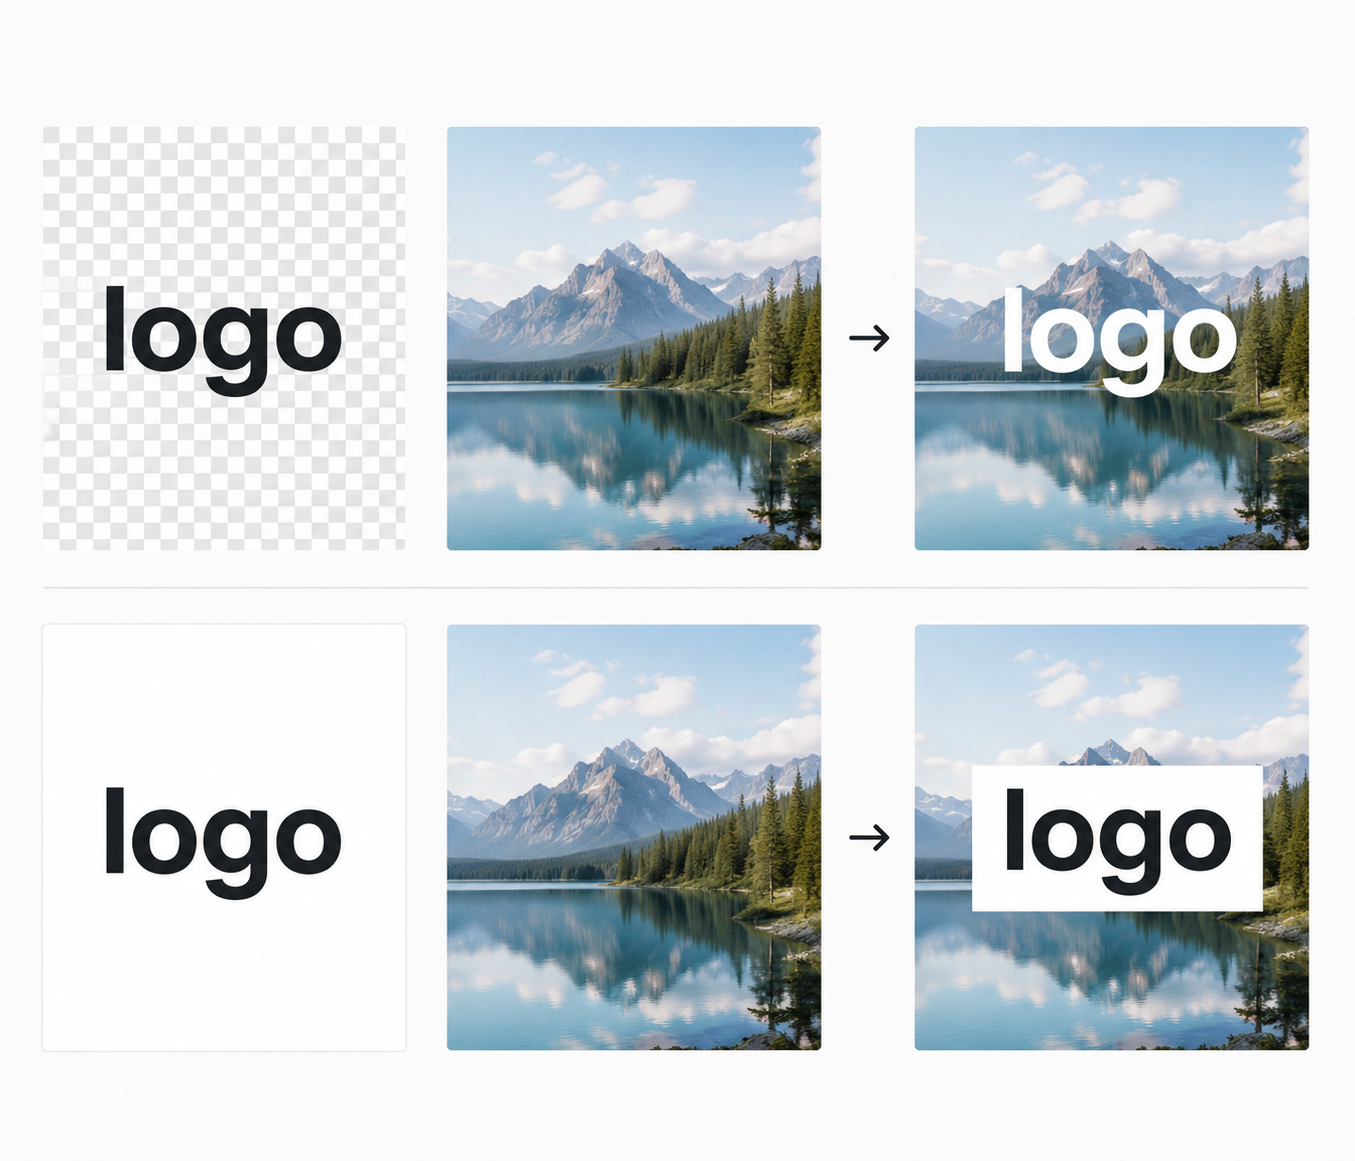
A transparent logo lets the photo show through the empty areas around its letters and symbols. PNG can store an alpha channel that controls opacity, while JPEG cannot. A transparent logo file should also preserve open spaces inside letters and symbols after the background is removed.
Inspect the outer edge against both a light background and a dark one. Anti-aliasing creates partly transparent edge pixels to make curves look smoother, but those pixels may retain color from the logo’s former background. This can produce a pale or dark halo after the logo is moved. Photoshop provides Defringe, Color Decontaminate, and matte removal controls for cleaning this type of edge contamination.
Choose PNG, SVG, or Another Logo Format
PNG works for most photo editors. SVG stores vector graphics, so compatible software can render it cleanly at different display resolutions, though some basic apps cannot import it. Use PNG when broad editor support matters.
An SVG file can contain vector shapes and embedded raster graphics. The vector sections remain scalable, while an embedded bitmap still has fixed pixel information. Open the file at a large size before assuming that every part of the design will stay equally sharp.
Keep the vector file as the master asset. When a phone app or browser editor does not accept SVG, export a PNG copy from that master for the required photo size. This avoids converting an already compressed image back and forth between formats.
| Format | Transparency | Resizing behavior | Practical use |
| PNG | Supported | Limited by pixel dimensions | Most photo editors |
| SVG | Supported | Scales as vector artwork in compatible software | Logos used at several sizes |
| JPG | No alpha channel | Can lose quality after repeated compression | Matching solid backgrounds |
| PDF or AI | Depends on the artwork | May preserve vector data | Desktop design software |
Make Sure the Logo Is Large Enough
Check the mark at the largest size you expect to use. Enlarging a small raster file can reveal blocky letters and soft edges because it has a fixed pixel grid. Start with the original export rather than a screenshot. Fixing pixelated photos may reduce mild damage, but a larger source is usually cleaner.
Prepare Light and Dark Logo Versions
Create at least two versions of the logo before adding it to photos. A light design remains visible over dark backgrounds, while a dark version works better on pale areas. Keep the symbol, lettering, and spacing consistent so both versions are recognized as the same logo.
When you are starting without an existing design, the online AI logo generator can generate several logo concepts from your business name, industry, and preferred style. After choosing a direction, adjust the font, color, and layout to create matching light and dark versions. Export both files so you can select the one with stronger contrast for each photo.
How to Choose Where to Place Your Logo
Logo placement should support the image’s purpose and survive the way the photo will be displayed. Before choosing a corner, look at the full composition and the space around the subject. A position that works inside an editor can fail after a platform changes the crop or adds interface elements.
Check Where the Main Subject Is
Find the part of the image that carries the message, such as a face, product, or existing text. Place the logo outside that visual path. Areas with fewer details provide cleaner separation and keep attention on the subject.
Choose a Corner That Keeps the Logo Visible
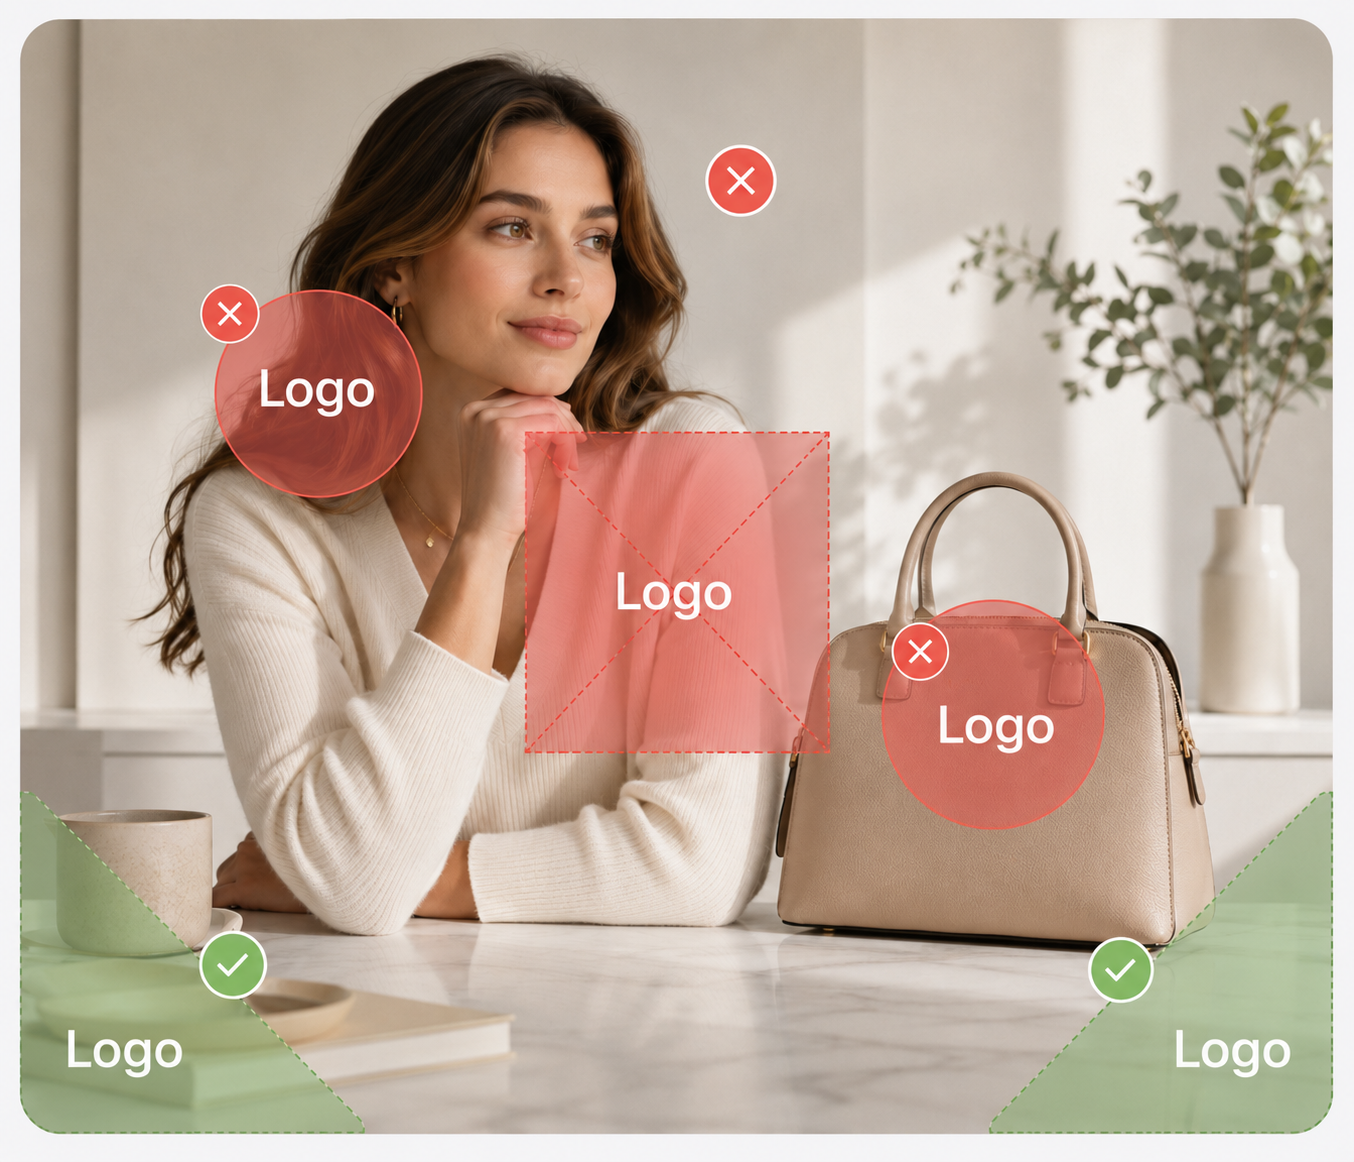
Corners often leave the center open. Test the lower areas, then consider captions or marketplace badges that may cover them. Move the mark if its letters cross bright and dark pixels.
Avoid Faces, Products, and Important Details
Do not cover eyes, labels, prices, or features viewers need to inspect. Zoom in before export and check whether thin logo lines cross a facial feature or product edge.
Consider How the Photo Will Be Cropped
A mark near the edge may vanish when a landscape photo becomes square or vertical. Leave a safe margin and preview each format. Keep one layered master so the logo can be moved without editing an exported image.
For a photo prepared for one specific format, complete the final crop before placing the logo. Cropping afterward can change the apparent margin or remove part of the mark. When several formats are required, duplicate the master and position the logo separately on each finished canvas. The logo can then respond to the subject’s location rather than remaining tied to coordinates from the original photo.
Use the Same Position Across Branded Photos
Choose a repeatable placement rule for each photo series. Keep a similar visual margin and apparent scale, but let the subject affect the exact position. Fixed pixel widths can look inconsistent across different shapes.
How to Add Your Logo to a Photo in 5 Steps
Most editors follow the same underlying process even when their menus look different. Keeping the logo separate from the main picture gives you control until export. The steps below work in a browser editor and can also be adapted to mobile or desktop apps with image overlay and layer controls.
Step 1: Upload the Photo You Want to Brand
Start with the original photo or highest-quality copy available. Social media downloads may already contain compression or reduced dimensions. Open the image at the size needed for its final use. Common layout tasks can be completed with browser-based design tools without installing desktop software.
Step 2: Add Your Logo as an Image Layer
Choose the option labeled Image, Overlay, Upload, or Add Layer, then select your logo file. The logo should appear above the photo as a separate element. Keeping it on its own layer allows you to move, resize, recolor, or remove it without changing the original image.
Resize the logo from a corner handle so its width and height remain proportional. Avoid stretching the sides independently because this can distort the lettering or symbol. Keep the layer editable until you have checked the placement against the subject, image edges, and final crop.
Step 3: Remove the Logo Background if Needed
A visible rectangle means the file lacks usable transparency or includes a background. Apply removal to the logo layer, check it over light and dark areas, then clean any damaged edges.
Step 4: Resize, Position, and Adjust Opacity
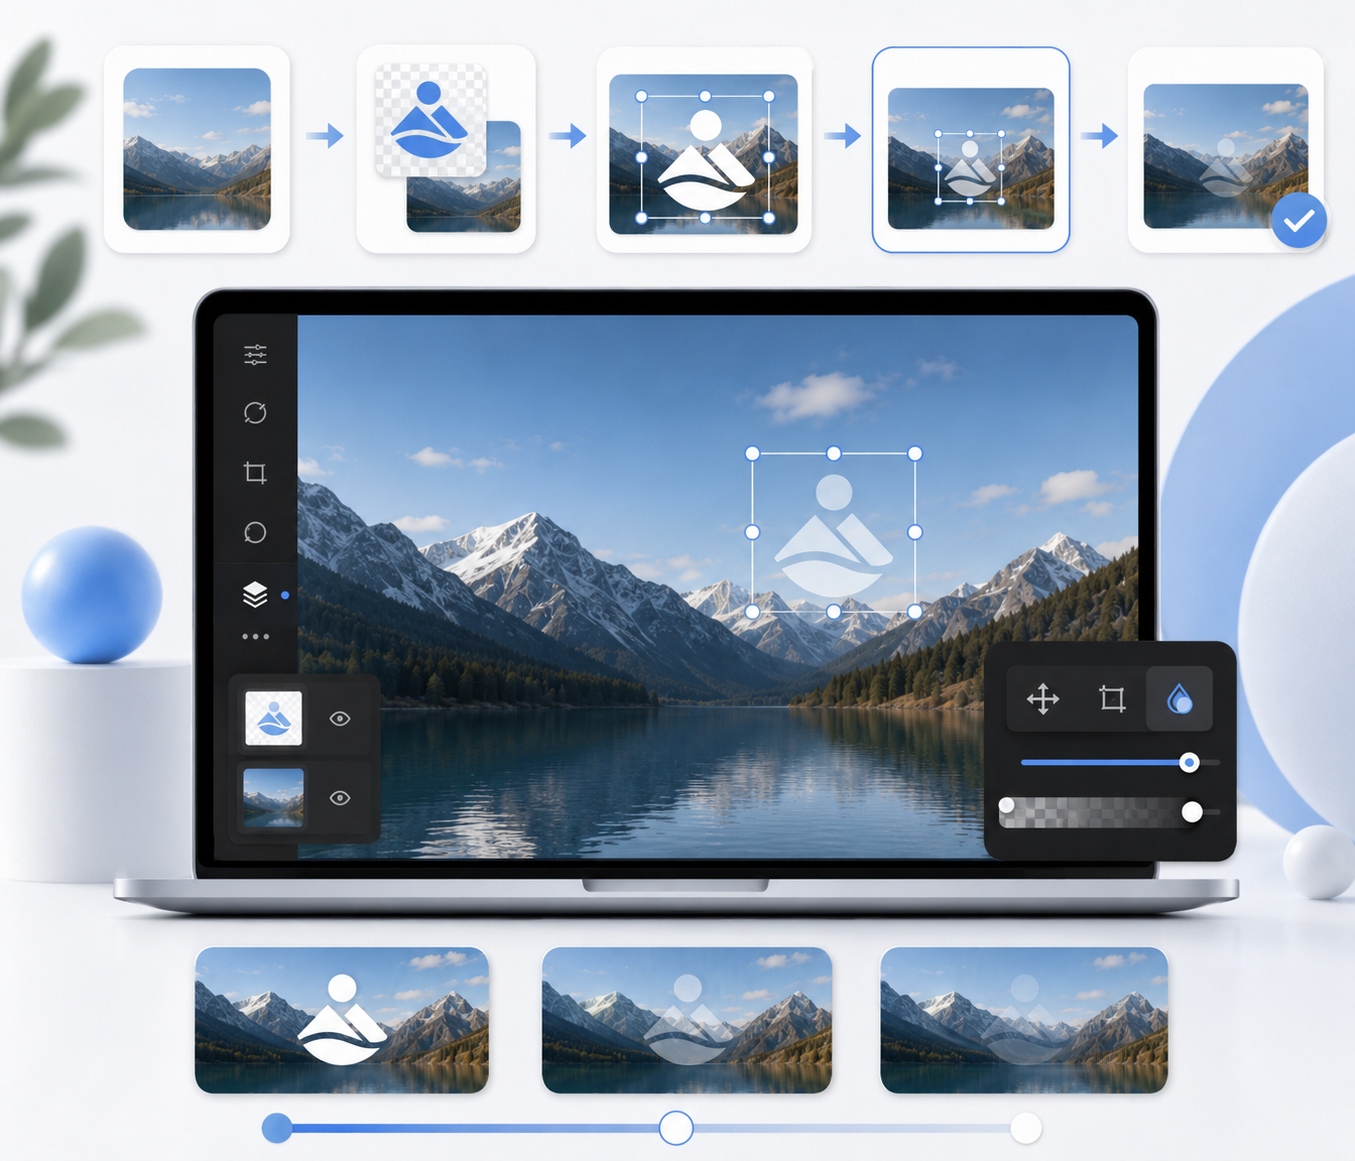
Reduce the logo until it is recognizable without dominating the image. Leave room from the edge. Use stronger opacity for clear identification, while a lighter watermark must remain readable after compression.
Use alignment guides or numeric position controls when several photos need the same margin. In Photoshop, layers can be aligned through the Layer menu, while guides can define a fixed boundary around the canvas. These controls are more accurate than placing every logo by eye.
Convert the logo layer to a Smart Object before making several size tests in Photoshop. Smart Objects preserve the source content while transformations are changed, allowing the layer to be scaled or rotated without permanently rewriting the original logo data. They do not create new detail beyond the source file, so a low-resolution logo still needs a better master.
Step 5: Export the Photo to High Quality
Export a new file and preserve the original. JPEG suits most completed photographs, while PNG uses lossless compression and can retain sharp graphic edges. JPEG uses lossy compression. When several versions are needed, resizing an image without losing quality should begin with the largest clean master instead of repeatedly saving smaller exports.
Check the output dimensions before saving. Exporting a file that is much smaller than the publishing size may force the platform or website to enlarge it, which can soften both the photo and logo. Open the exported file outside the editor and inspect the mark at normal size and at 100 percent.
Color can also shift when a file moves between applications that interpret its profile differently. Photoshop allows a color profile to be embedded during saving, and Adobe recommends sRGB when preparing images for the web. When using Image Processor, select Convert Profile to sRGB and Include ICC Profile if consistent web color is important.
How to Make Your Logo Look Good in a Photo
A technically correct overlay can still look awkward when its visual weight does not suit the image. Review the complete composition at the normal viewing size rather than judging every change while zoomed in. Small adjustments to scale, spacing, color, and separation often improve recognition without pulling attention away from the photo.
Choose the Right Logo Size for Your Photo
There is no universal percentage for every logo. A compact symbol can remain readable at a smaller size than a long wordmark. Compare two versions outside the editor and choose the smaller one when both remain recognizable.
Set the Best Logo Opacity for Clear Branding
Opacity should match the purpose. Promotional images usually need a clear mark, while proof images may use a quieter watermark. One preset number is unreliable because backgrounds change its apparent strength.
Keep Enough Space Around the Logo
Leave visual space between the mark and the image edge. Check transparent padding inside the file as well. Excess padding can make the visible artwork appear misaligned, so crop it when precise placement becomes difficult.
Match the Logo Color to the Background
Use the light version over dark areas and the dark version over light ones. An approved brand color works when it creates clear separation. Move the mark before recoloring it because nearby open space may solve the contrast problem.
Add a Shadow or Background for Contrast
A subtle shadow can separate a logo from texture. Keep the blur small and the offset close. A drop shadow follows the alpha mask rather than producing a rectangular box. Use a simple padded shape on highly varied backgrounds.
How to Add a Logo to Multiple Photos at Once
Batch processing helps when a group of images shares the same publishing format. It reduces repeated placement work, although different shapes and brightness levels may still need separate settings. Organize the photos before editing so one preset is not forced onto files that require another logo version or layout.
Use a Batch Logo or Watermark Tool
A batch editor applies one setup to several photos. Choose a tool that previews individual results and allows exceptions. Separate images that require different logo versions.
Create a Reusable Logo Placement Preset
Save the asset with its position, margin, scale, and opacity. Name the preset for one output format, then create another when the aspect ratio changes.
Batch Add a Logo With Photoshop Actions
Photoshop Actions record editing tasks and replay them across files. The Batch command can then run the recorded sequence on images from a folder. Create the action on a sample that has the same dimensions and orientation as the rest of the set.
Choose a separate destination folder instead of Save and Close when the source images must remain untouched. If the action includes a Save As step, enable Override Action “Save As” Commands. Without that setting, Photoshop may use the folder and filename recorded inside the action, which can send files to the wrong location or overwrite the same file repeatedly. Adobe also requires at least one unique filename element when batch naming files.
Image Processor may be simpler when the task mainly involves conversion or resizing. It can process folders, preserve image proportions with Resize to Fit, convert files to sRGB, embed an ICC profile, and create unique output names. A recorded action can still be run within Image Processor when the logo placement itself needs automation.
Keep Logo Size Consistent Across Photo Shapes
Group square, portrait, and landscape photos before applying the mark. Give each group a scale with similar visual weight. A proportional setting based on canvas width is more dependable than one fixed pixel size. Review panoramic files separately.
FAQs
Why Does My Logo Look Blurry or Pixelated?
The mark may have been enlarged too far or compressed during export. Replace it with a larger PNG or compatible SVG, keep its proportions locked, and export once from the layered master.
Why Does the Logo Change Size After Export?
The canvas or output dimensions changed. Size the logo in relation to the full image, then confirm the exported pixel dimensions before publishing.
Is a Logo on a Photo the Same as a Watermark?
Sometimes. A logo identifies the brand. It also acts as a watermark when its placement helps show the image’s source or ownership.
Can You Add More Than One Logo to a Photo?
Yes. Place each mark on a separate layer and maintain a clear visual hierarchy. Additional logos should not cover the subject or compete with the primary brand.
Conclusion
Adding a logo to a photo follows the same core process across devices. Begin with a clean source image and a suitable logo file, then place the mark on its own layer so every change remains reversible. Choose a location that protects the subject and stays visible after cropping. Export from the layered master at the dimensions required for the final platform. When branding a group of photos, organize them by shape and use format-specific presets rather than one rigid setup. Careful preparation keeps the logo clear, preserves the image’s purpose, and reduces repeated editing later.
You May Be Interested

140+ Facebook Bio Ideas: Short, Professional, Unique, and More

100+ Mother's Day Quotes to Celebrate Mom

12 Trusted Green Logo Examples Used by Successful Brands

150+ Instagram Bio Ideas to Catch Eyes at a Glance in 2026

2D logo vs 3D logo: Which One is More Impactful for Branding