How to erase something on a picture
Learn how to erase something on a picture using AI, Photoshop, or built-in phone tools. This guide covers removing people, objects, text, shadows, and reflections while fixing blurry areas, repeated patterns, broken edges, and lost image quality.

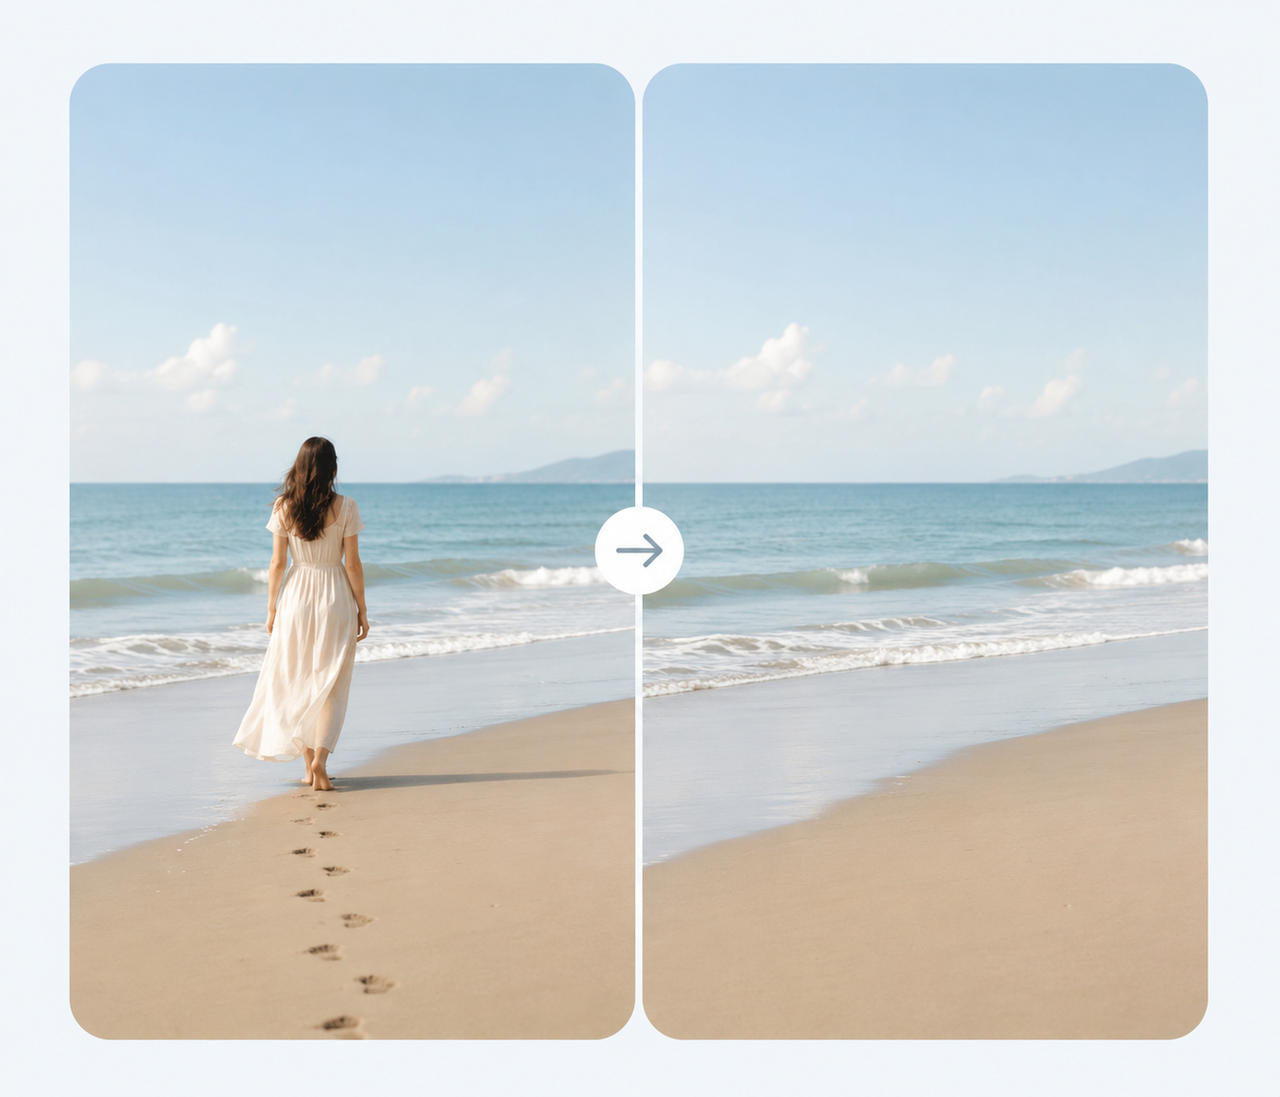
An unexpected person, a distracting object, or unwanted text can easily ruin an otherwise good photo. You can remove these elements with an AI photo eraser, Photoshop, or the built-in editing tools available on some iPhone and Android devices.
The final result depends on more than the tool you choose. The object’s position, the complexity of the background, the size of the selected area, and the quality of the original image can all affect how natural the edit looks. This guide explains each method and shows you how to fix common issues such as blurry patches, leftover details, and distorted backgrounds.
What Can You Erase from a Picture?
Photo erasing is not limited to removing one specific type of object. As long as the editing tool can identify the selected area and find enough visual information in the surrounding background, it can attempt to rebuild the missing space.
Simple backgrounds are usually easier to recreate. Overlapping people, detailed textures, and large covered areas often require more careful selections and additional cleanup.
People and Unwanted Objects
People, vehicles, and other small unwanted objects can often be erased from a picture. Common examples include a tourist walking through a vacation photo or product packaging left beside an item. The more clearly the object stands out from the background, the easier it is to produce a clean result, although comparing different apps for removing a person from a picture can also help you choose the right option for mobile edits.
Text, Signs, and Background Clutter
Date stamps, price tags, street signs, wall text, and cluttered items on a table can also be removed. Text placed over a plain wall, sky, or grassy area is usually easier to erase than text covering a face, clothing pattern, or building detail. Depending on the photo, you can use an AI eraser, Photoshop, or the built-in cleanup features available on iOS and Android devices.
How to Erase Something from a Picture With AI
Browser-based platforms such as Zawa make AI photo editing more accessible to users who want quick results without learning professional editing software. The tool analyzes the surrounding colors, lighting, and textures, then generates new content to fill the selected area.
The process requires little manual pixel-by-pixel editing, but the result should still be reviewed carefully. In complex scenes or areas with repeating patterns, you may need to give the AI a more specific prompt and edit the image in smaller sections.
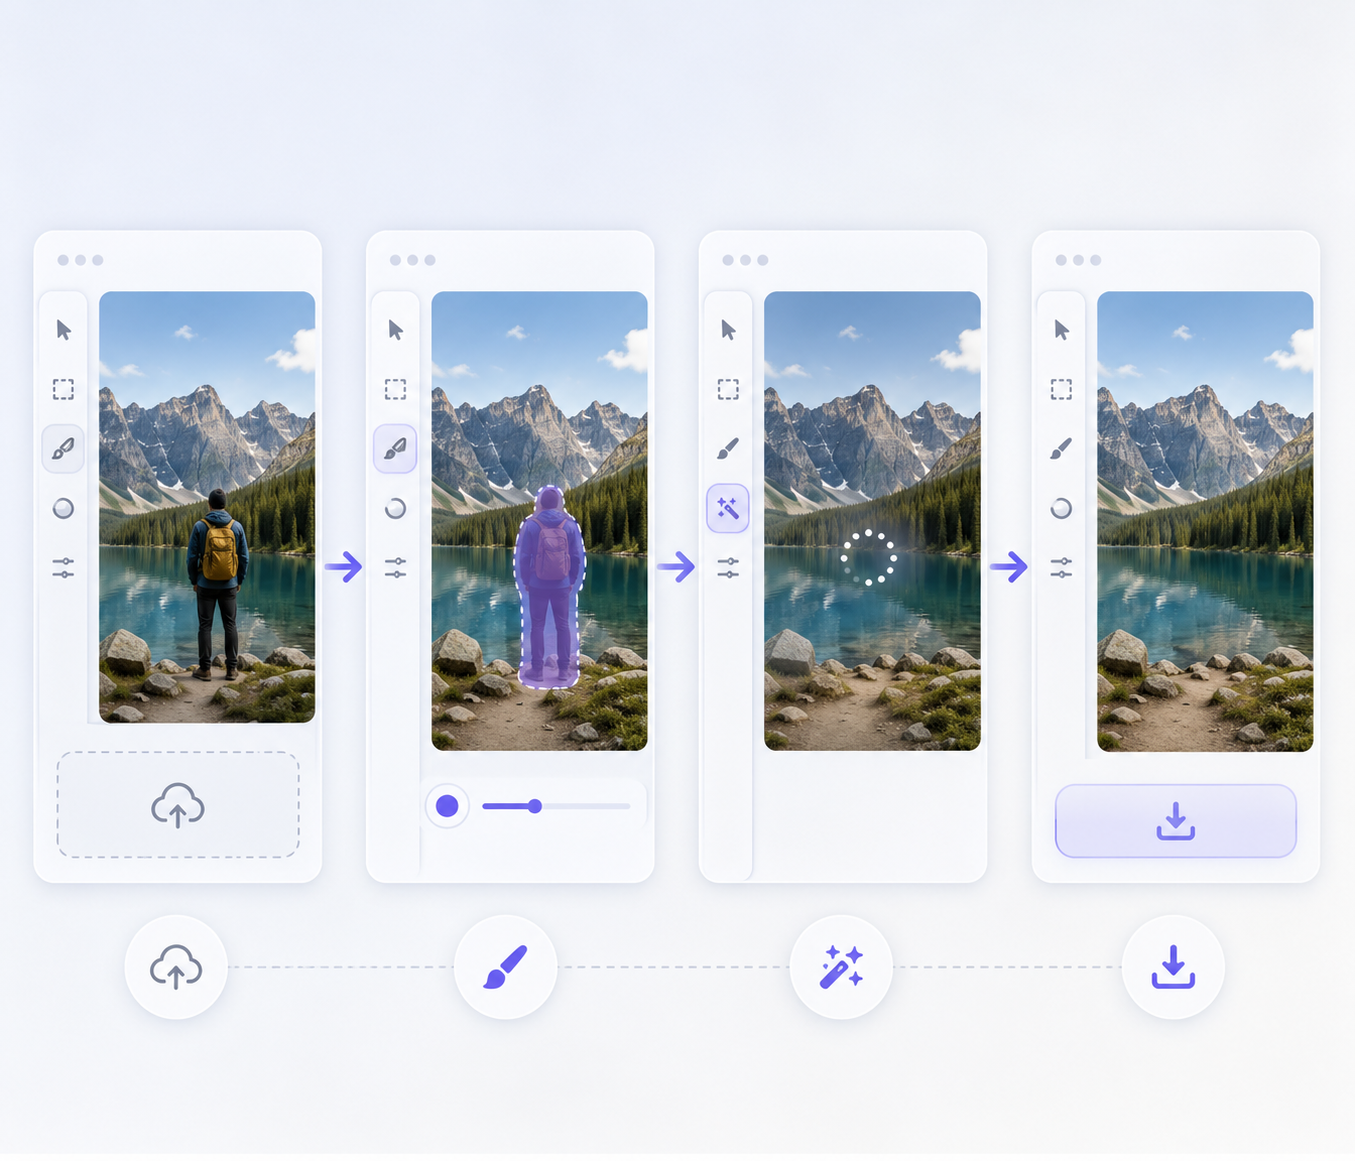
Step 1: Upload Your Picture
Start with a clear JPG, PNG, or another supported image format. Whenever possible, upload the original file instead of a screenshot or a photo that has already been compressed several times by social media. A higher-quality source gives the AI more detail to work with and reduces the chance of blurry patches, blocks, or broken textures.
Step 2: Select or Describe the Object
A brush-based AI object remover lets you paint over the unwanted element, while prompt-based editors allow you to describe what should be removed. The selection should cover the full object and its edges without including too much of the surrounding area. When removing a person, remember to include details such as their shadow, reflection, hair, or the edge of a shoe.
Step 3: Generate the Missing Background
Once the selection is submitted, the AI uses nearby pixels, colors, and structures to create a replacement background. A wall, open sky, or softly blurred background may be fixed in one attempt, while plants, flooring, and repeating patterns may require a clearer prompt or several smaller edits.
Keep in mind that AI creates new content that fits the visible scene. It cannot reveal the real background that was originally hidden behind the object, person, or text.
Step 4: Review and Download the Result
Do not judge the finished edit only from a small preview. Zoom in and inspect the edges, lighting, textures, and straight lines around the erased area. Look for repeated patterns, sudden breaks, or unusually soft sections. Once the image looks natural, download it at the highest available quality and keep the original file in case you need to make another edit.
How to Erase Something in Photoshop
Photoshop is better suited to images that require precise control, such as product photos, architectural images, portraits, or scenes with detailed backgrounds. Photoshop’s removal tools work differently, so a detailed guide to removing objects in Photoshop can help you choose the right method based on the object’s size, shape, and surroundings.
The Remove Tool works well for simple distractions. Generative Fill is useful when a larger area needs to be rebuilt, while Content-Aware Fill and the Clone Stamp provide more control over textures and edges.
Use the Remove Tool
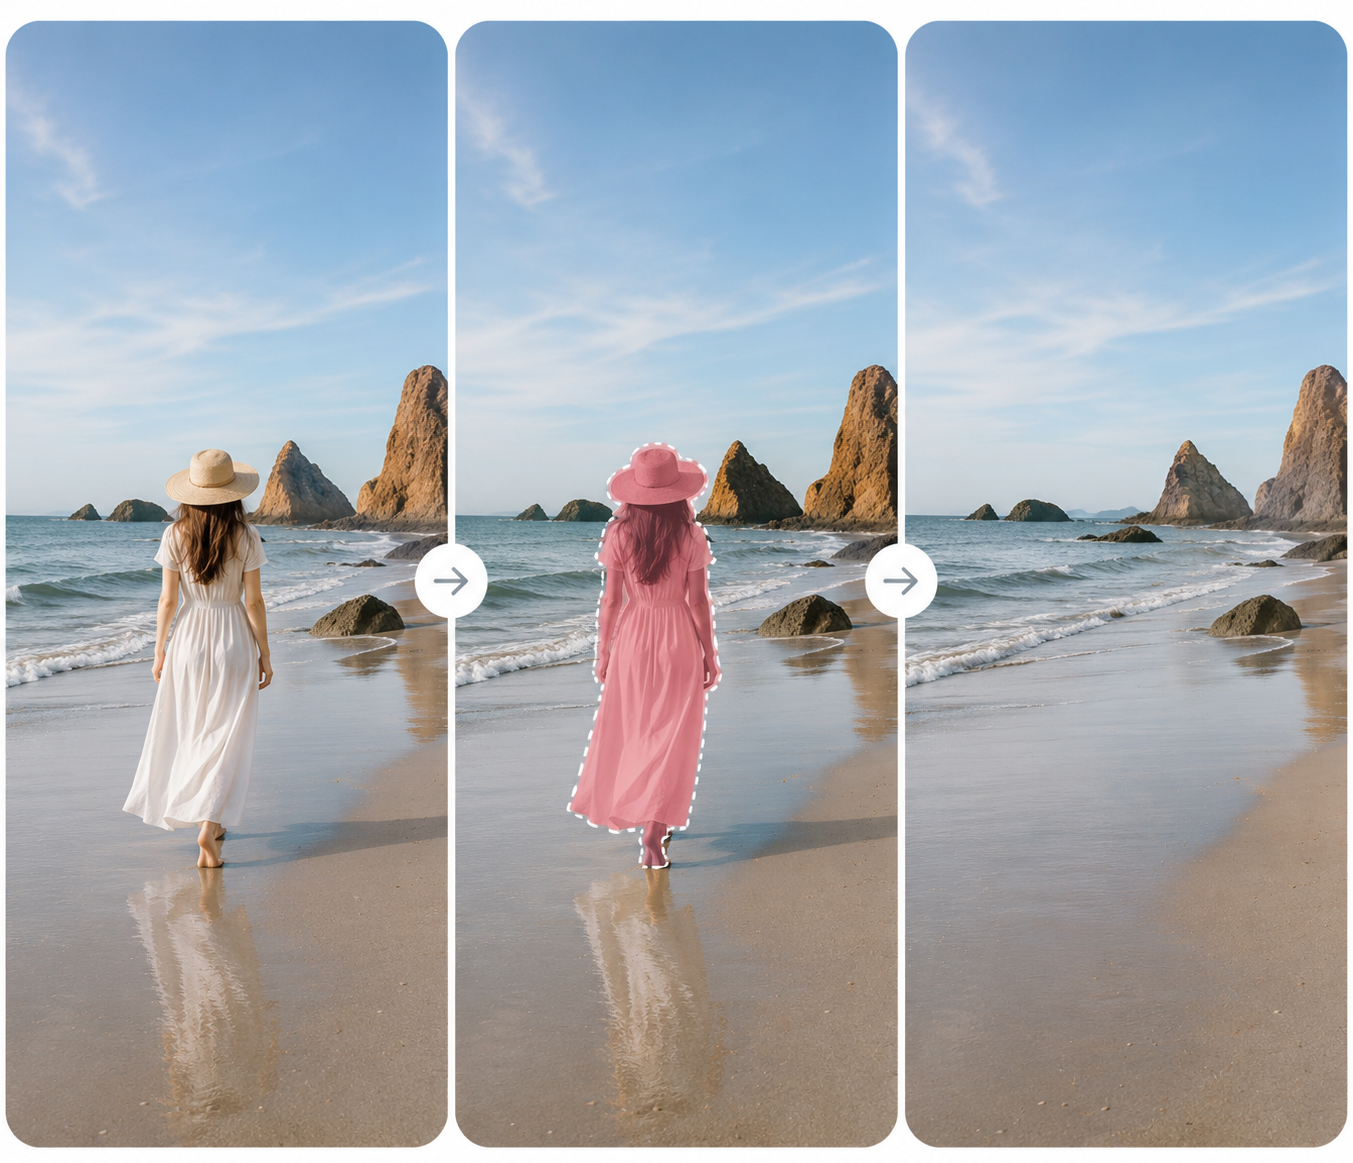
The Remove Tool is useful for erasing spots, small people, thin lines, and other isolated distractions. Paint over the entire object, and Photoshop will analyze the surrounding area before filling it in. For long or irregular objects, work in smaller sections so the selection does not affect nearby people, buildings, or important background details.
Use Generative Fill
Generative Fill can add, replace, or remove image content with a selection and an optional text prompt. To erase an object, select it and leave the prompt blank so Photoshop can rebuild the area based on the surroundings. When the first result does not look right, a more specific description of the desired background can help guide the next generation.
Use Content-Aware Fill or Clone Stamp
Content-Aware Fill uses nearby pixels to rebuild a selected area and works well on walls, floors, and natural backgrounds. The Clone Stamp lets you manually copy texture from another part of the image, making it more suitable for brick walls, tiles, railings, and repeating patterns. It requires more hands-on work, but it also gives you greater control over the sampling area and texture direction.
How to Erase Something on iPhone or Android
A phone is often enough for quick edits before sharing a photo. You can remove a background person, clutter on a table, or a distracting object near the edge without transferring the image to a computer.
Object-removal features differ by phone model, operating system, and photo app. Some supported iPhones provide a Clean Up tool, while certain Android phones offer tools such as Object Eraser, Magic Eraser, or AI Eraser. If your device does not include a compatible feature, you can use an online photo eraser in your mobile browser.
Check Your Phone’s Photo Editor for an Eraser Tool
Open the photo in your phone’s default gallery or photo app and enter editing mode. Look for an option labeled Clean Up, Object Eraser, Magic Eraser, AI Eraser, or a similar name. If available, circle, brush over, or tap the unwanted object so the app can reconstruct the background. Results are usually best when removing a small, clearly defined object from a simple background.
Use an Online Photo Eraser
If your phone does not have a suitable removal tool, open an online photo eraser in your mobile browser. Upload the image, mark the person or object you want to remove, and let the tool rebuild the selected area. This method works across different phone brands and is useful for travel photos, screenshots, and product images. Before downloading, check the repaired area and confirm that the image retains enough resolution and detail.
How to Make Object Removal Look Natural
A convincing edit involves more than making the main object disappear. The lighting, background structure, texture, and sense of depth also need to remain consistent. Even a small mismatch can draw more attention than the original distraction.
After the first edit, review both the overall composition and the fine details around the removed area. Looking only at the center of the selection can make it easy to miss shadows, reflections, or broken lines.
Remove Shadows and Reflections
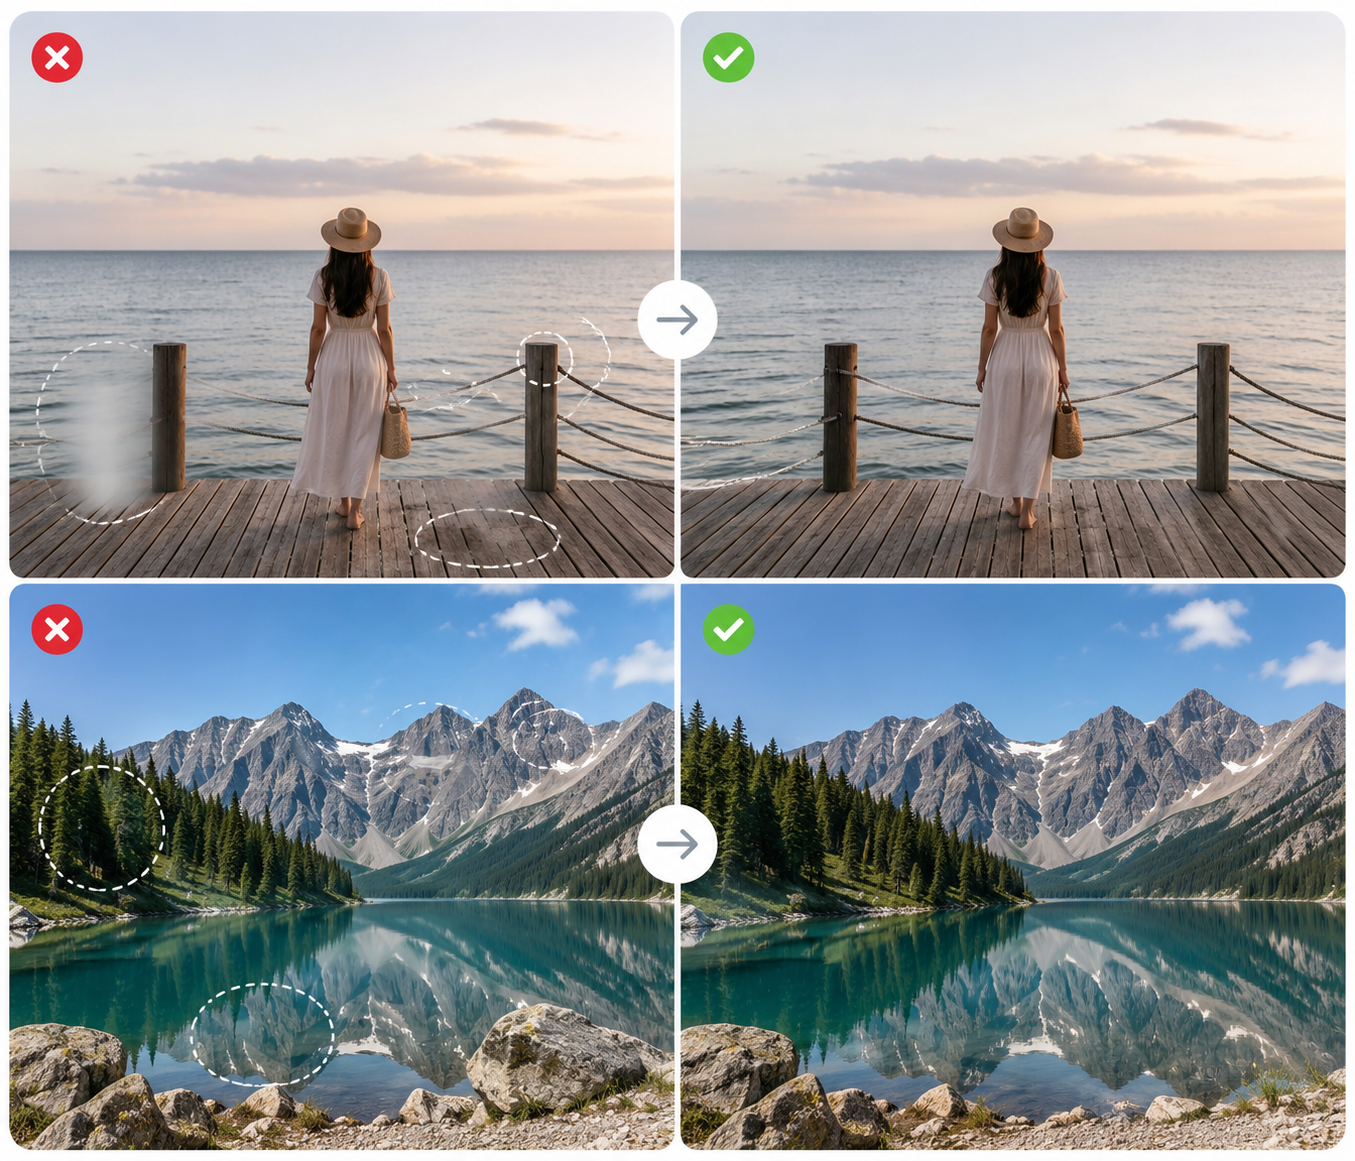
After a person or object is erased, its shadow, reflection in glass, or reflection on water may still remain. Remove the main subject first, then select the leftover lighting details separately. Erasing the subject and a large shadow in one selection can leave the tool with too little information to rebuild the ground texture and lighting direction accurately.
Protect Lines, Textures, and Patterns
Railings, window frames, table edges, and tile lines can look wrong even when they are only slightly distorted. Keep the selection away from lines that do not need to be changed, then check whether the structure remains continuous. For repeating patterns, give the AI a more specific background instruction or copy texture from a nearby area and blend the seam.
Edit Large Objects in Smaller Sections
A large selection leaves the tool with less surrounding information to reference. When removing a car, piece of furniture, or full person, it is often better to work in stages. Begin with the outer edges, then clear the center, the contact point with the ground, and any remaining shadow. This approach takes a little longer but usually preserves the surrounding scene more effectively.
Common Object Removal Problems and How to Fix Them
An editing tool may remove the selected object while still leaving behind blur, smudging, repeated textures, or bent lines. These issues usually come from an oversized selection, limited background information, or an unsuitable generation method.
Instead of repeatedly expanding the selection and starting over, identify the specific problem and repair only the affected area.
The Erased Area Looks Blurry or Smudged
Blurry results often come from a low-resolution source image, an overly large selection, or a lack of nearby texture. Try selecting a smaller area and generating it again while leaving more surrounding background visible. Any sharpening should be applied lightly and only to the repaired section, since sharpening the entire photo can make it look overprocessed.
Part of the Object Is Still Visible
Hair, fingers, shoes, thin wires, and shadows are easy to miss during the first selection. Zoom in, inspect the outer edge, and use a smaller brush to cover the remaining pieces. Only edit the visible leftovers during the second pass so you do not damage the background that was already repaired successfully.
The Background Pattern Looks Repeated
AI may copy the same leaves, bricks, clouds, or other details several times, creating an obvious repeating pattern. Try generating another version, provide a more specific background prompt, or copy texture from a different part of the image. Keeping some natural variation in brightness and color also helps the background look more realistic.
Lines and Edges Become Distorted
Building edges, horizons, and furniture outlines can bend or break when they are included in the selection. Reduce the selected area and preserve as much of the original line as possible, then fill only the part that was covered by the object. For images that require precise geometry, manually aligning the edge in Photoshop usually provides a cleaner result.
The Edited Photo Loses Quality
Image quality may drop because of upload compression, limited export resolution, or repeated saving. Begin with the original image and download the edited version at its original dimensions or the highest available quality. Avoid moving and resaving the photo through several apps, since each additional compression can remove fine detail.
FAQ
Q: Can I Erase Something from a Picture for Free?
Yes. Many online tools and mobile apps provide free object-removal features, although they may limit image resolution, file size, or the number of downloads.
Q: Can I Remove Something That Covers a Face or Important Detail?
You can remove the covering object, but the original hidden detail cannot be recovered. AI can generate a realistic replacement, but it is not restoring the actual face or background that was behind the object.
Q: Are Photos Uploaded to an Online Object Remover Private?
Image privacy and data security are important when using any online editing tool. Zawa values user privacy and is committed to protecting uploaded images and personal information, helping users edit their photos with greater peace of mind.
Conclusion
Erasing a person, object, or text from a picture is usually straightforward when you choose the right method for the image. AI tools and built-in phone features work well for simple backgrounds and small distractions, while Photoshop offers better control over complex textures, architectural lines, and professional photos.
Whichever method you use, make sure the selection covers the entire object and check for leftover shadows, reflections, broken edges, and repeated patterns. Keeping the original file, editing large areas in sections, and exporting at a high quality will help the finished picture look more natural.
You May Be Interested

150+ Instagram Bio Ideas for Moms

130+ Independence Day Quotes for Instagram
165 Father’s Day Card Messages & Ideas

What Is 2K Resolution? Dimensions, Quality & Use Cases

50 Famous Logos in the World and What Makes Them Timeless