How to Remove Color From an Image
Learn how to remove color from an image by deleting one shade, making a background transparent, converting photos to black and white, or replacing colors. Compare AI and Photoshop methods, fix color halos, and preserve clean edges and visual quality.

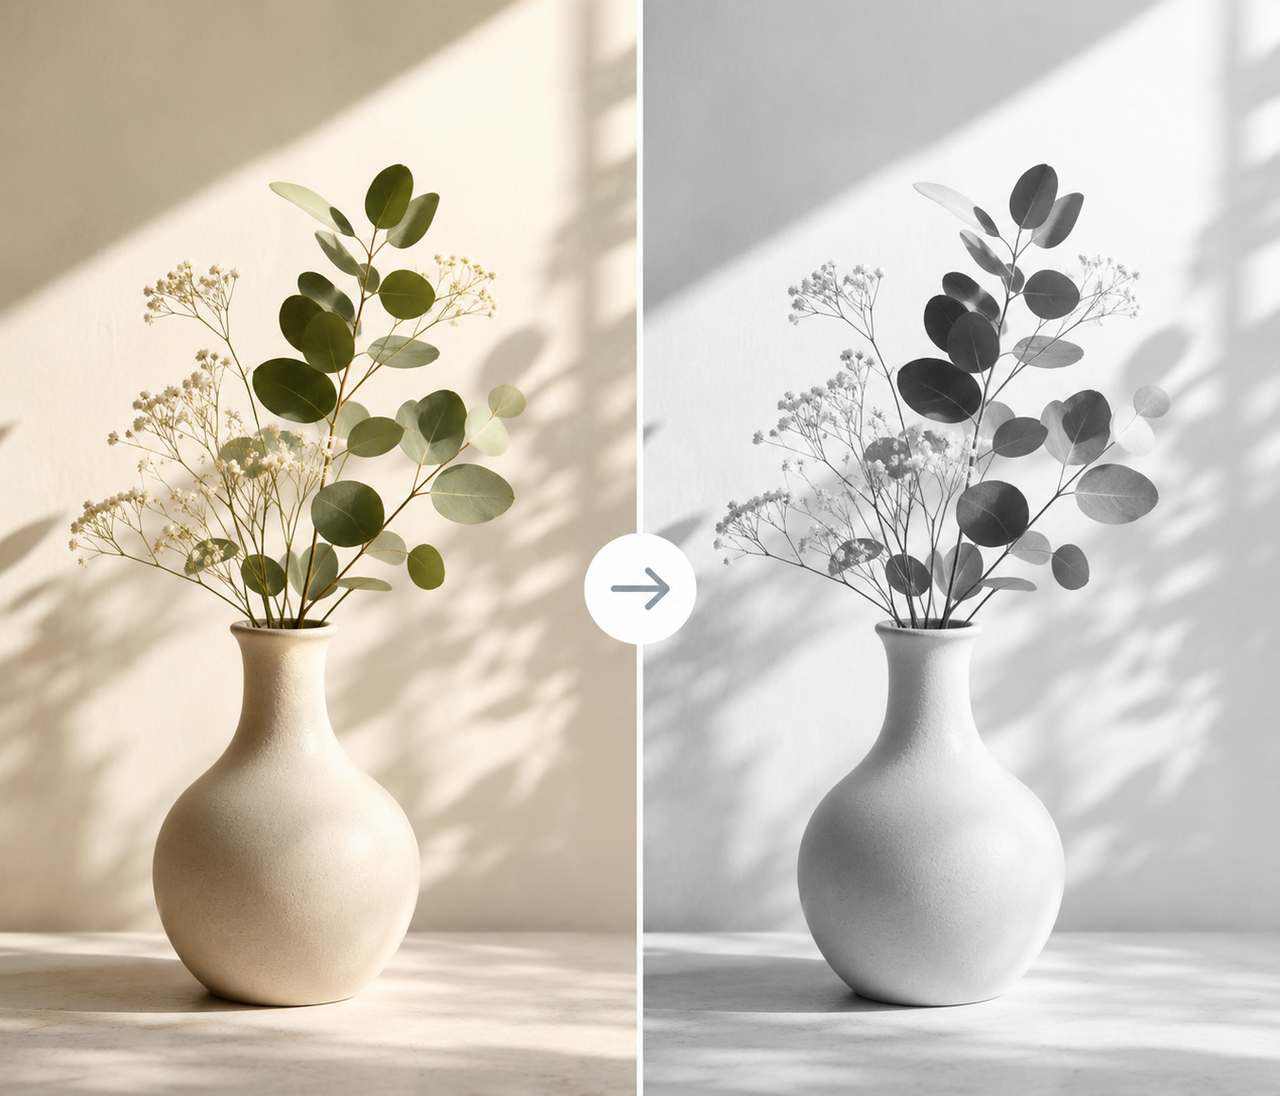
Removing color from an image may involve deleting one shade, making a colored background transparent, converting a photo to black and white, or replacing an existing color. The right method depends on which part of the image you want to change.
Online editors are convenient for quick adjustments, while Photoshop offers more control over detailed selections and edges. This guide covers each option and explains how to avoid common problems such as color halos, accidental removal, and lost image quality.
What Does Removing Color From an Image Mean?
“Remove color” can describe several editing tasks. Defining the result before you begin will make it easier to choose the right feature and protect parts of the image that should remain unchanged.
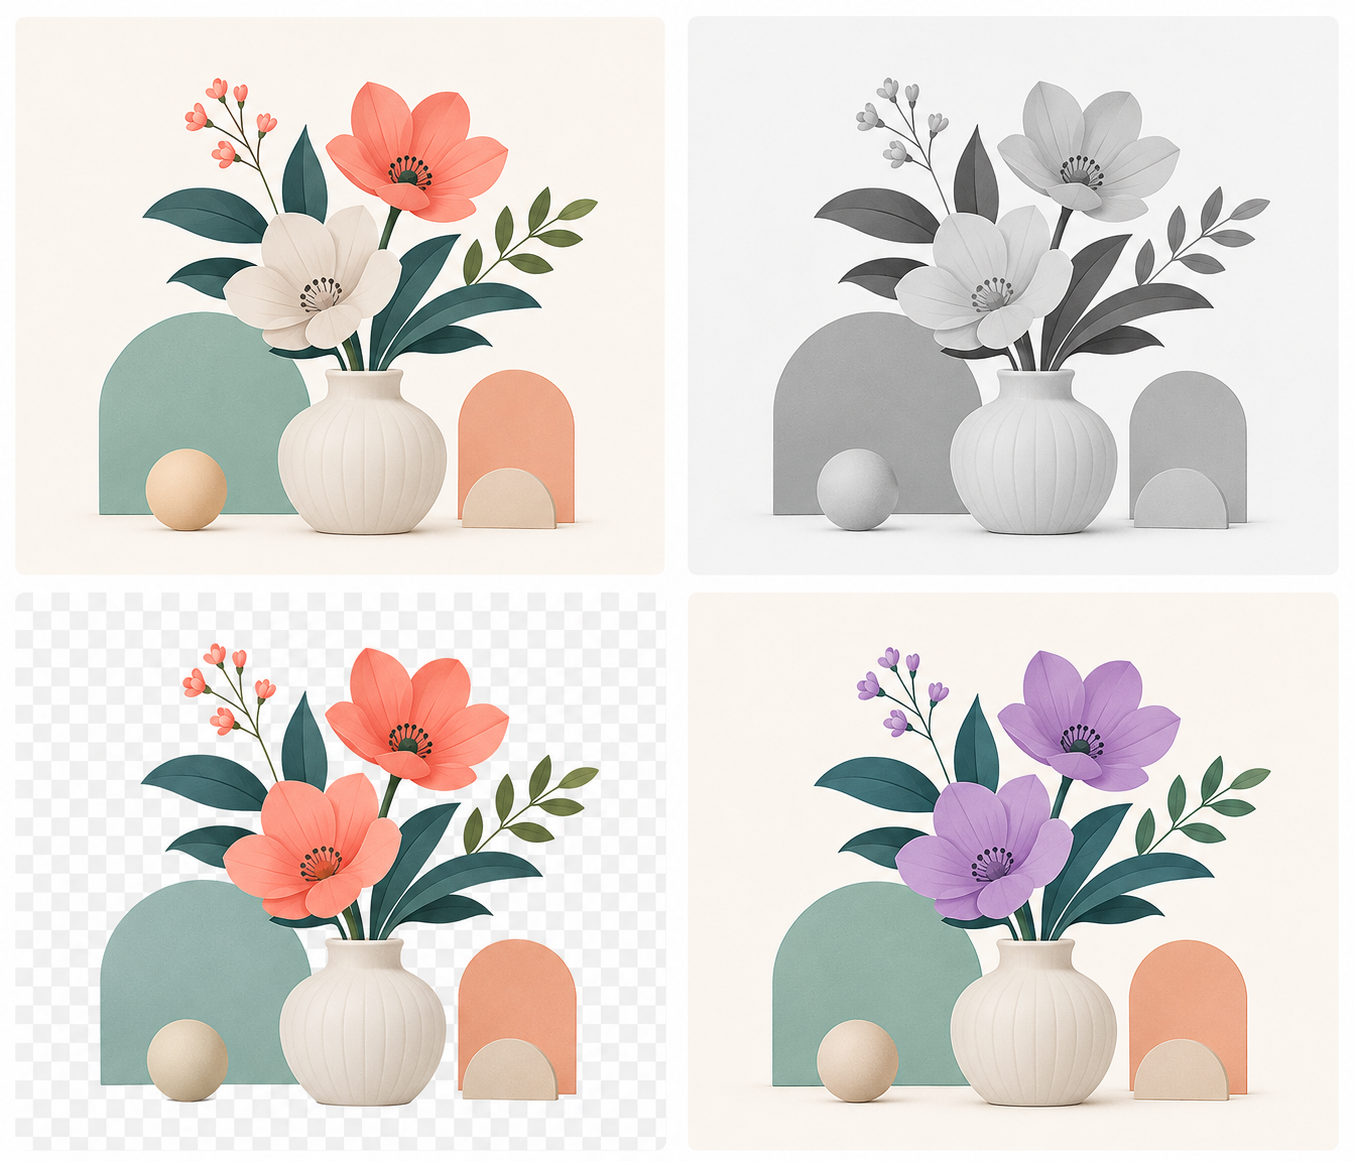
Remove One Specific Color
A color selection tool identifies pixels within a sampled range, allowing you to delete, desaturate, or recolor them. This works well for removing a white logo background, clearing a blue annotation, or changing the color of a simple graphic. Because lighting creates variations within the same color, the selection usually needs to include several related shades.
Remove All Colors and Make the Image Black and White
A black-and-white conversion removes the visible color while retaining differences in brightness and contrast. It is commonly used for portraits, street photography, archival images, and designs that need a consistent visual style. Adjusting individual color channels generally creates more depth than simply lowering saturation to zero.
Remove a Background Color
Solid white, black, green, and other single-color backgrounds can often be converted to transparency. This is useful for product images and graphic assets, especially when you need to remove the background from a logo or prepare a scanned signature for reuse. Clean contrast produces the best edges, while hair, glass, shadows, and translucent materials usually need additional refinement.
Replace One Color With Another
Recoloring changes a selected shade without removing the object itself. It can be used to preview a different shirt color, update an icon, or create product color variations. Hue adjustments and masked color layers preserve highlights, folds, reflections, and surface texture better than a flat color overlay.
How to Choose the Right Color Removal Method
Each editing goal calls for a different kind of selection. A global adjustment changes the whole photo, a color-based tool targets similar pixels, and an object or background remover focuses on a defined part of the scene.
Choose a method based on the image you actually need to edit. Matching the technique to the task will produce a result that is closer to what you expect.
Use Desaturation for a Black-and-White Photo
Desaturation is the simplest option when all color should be removed from the photo. For more control, use a black-and-white adjustment that lets you change how individual reds, blues, greens, and other colors translate into gray. This keeps skin, clothing, skies, and backgrounds from losing visual separation.
Use Color Selection for One Specific Color
Color Range, Select by Color, and similar features are useful when the same shade appears across several parts of an image. They work especially well with logos, icons, illustrations, and solid backgrounds. When that color also appears on the subject, use a mask or a limited selection area to protect it.
Use Background Removal for a Transparent Background
A background remover is designed to keep the main subject while clearing the surrounding scene. It is usually more efficient than selecting a background color manually, especially for portraits and product photos. Once the background is gone, inspect fine details such as hair, fingers, fabric, and product edges.
Use AI Object Removal for Colored Objects or Areas
A color-based selection is not ideal when only one colored item should disappear. For example, removing a red stain should not affect every other red detail in the photo. With the ZaWa AI Object Remover, you can mark the unwanted object, text, pattern, or area, and the AI will rebuild the space using the surrounding background.
Color Removal Method Comparison Table
Editing goal | Recommended method | Best for | Keeps the same color elsewhere? |
Make the entire photo black and white | Black-and-white adjustment or desaturation | Portraits and photography | No |
Remove one recurring color | Color selection | Logos, icons, and simple graphics | A mask may be required |
Create a transparent background | Background removal | Products, portraits, and signatures | Usually |
Erase one colored object or stain | AI object removal | Photos and local corrections | Yes |
Change an existing color | Hue or color replacement | Clothing, products, and design elements | Yes |
How to Remove Color From an Image Online With AI
Online platforms such as ZaWa combine automatic background removal, object erasing, color adjustments, and export tools in one workspace. The process is straightforward, but the selected feature should match the intended result.
For cleaner edits, complete the main removal first. Contrast, exposure, saturation, and edge corrections can be handled afterward.
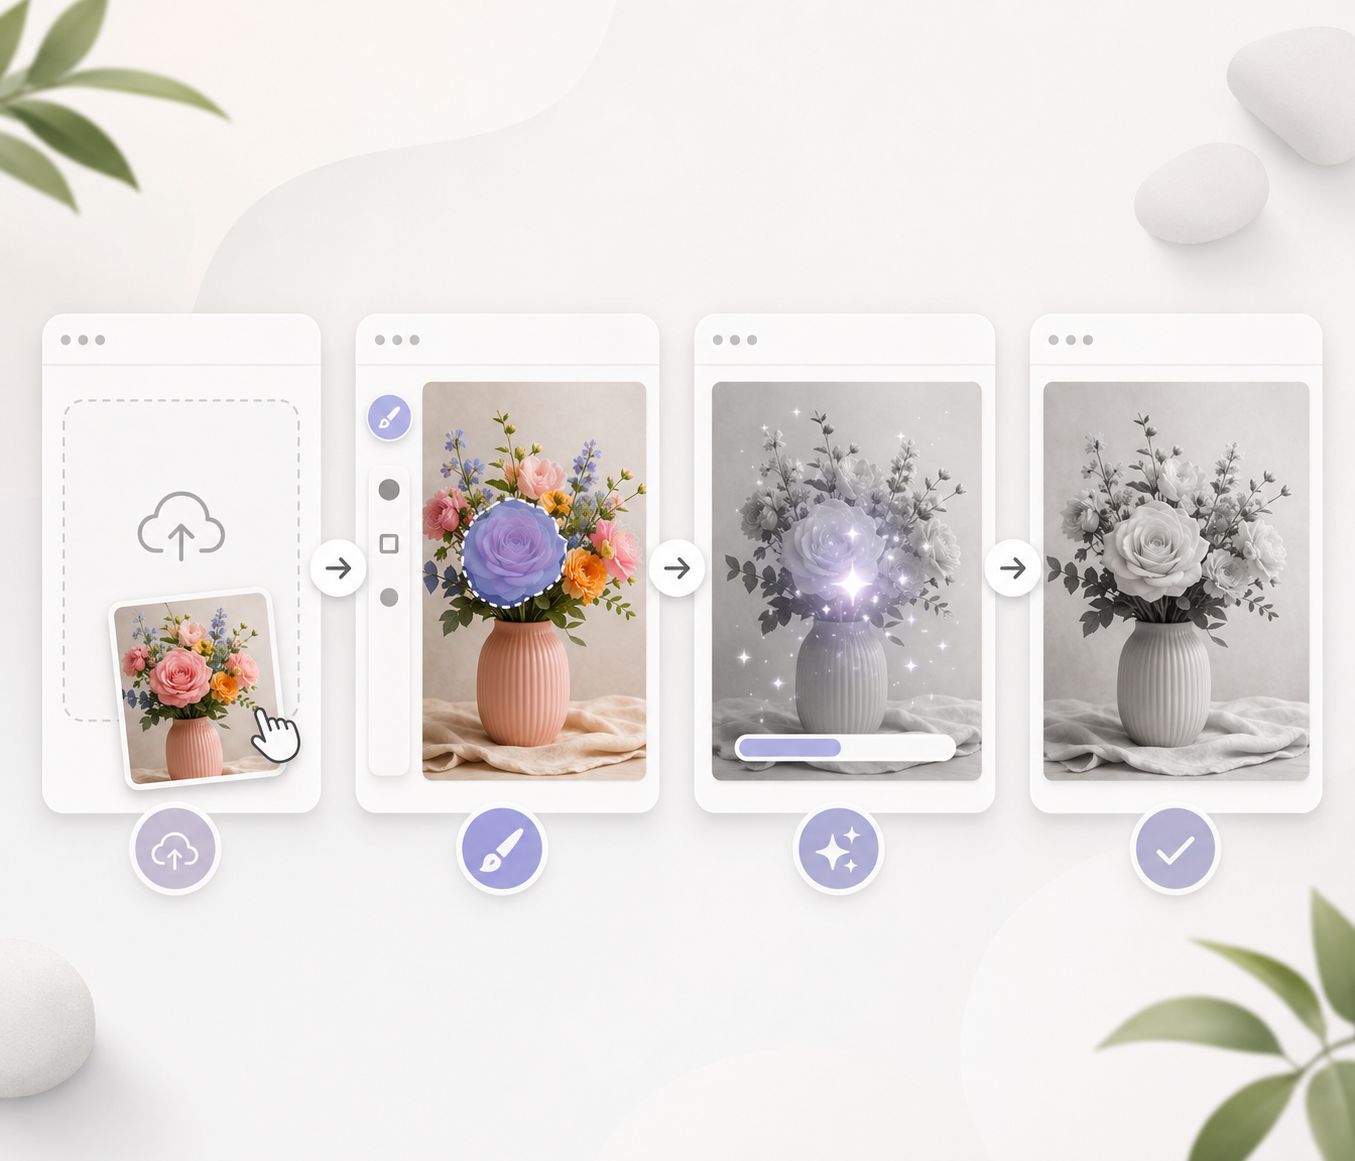
Step 1: Upload the Image You Want to Edit
Use the original JPG, PNG, WebP, or another supported file whenever possible. Screenshots and repeatedly compressed images contain less edge and color information, which can make fine details harder to preserve. A clear source is especially important for hair, text, product surfaces, and transparent materials.
Step 2: Choose the Color Removal Result
Select the feature that fits the finished image. Use a black-and-white adjustment for a monochrome photo, background removal for a transparent cutout, color selection for a repeated shade, or object removal for one local item. This prevents unnecessary changes to the rest of the picture.
Step 3: Mark the Color or Area to Remove
For a specific color, sample the shade and gradually widen the selected range until the necessary pixels are included. For an object, brush over its full outline along with any attached shadow or reflection. Keep the marked area as focused as possible so nearby details remain available for reference.
Step 4: Review and Refine the Result
Zoom in rather than judging the edit from a small preview. Check for missed color, rough edges, repeated textures, or background details that no longer line up. A small correction brush is usually more effective than reprocessing the entire selection.
Step 5: Adjust Contrast, Exposure, and Saturation
Once the color has been removed, make only the adjustments the image needs. A monochrome portrait may benefit from stronger midtone contrast, while a recolored product may need a slight brightness change to match the lighting. Avoid pushing the settings so far that texture and natural shadows disappear.
Step 6: Download the Edited Image
Use PNG when transparency must be preserved. JPG is suitable for regular photographs with a solid background and usually creates a smaller file. Before saving, confirm that the output dimensions are large enough for the website, social platform, or design in which the image will be used.
How to Remove One Color From an Image in Photoshop
Photoshop provides more control when similar shades appear in both the subject and background. Its Color Range feature can build a selection from sampled colors, while layer masks let you correct mistakes without permanently deleting pixels.
Step 1: Open the Image and Unlock the Layer
Open the file, duplicate the image layer, and keep the original copy untouched. If it appears as a locked Background layer, convert it to a regular layer. This allows removed pixels to become transparent instead of being filled automatically with a background color.
Step 2: Select the Color With Color Range
Choose the editing action that directly matches your goal:
To remove one specific color, sample the target shade and select similar pixels.
To make a colored background transparent, use the background removal feature and preserve the main subject.
To remove all colors, apply a black-and-white or desaturation adjustment.
To replace one color with another, select the original shade and apply the new hue while retaining highlights, shadows, and texture.
Selecting the correct action at this stage helps prevent unintended changes elsewhere in the image.
Step 3: Adjust Fuzziness or Tolerance
The Fuzziness control determines how broadly Color Range includes related shades. A low setting stays close to the sampled color, while a higher setting captures more variations. When using the Magic Wand instead, adjust Tolerance, which serves a similar purpose for that tool.
Step 4: Protect Similar Colors With a Layer Mask
When the selected color also appears in the subject, apply the selection through a layer mask rather than deleting it immediately. Paint on the mask to restore clothing, text, skin, or product details that were included by mistake. This keeps the edit reversible throughout the process.
Step 5: Delete, Desaturate, or Replace the Selected Color
The active selection can now be handled in several ways. Hide it to create transparency, lower its saturation to remove the color, or apply a Hue/Saturation adjustment to replace it. Adjustment layers are preferable when the original lighting and surface texture need to remain intact.
Step 6: Refine the Edges and Export the Image
Look closely for jagged outlines, colored fringes, and isolated pixels. Use modest smoothing or feathering rather than softening the entire edge. Export as PNG for transparency or use a high-quality JPG when the image will keep a solid background.
Color Removal Tools Beyond Photoshop
Photoshop is not necessary for every color-editing task. Canva, GIMP, and built-in phone editors provide useful features for monochrome conversion, basic recoloring, background removal, and transparent graphics.
Remove Color From an Image in Canva
Canva can turn a photo black and white through its filters and saturation controls. Its background remover is also useful for quick product cutouts, portraits, and social media graphics. For precise selection of a repeated color inside a detailed image, a layer-based editor offers more control.
Remove Color From an Image in GIMP
GIMP includes Select by Color for targeting similar pixels across a layer. Its Color to Alpha feature can turn a chosen shade transparent, which is useful for white-background logos and scanned signatures. Threshold settings and layer masks help separate the background from similar colors on the subject.
Remove Color With an iPhone Photo Editor
The iPhone Photos app can create a black-and-white look with filters or saturation adjustments. These controls affect the image as a whole rather than removing one precise shade. A dedicated editor is more suitable for transparent backgrounds and local corrections, while this guide to the best background remover apps can help you compare mobile options.
Remove Color With an Android Photo Editor
Available features vary across Android devices, but most gallery apps provide monochrome filters and basic color adjustments. Some models also include background or object removal. Selecting every instance of one color may still require an editor with a dedicated color-range tool.
Common Color Removal Problems and How to Fix Them
Lighting, shadows, reflections, and compression can create several versions of what appears to be the same color. Most unwanted results can be corrected by narrowing the selection, refining the mask, or choosing a more suitable export format.
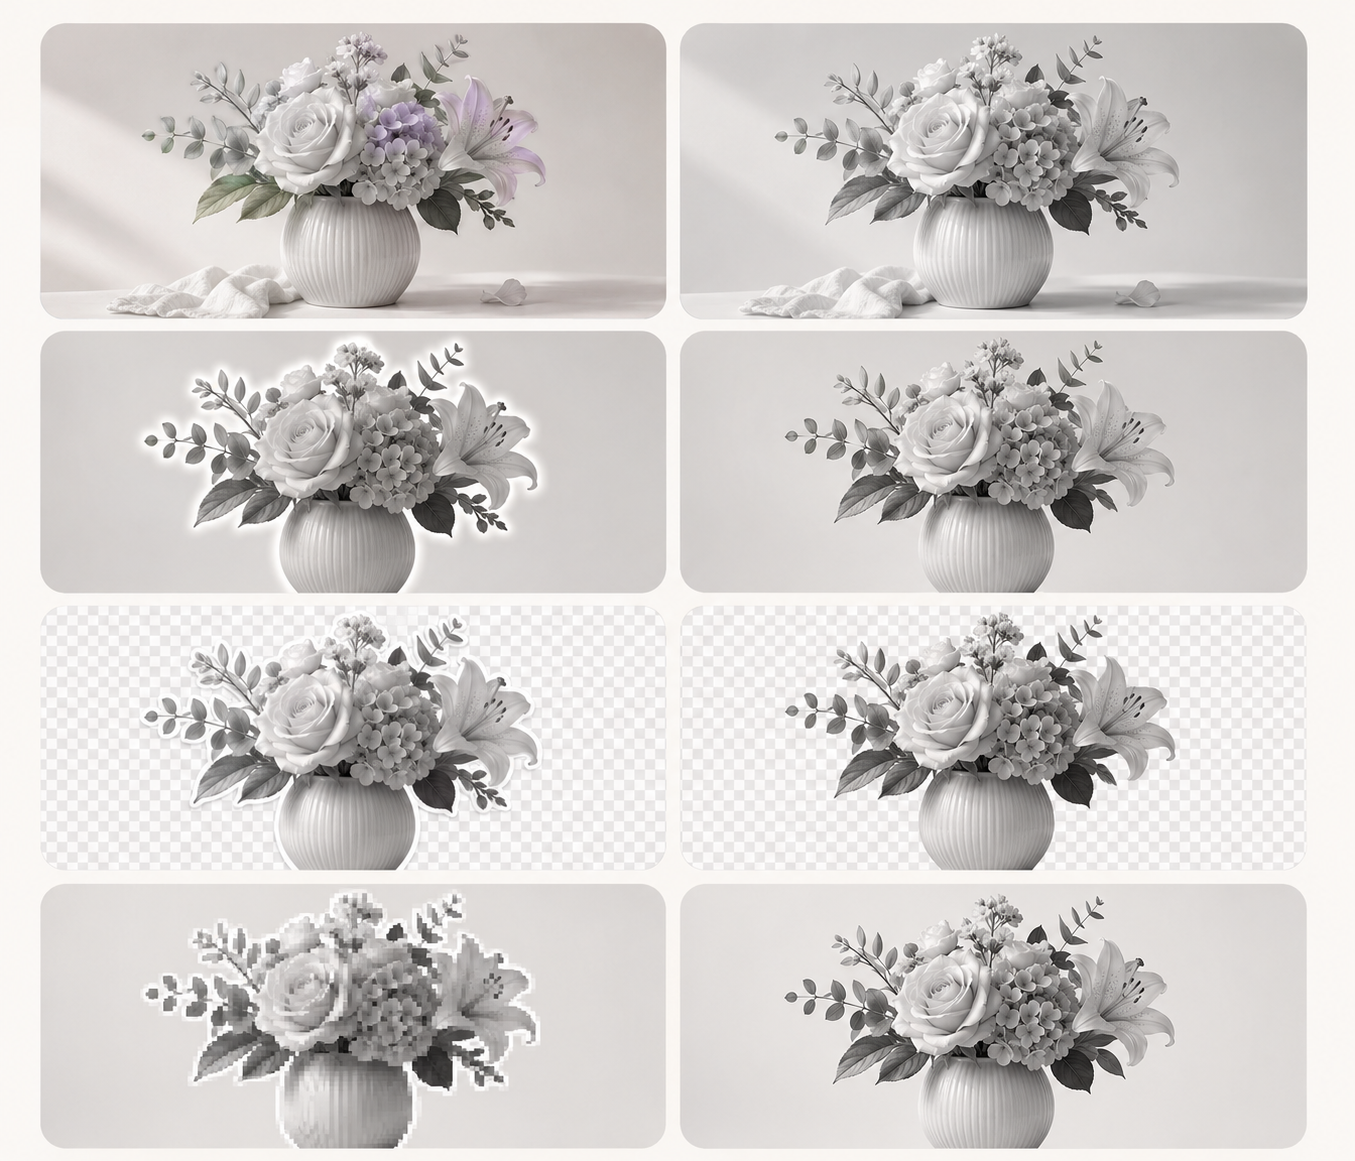
Reduce Fuzziness or Tolerance so the tool selects a narrower range. When the unwanted color and subject color are too close, limit the edit to a specific area and use a mask to restore the subject. This is more reliable than repeatedly undoing and rebuilding the full selection.
Colored Edges Remain Around the Selection
A color halo often comes from partially selected edge pixels or reflected light from the old background. Expand the selection slightly, then use gentle feathering or edge refinement. Hair, fur, and fabric should be refined with a soft edge tool rather than a hard eraser.
The Black-and-White Image Looks Flat
Different colors can turn into nearly identical gray values after basic desaturation. Use a black-and-white adjustment to brighten or darken the original color channels separately. Better separation between the subject, middle ground, and background will create more depth.
Transparent Areas Turn White After Export
JPEG does not support transparency, so transparent pixels are replaced with a solid color. Export the image as PNG and confirm that transparency is enabled. Previewing the file against both dark and light backgrounds can reveal edge halos before publication.
The Edited Image Looks Pixelated
Pixelation usually comes from a small source image, heavy enlargement, or repeated compression. Return to the highest-resolution original and export only once at the required dimensions. Logos and icons are better handled as vector files when an original vector version is available.
Too Much Editing Removes Natural Detail
An overly broad color range may flatten skin tones, erase fabric variation, or remove reflections that give a product its shape. Narrow the selection and work in smaller areas. Regularly comparing the edited version with the original makes it easier to preserve realistic detail.
FAQ
How Do I Remove One Color From an Image?
Sample the target shade with a color selection tool, then adjust the range until the relevant pixels are selected. Use a mask to protect similar colors before deleting, desaturating, or replacing the selection.
How Do I Make a Color Transparent?
Select the color and hide it with a mask or convert it to an alpha channel. A background remover can also work when that color covers most of the background.
What Format Should I Use for Transparency?
Use PNG for logos, product cutouts, signatures, and other images that require transparency. JPEG files cannot preserve transparent pixels.
How Do I Remove Color Without Affecting Similar Shades?
Use a narrower selection range and restrict the edit to the necessary part of the image. A layer mask can then exclude similar shades that belong to the subject.
Conclusion
Removing color can involve converting an entire photo to black and white, clearing one recurring shade, creating transparency, recoloring an element, or erasing a local object. The best results come from choosing a tool designed for that specific job.
Start with the original image, keep important edits reversible, and inspect the edges before exporting. These steps help preserve texture and detail while producing a cleaner, more natural result.
You May Be Interested

100+ Mother's Day Quotes to Celebrate Mom

130+ Independence Day Quotes for Instagram

178 Independence Day Wishes & Quotes

30 Teamwork Quotes That Build Stronger and Smarter Teams

50+ Mother’s Day Post Ideas for Instagram, Facebook & More