
Why Does Instagram Ruin Photo Quality
Instagram often reduces photo quality through resizing, compression, and color conversion. This guide explains the best image size, format, export settings, and upload steps to keep Instagram photos sharp, clear, and true to the original every time.

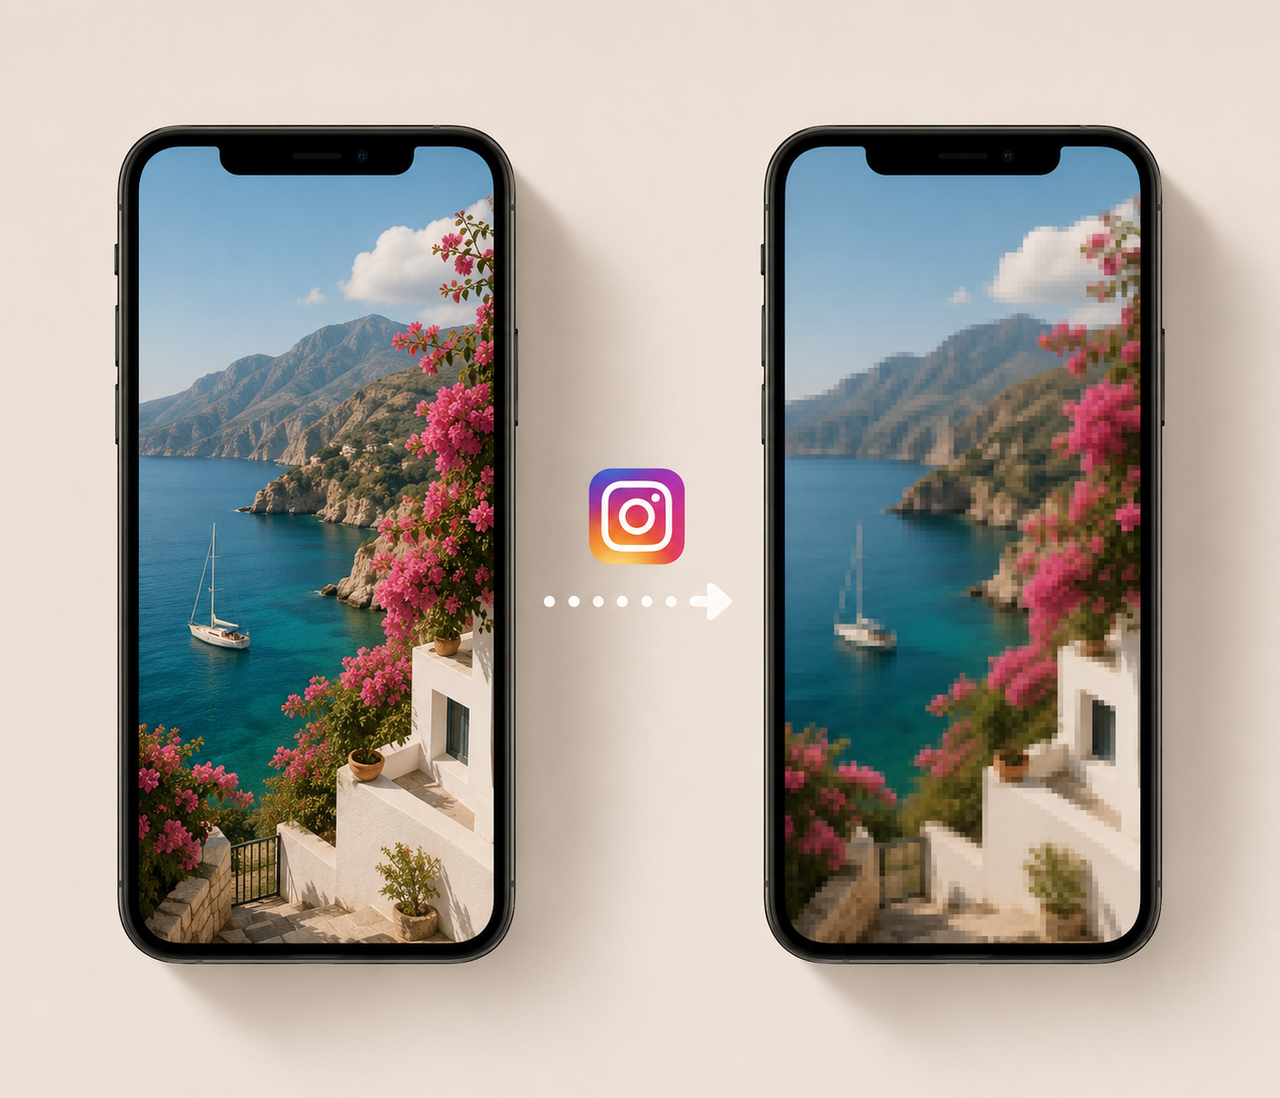
A photo may look crisp in your camera roll and noticeably softer after it appears on Instagram. Fine hair loses definition, text develops fuzzy edges, and carefully edited colors sometimes shift. The change is not usually caused by one mistake. Instagram processes every upload so it can load efficiently across different screens, networks, and devices.
Compression is unavoidable, but poor-looking results are not. Most visible quality loss comes from uploading oversized images, using the wrong aspect ratio, exporting with unsuitable settings, or starting with a file that has already been compressed. Understanding how Instagram handles photos allows you to prepare each image before the platform makes its own adjustments.
5 Common Reasons Instagram Ruins Photo Quality
Instagram standardizes millions of uploads from different cameras and editing apps. These five issues explain why some photos survive that process better than others.
Instagram Automatically Compresses Photos
Every uploaded photo is processed and compressed to reduce the amount of data Instagram must store and deliver. Subtle texture in grass, hair, fabric, smoke, or distant architecture is often the first detail to disappear. A portrait with a clean background may remain sharp, while a wide cityscape filled with windows, signs, and tree branches can look noticeably softer after the same upload process.
Incorrect Dimensions Trigger Resizing
Instagram handles an image more predictably when its width and aspect ratio already fit the platform. An oversized 6,000-pixel camera file must be reduced, while an unsupported panoramic or extra-tall composition may be cropped or resized. That additional processing can soften edges and make small text difficult to read. Preparing a correctly proportioned 1080-pixel-wide file gives you more control over the final result.
The Original Photo Is Already Compressed
Quality loss often begins before Instagram receives the image. Photos downloaded from WhatsApp, copied from social media, saved from an email preview, or repeatedly exported as JPEG may already contain visible compression artifacts. Instagram then processes the weakened file again. For example, a screenshot of a product photo will usually produce poorer results than an export made directly from the original editing file.
Unsupported Color Profiles Change Colors
A photo edited in Adobe RGB, Display P3, or another wide-gamut color space may not look identical after online conversion. Saturated reds can become duller, skin tones may shift, and shadows can appear less balanced. These changes are sometimes mistaken for resolution loss even though they are primarily color-management problems. Converting the final image to sRGB before export usually produces more consistent results across Instagram, mobile browsers, and different phone displays.
High-Quality Uploads Are Turned Off
Instagram includes an “Upload at highest quality” option, but it may not be enabled on every account or installation. When the feature is off, the app can prioritize faster transfers and lower data use, especially on a cellular connection. A travel photo uploaded from a weak airport network, for instance, may not retain as much detail as the same file posted later with high-quality uploads enabled over stable Wi-Fi.
What Is the Best Photo Size for Instagram?
The ideal dimensions depend on how much feed space the image should occupy. Rather than uploading the largest available file, match the canvas to the intended presentation.
Instagram Photo Sizes at a Glance
Meta recommends photos at least 1080 pixels wide and supports feed-photo aspect ratios from 1.91:1 to 3:4. Instagram can preserve an image that falls within its supported width and ratio range, while other images may be cropped or resized. The following dimensions are practical starting points for common feed layouts. (Meta Help Center)
| Post type | Recommended size | Aspect ratio | Best used for |
| Square post | 1080 × 1080 px | 1:01 | Product grids, quotes, food and centered compositions |
| Portrait post | 1080 × 1350 px | 4:05 | Fashion, portraits, tutorials and promotional graphics |
| Native camera portrait | 1080 × 1440 px | 3:04 | Photos captured in a common camera aspect ratio |
| Landscape post | 1080 × 566 px | 1.91:1 | Scenery, interiors and wide group photos |
Create an Instagram Post at the Right Size
Once you know the required dimensions, build the post on that exact canvas instead of asking Instagram to shrink an oversized design. An AI social media post generator can turn a prompt into a complete Instagram visual with editable text, imagery, and brand elements. After refining the hierarchy and spacing, export the design at the intended dimensions with an sRGB profile and a suitable image format.
Which Image Format Is Best for Instagram?
Format affects file size, transparency, color handling, and the way detailed areas respond to compression. The best choice depends on whether the post is primarily a photograph or a graphic.
Is JPEG or PNG Better for Instagram?
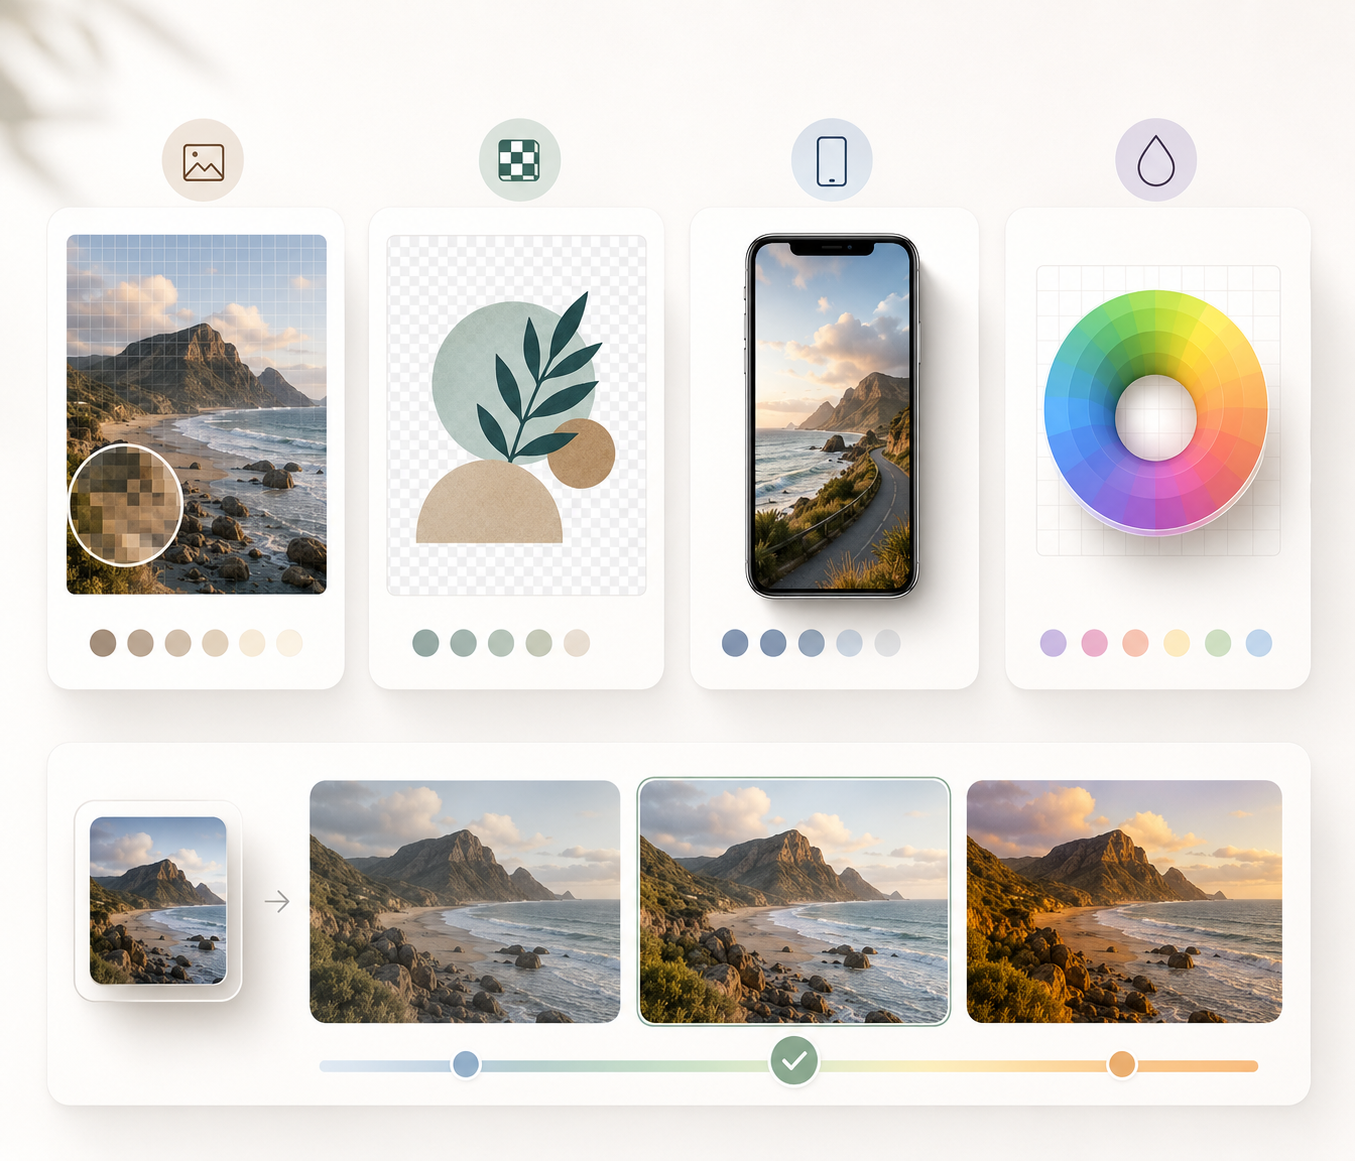
JPEG is generally the practical choice for photographs because it stores complex colors and gradients at a manageable file size. PNG works well for graphics containing logos, flat colors, screenshots, or sharp typography, although Instagram may still convert or recompress it. A café photo with soft lighting is better suited to JPEG; a simple event announcement with solid shapes may retain cleaner edges when exported as PNG.
Should You Convert HEIC Before Uploading?
Modern iPhones and some Android phones use HEIC or HEIF to preserve good quality in smaller files, but conversion can occur when the image passes through an editor, cloud service, or social app. Exporting a finished copy as sRGB JPEG gives you the opportunity to inspect the conversion before posting. This is especially helpful when a HEIC photo contains strong HDR highlights, saturated colors, or edits made in an app that handles the format inconsistently.
Why Instagram Photos Should Use sRGB
sRGB is the safest working color space for predictable web and social media display. It has a smaller gamut than Display P3 or Adobe RGB, but it is widely interpreted across phones, browsers, and apps. A designer creating a post on a wide-gamut monitor should therefore convert—not merely assign—the final image to sRGB so the intended colors are translated correctly rather than re-labeled.
What JPEG Quality Should You Export?
A JPEG quality setting around 80–90% usually offers a sensible balance between clean detail and reasonable file size. Exporting at 100% produces a much larger file without guaranteeing a better Instagram post, since the platform will still process it. Very low settings are more damaging: compression blocks around text, jewelry, eyelashes, and high-contrast edges can become more obvious after a second round of compression.
Does File Size Affect Instagram Quality?
File size alone does not determine how sharp a post will look. A 12 MB image may simply contain unnecessary dimensions or metadata, while a carefully exported 1.5 MB file can look excellent at 1080 pixels wide. Content matters as well. Grainy night photography and dense foliage require more data than a studio portrait with a smooth background, so avoid forcing every image under the same unusually low file-size limit.
How to Upload Photos Without Losing Quality
Good Instagram quality depends on more than the upload itself. Each step—from selecting the source file to transferring and exporting it—can either preserve detail or introduce another layer of compression.
Step 1: Start With the Original Photo
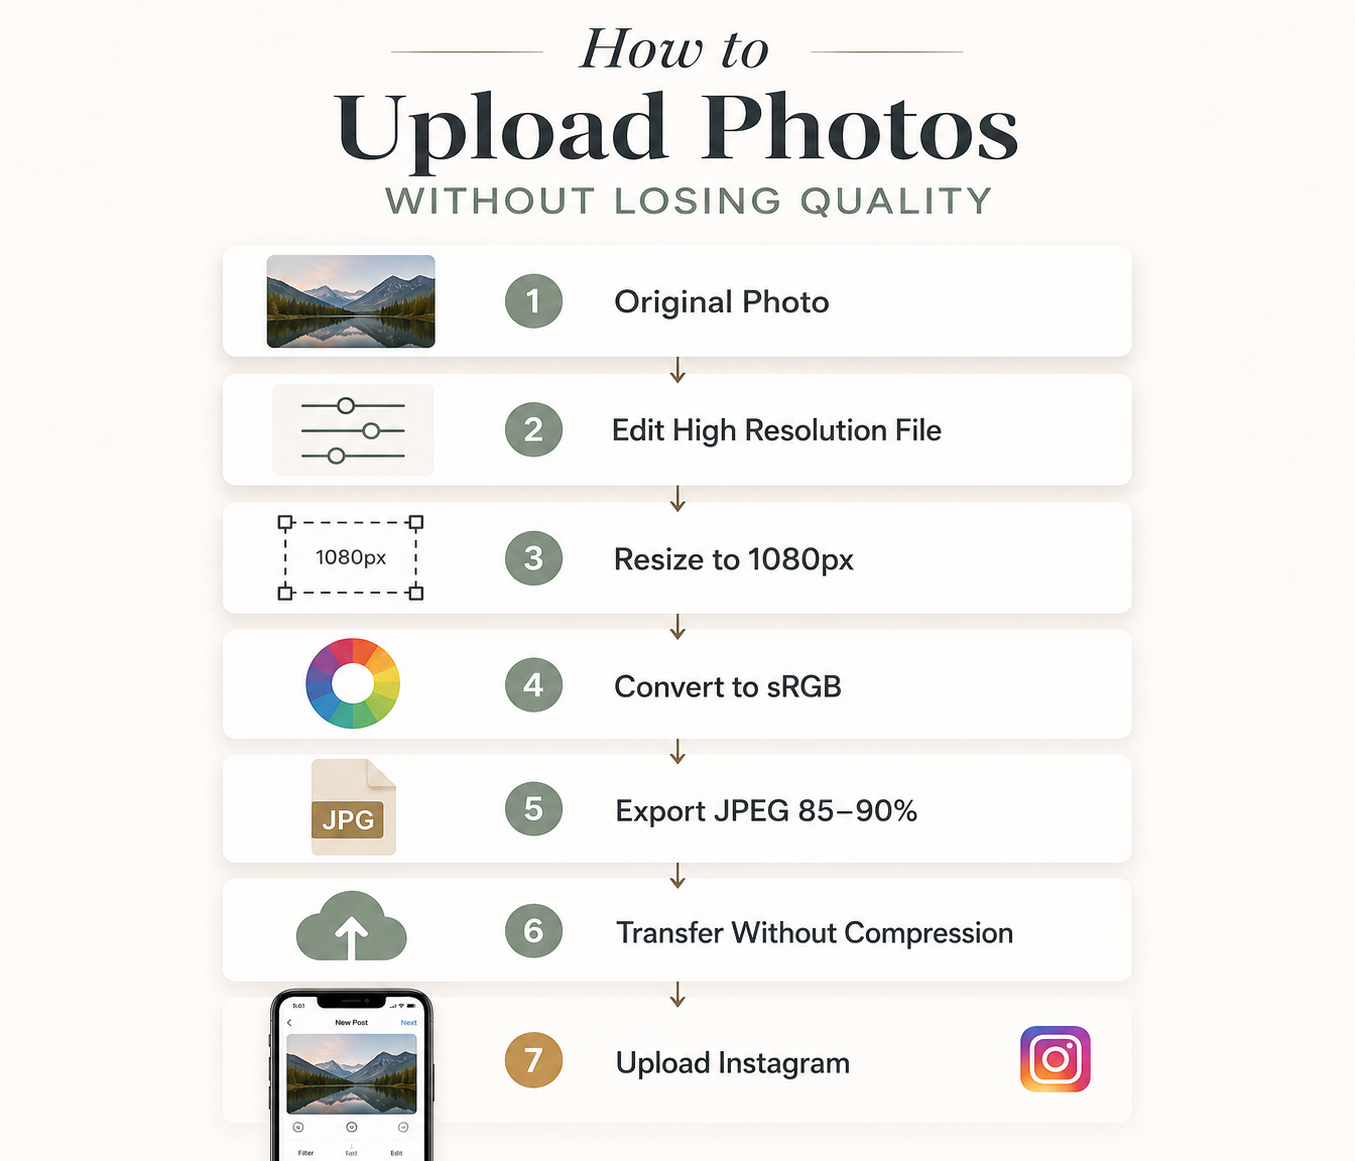
The best starting point is the original camera file or highest-resolution edited master. Copies downloaded from a chat, website, or previous social post may already have lost fine detail. When using iCloud or Google Photos, make sure the full-resolution image has finished downloading instead of editing an optimized preview. A separate Instagram export also keeps the master available for future revisions.
Step 2: Enhance a Blurry or Low-Resolution Photo
Not every soft image needs aggressive sharpening. An older product photo or heavily cropped travel shot may benefit from an AI image enhancer, especially when mild blur, noise, or limited resolution is present. However, enhancement cannot recreate every missing detail. Too much sharpening may introduce halos and unnatural skin texture that become more noticeable after Instagram compression.
Step 3: Crop and Resize for Instagram
Composition should be finalized before the image is reduced. A 4:5 portrait takes up more vertical feed space, while a landscape format retains more of the surrounding environment. Faces, products, logos, and important text should remain clear of the outer edges before the file is resized to 1080 pixels wide. Carousel slides also need a consistent aspect ratio because the first image usually determines how the rest are displayed.
Step 4: Export With the Recommended Settings
A reliable Instagram export combines suitable dimensions with an sRGB color profile and either JPEG or PNG format. Around 85% JPEG quality is a practical starting point for photography, although detailed scenes may require closer inspection. Small text, facial features, smooth gradients, and dark shadows deserve particular attention. Any visible banding or blockiness in the exported file may become stronger after uploading.
Step 5: Transfer It Without Compression
Even a carefully prepared export can lose quality on the way to the phone. Messaging apps commonly reduce photo dimensions, while email services may prompt users to send a smaller attachment. AirDrop, USB transfer, cloud storage, or another service that preserves the original file is generally safer. When chat is the only option, attaching the image as a document or file can help avoid automatic compression.
Step 6: Upload Through the Instagram App
The final quality check happens inside the Instagram app. Before publishing, confirm that the crop remains correct and that the app has loaded the intended high-resolution file. Strong filters are unnecessary when an image has already been color-graded and may cause clipped highlights or amplified noise. Once processing is complete, evaluate the photo in the feed rather than relying on the smaller upload preview.
How to Enable High-Quality Instagram Uploads
Instagram’s menus change periodically, and option names can differ between iOS, Android, regions, and app versions. Look under the app’s data usage or media quality settings rather than relying solely on an older step-by-step screenshot.
Turn On Upload at Highest Quality
From your profile, open the menu and locate Data usage and media quality or a similarly named section under Settings and activity. Enable Upload at highest quality if it appears. The setting may make uploads take longer, but it tells Instagram to favor media quality over speed. Check it again after reinstalling the app or moving to a new phone because preferences do not always carry over.
Turn Off Instagram Data Saver
Data Saver—sometimes labeled Use less cellular data—is useful when a mobile plan is limited, but it can prioritize reduced data consumption. Turn it off when image quality matters and you have sufficient bandwidth. This option is separate from the phone’s system-wide Low Data Mode, so examine both settings if Instagram continues behaving as though it is on a restricted connection.
Check High-Resolution Media Settings
Some Android versions of Instagram provide a separate high-resolution media preference with choices for Wi-Fi, cellular data, or both. If your app displays that control, allow high-resolution media on the networks you normally use for posting. Do not worry if the option is absent; Instagram tests and reorganizes settings, and not every account receives an identical menu.
Use a Stable Wi-Fi Connection
A stable connection reduces failed transfers and the temptation to repeatedly restart an upload. Before publishing an important campaign post, wait until the original file has fully synced to the phone and connect to dependable Wi-Fi. Network quality cannot rescue a poorly exported image, but it can prevent incomplete cloud downloads, interrupted uploads, and accidental use of a low-resolution preview.
How to Fix Blurry Instagram Photos
When a post looks wrong, changing several settings at once makes the cause harder to identify. A simple comparison can reveal whether the problem began during editing, transfer, upload, or display.
Compare the Original and Posted Photo
Place the exported file and Instagram post side by side on the same screen at a similar size. Uniform softness across the entire post points toward resizing or upload processing, while blocky areas already visible in the export suggest earlier JPEG compression. If the source itself looks soft, the right way to make a picture less blurry depends on whether the cause is motion, missed focus, noise, or insufficient resolution. Fuzzy text alone may simply mean the typography is too small or thin for the canvas.
Update Instagram and Clear the Cache
An outdated app can cause upload or preview problems that are unrelated to the image file. Android users can clear Instagram’s cache through the phone’s app settings, while iPhone users may need to offload or reinstall the app if a persistent local issue remains. Save login details and drafts first. Cache clearing should be treated as troubleshooting, not as a required step before every post.
Test the Photo on Another Device
A single screen can give a misleading impression because display resolution, sharpening, color mode, brightness, and cached previews vary. View the post on another phone or in a desktop browser, preferably while signed into a different account. If the image looks clear elsewhere, the upload is probably intact and the original device may be showing an outdated preview or applying unusual display processing.
Re-Export and Repost the Photo
When the posted version is genuinely poor, return to the master and create one controlled export at 1080 pixels wide, sRGB, and high-quality JPEG. Transfer that file without compression and compare it with the first attempt. Reposting makes sense for an important portfolio or branded campaign, but a barely perceptible difference may not justify losing existing comments, saves, and engagement.
Instagram Photo Quality on iPhone vs Android
Neither operating system is automatically better for every Instagram upload. Differences usually arise from camera formats, manufacturer processing, app integration, display behavior, and the way files reach the posting device.
Why Instagram Photos Look Blurry on iPhone
An iPhone may keep the full-resolution original in iCloud while storing a lighter device copy, especially when Optimize iPhone Storage is enabled. Posting before the original finishes downloading can lead to disappointing results. HEIC conversion, HDR appearance, digital zoom, and aggressive cropping can also contribute. Opening the photo at full size and waiting for it to load before editing is a simple safeguard.
Why Instagram Photos Look Blurry on Android
Android includes a wide range of cameras, image-processing systems, screen resolutions, and manufacturer software. A photo may pass through a device-specific gallery editor before Instagram receives it, producing less consistent results between models. Using the phone’s main camera app, editing the original file, and uploading a prepared 1080-pixel version is generally more reliable than capturing or heavily editing the image inside Instagram.
Why Samsung Photos May Lose More Detail
Some Samsung phones create very large high-resolution images or combine multiple frames through computational photography. Those files can contain excellent detail, but reducing them directly from 50 or 200 megapixels to an Instagram-sized post is a major transformation. Fine leaves or patterned clothing may turn mushy. Editing the full file first and applying one careful downsize usually gives better control than leaving the entire reduction to Instagram.
Does Posting From a PC Reduce Quality?
Uploading from a PC does not inherently ruin a photo, provided that the browser receives the same properly prepared file. Desktop posting can even simplify a workflow built around Photoshop or Lightroom because no phone transfer is required. However, browser and app features may differ, and account-specific tools sometimes reach mobile first. Compare one test upload if color accuracy or carousel behavior is critical to the campaign.
FAQs
Do Carousel Posts Reduce Photo Quality?
Carousel posts are processed in much the same way as individual feed photos, so the format itself does not automatically create severe quality loss. The more common issue is inconsistent source material. A square first slide can establish a square presentation for the set, forcing later portrait images into an unsuitable crop. Export every slide at the same dimensions and inspect each one before publishing.
Does Instagram Lower the Quality of Old Posts?
Instagram does not normally make a post blurrier simply because it has become old. Apparent changes may come from a cached preview, a newer high-density screen, updates to feed presentation, or the fact that older uploads were created at smaller dimensions. If an archived photo looks worse than expected, compare it with the original file rather than assuming Instagram recently recompressed it.
Can You Upload 4K Photos to Instagram?
You can select a 4K image, but Instagram will not display a standard feed photo at its original 4K pixel dimensions. The platform resizes uploaded photos for supported feed delivery, so extra resolution does not guarantee extra visible detail. Keep the 4K master for printing or future crops, then export a separate 1080-pixel-wide version designed specifically for the post.
Does Adding Music Reduce Photo Post Quality?
Adding music does not inherently make a feed photo blurry. Nevertheless, music features may change how a post is packaged, displayed, or processed across app versions, particularly when a static visual becomes part of a video-style experience. If image fidelity is essential, compare a private test or secondary-account upload with and without music before publishing the final campaign.
Conclusion
Instagram changes photo quality because every upload passes through resizing, format conversion, and compression. The most effective response is not to upload the largest possible file, but to give the platform a clean, correctly prepared one. Start with the original image, choose a supported aspect ratio, resize it to 1080 pixels wide, convert it to sRGB, and export without excessive JPEG compression.
A compression-free Instagram upload is not realistic, yet visible damage can be minimized. High-quality upload settings, lossless file transfer, restrained enhancement, and a stable connection each protect a different stage of the process. Once these habits become part of the workflow, posts are far more likely to retain the sharpness, color, and detail seen during editing.
You May Be Interested

140+ Facebook Bio Ideas: Short, Professional, Unique, and More

100+ Free Stable Diffusion Prompts to Generate Amazing AI Art

1440p vs 4K: Key Differences, Real Scenarios & Blur Fix
215+ Thoughtful Father’s Day Ideas for Dad

35 AI Image Prompt Examples: How to Get Outstanding AI Images
