Jewelry Photo Retouching: Make Product Images Stand Out
Jewelry photo retouching improves product images while preserving accurate color, shape, texture, and shine. Clean dust, clean up backgrounds, control reflections, restore gemstone detail, add natural shadows, and export consistent e-commerce images.

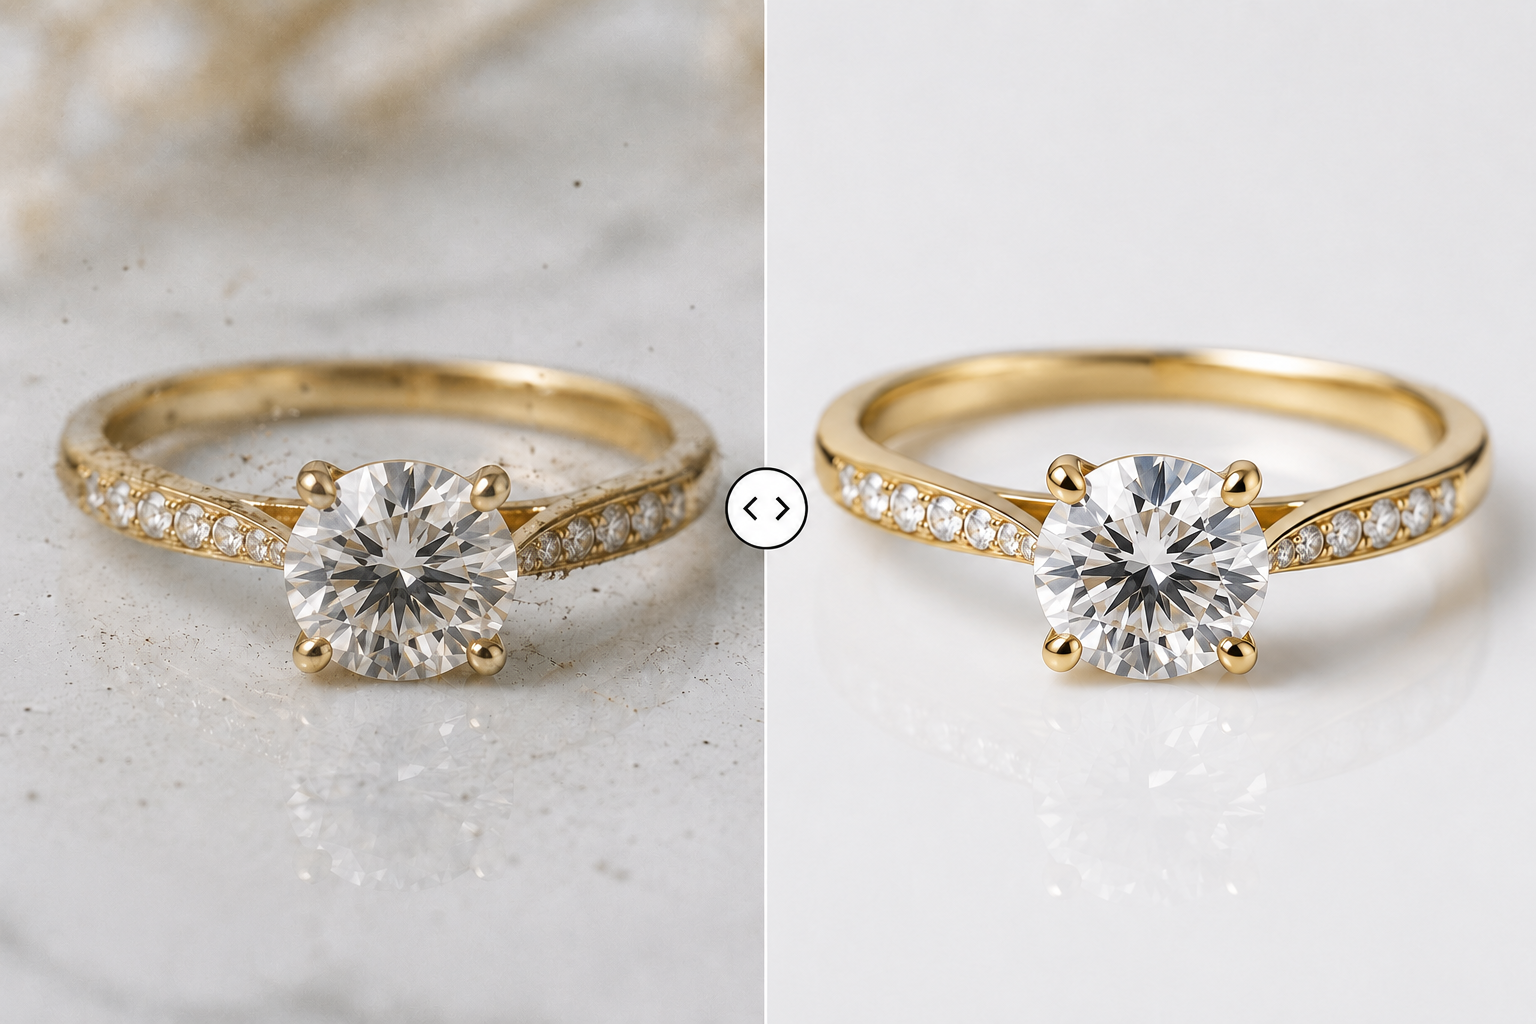
Jewelry often photographs differently from how it appears in person. Macro lenses and controlled lighting reveal small surface issues, while highly reflective materials can confuse the camera’s exposure and color response. Any correction must preserve the piece’s real shape, material, setting, and finish so customers receive an accurate product view. Because metal, gemstones, and backgrounds respond differently to the same adjustment, polished results require more than basic editing.
Why Jewelry Photos Need More Than Basic Editing
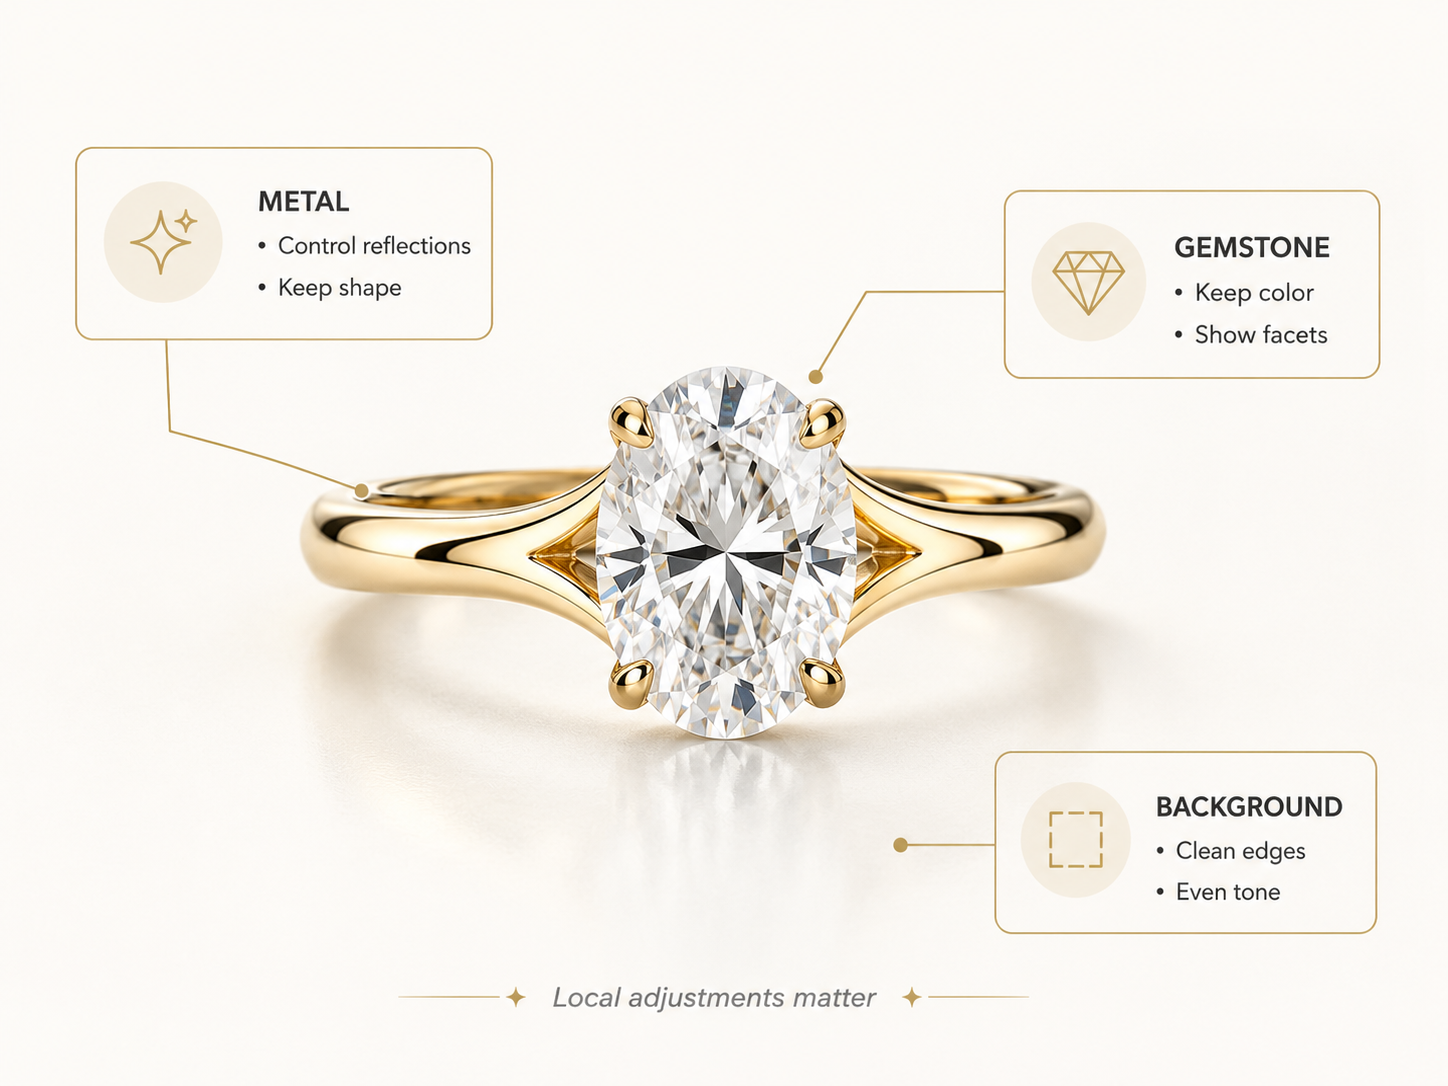
Global controls can improve the overall exposure and color, but they cannot treat metal, stones, and backgrounds independently. Jewelry retouching relies on precise local adjustments to preserve material differences and product accuracy.
Metal Reflections Are Hard to Control
Polished metal acts like a curved mirror, reflecting the camera, light modifiers, and surrounding studio. On rings and bracelets, those reflections create the light and dark bands that define shape, so removing them all would leave the surface flat. Retouching should clean broken or distracting reflections while preserving the gradients that make gold, silver, and platinum look dimensional.
Gemstones Lose Color and Sparkle Easily
Gemstone retouching requires separate control over detail, highlights, and color.
Facet definition: Restore local contrast so individual cuts remain visible.
Highlight control: Preserve bright sparkle points without clipping them to pure white.
Color accuracy: Remove unwanted casts and match saturation to the physical stone.
Treating these areas separately produces more depth than applying one broad brightness or saturation adjustment.
Should You Retouch the Photo or Reshoot It?
The decision depends on whether the file still contains reliable product information. Retouch capture-related distractions, but reshoot when important design details or image data are missing.
When Jewelry Photo Retouching Is Enough
Retouching is suitable when the original image is sharp, accurate, and complete enough to support localized corrections.
Dust, fingerprints, or temporary surface marks are visible
The background has wrinkles, seams, or uneven color
Metal shows a mild color cast or uneven brightness
Reflections distract without covering key product details
The jewelry needs better centering, cropping, or alignment
Gemstones look slightly dull but retain visible facet detail
The file is large and sharp enough for e-commerce zoom
These problems can be corrected without inventing new product information or changing the jewelry’s construction.
When You Should Reshoot the Jewelry Photo
A new photograph is the safer choice when the original file no longer shows the product accurately or completely.
The jewelry or gemstones are out of focus
Highlights are pure white with no recoverable detail
Reflections hide prongs, engraving, stones, or metal texture
The recorded color differs substantially from the real piece
The chain, clasp, or setting is hidden or poorly arranged
The file is too small, compressed, or noisy for product zoom
Large parts of the jewelry would need to be reconstructed
If retouching requires the editor to guess what the product should look like, a reshoot based on stronger jewelry photography techniques will produce a more accurate and trustworthy result.
How to Retouch Different Jewelry Materials
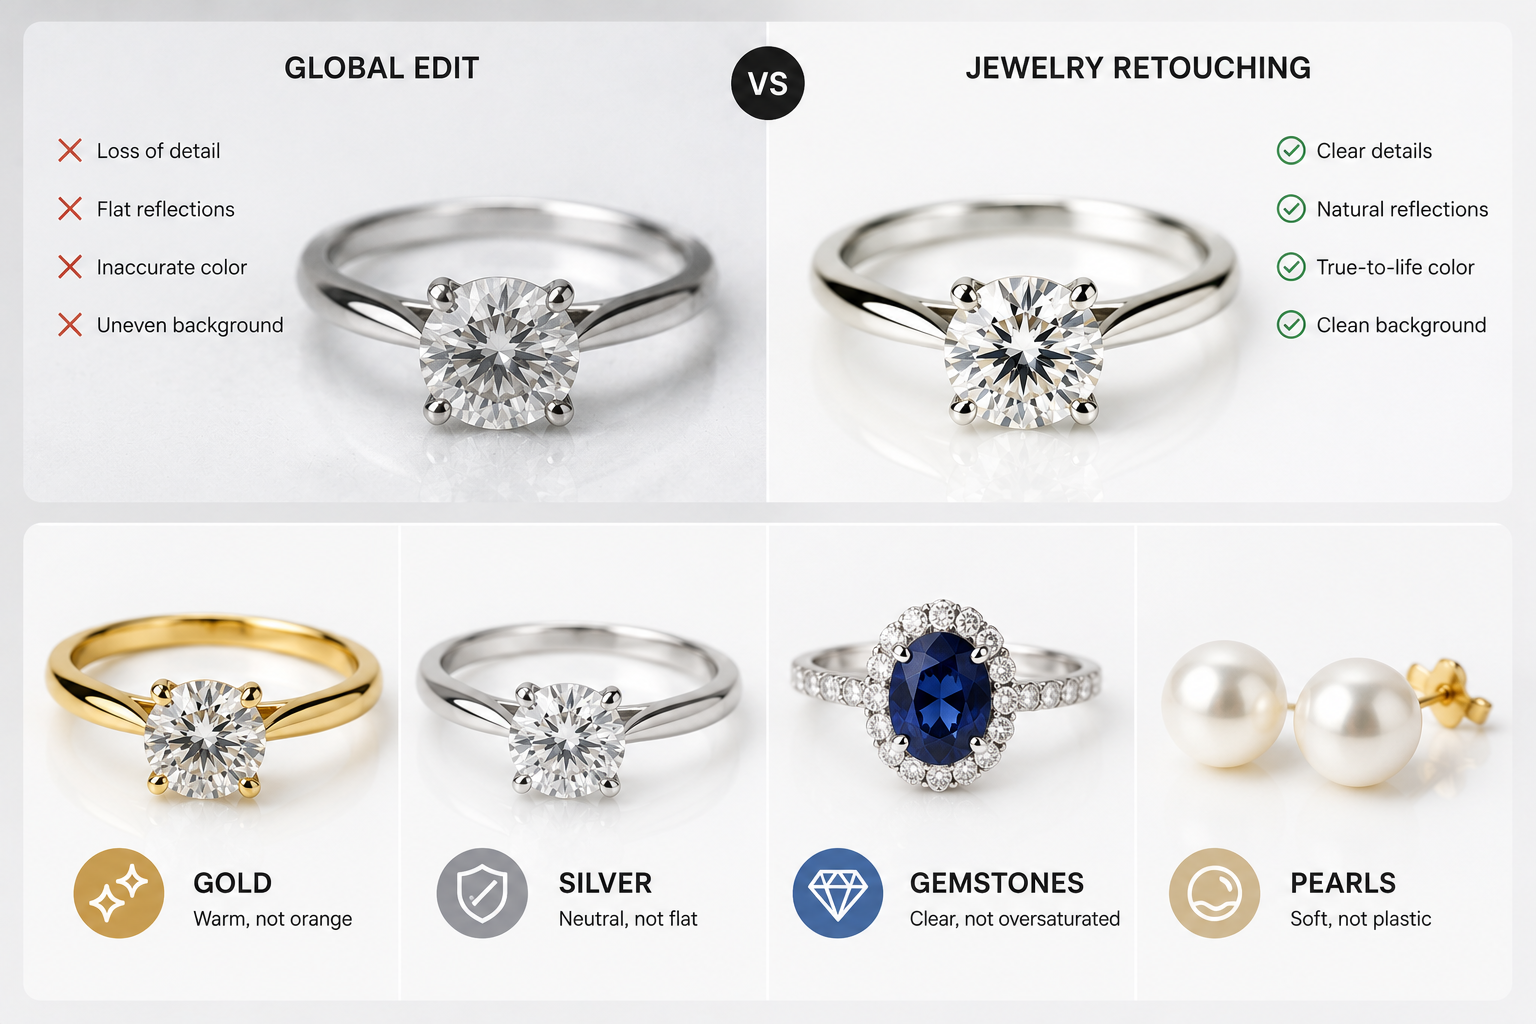
Each jewelry material responds to light in a different way, so one correction cannot be applied across every product. The retouching should reflect the surface, color, and optical behavior of the actual piece.
Restore Warm Tones and Highlights on Gold
Warmth gives gold its recognizable character, but too much yellow or orange makes the metal look inaccurate. Rather than increasing saturation across the whole image, use selective color adjustments to refine the midtones while protecting bright reflections. Darker bands should remain visible because they define the curves and depth of the piece.
Remove Color Casts and Add Contrast to Silver
Because silver reflects its surroundings, studio colors can easily appear across the surface. Local desaturation or masked color correction can neutralize blue, green, or skin-toned reflections without turning the metal gray. Enough contrast must remain between highlights and shadows for the shape to look polished rather than flat.
Retouch Diamonds and Colored Gemstones Differently
Diamonds rely on neutral contrast and controlled white highlights, while colored gemstones need their hue and transparency preserved. Applying the same treatment to both can leave diamonds gray or make sapphires and emeralds look oversaturated. Separate masks allow each type of stone to retain its own optical character.
Preserve Luster and Details on Pearls
Unlike faceted stones, pearls rely on soft gradients and subtle surface color to show their luster. Over-whitening can erase cream, pink, gray, or green undertones and leave the pearl looking like plastic. Keep the rounded highlight transition intact while removing only dust, harsh reflections, and temporary surface distractions.
How to Retouch Jewelry Photos Step by Step
Once the material and image quality have been evaluated, the photograph can move through a fixed editing sequence. Keeping each correction on a separate layer makes product accuracy easier to protect and revisions simpler to manage.
Step 1: Remove the Background Cleanly
A precise cutout creates the foundation for every later adjustment. An AI background remover can create the initial cutout, followed by manual refinement around prongs, chain links, narrow gaps, and translucent stone edges. Check the result against both dark and light backgrounds to catch halos, missing sections, or rough transitions.
Step 2: Clean Dust, Scratches, and Fingerprints
Keep surface cleanup non-destructive and match each problem with the right tool.
Editing layer: Work on an empty layer with sampling enabled below.
Dust: Use the Healing Brush for small, isolated particles.
Fingerprints and marks: Apply a low-opacity Clone Stamp for greater control.
Product details: Preserve hallmarks, engraving, and the direction of the metal finish.
The cleaned surface should look polished without erasing authentic construction details.
Step 3: Fix Exposure and White Balance
Once the surface is clean, use the histogram and a neutral reference to establish overall brightness and color. Recover important metal highlights before lifting darker areas, since excessive shadow recovery can reveal noise. Separate masks may be needed when the background is neutral but the jewelry still carries a color cast.
Step 4: Control Metal Shine and Reflections
Metal should retain continuous light and dark bands that describe its shape. Masked Curves or subtle dodge and burn adjustments can smooth broken reflections without removing the surface gradient. Cloning is best reserved for isolated reflections that interrupt an edge or cover a product detail.
Step 5: Bring Back Gemstone Color and Detail
If a stone lacks definition, isolate it before adjusting local contrast. Small tonal changes between neighboring facets usually create more depth than increasing saturation across the entire gem. Keep a reference image or the physical piece nearby so hue and brightness remain commercially accurate.
Step 6: Add a Natural Shadow and More Depth
Without a contact shadow, isolated jewelry can appear to float above the background. Reuse the original shadow when possible, or build a soft shape that follows the direction and height of the light source. The area nearest the product should remain darker before fading gradually outward.
Step 7: Sharpen and Export for E-commerce
Final sharpening belongs after the image has been resized for its destination. When more control is needed, use a separate layer to sharpen the image in Photoshop, then mask the effect to the product details. At 100%, inspect gemstone edges, chain links, engraving, and cutout boundaries for halos or jagged lines. Export in the platform’s required JPEG or PNG format using sRGB.
Jewelry Retouching Mistakes That Look Fake
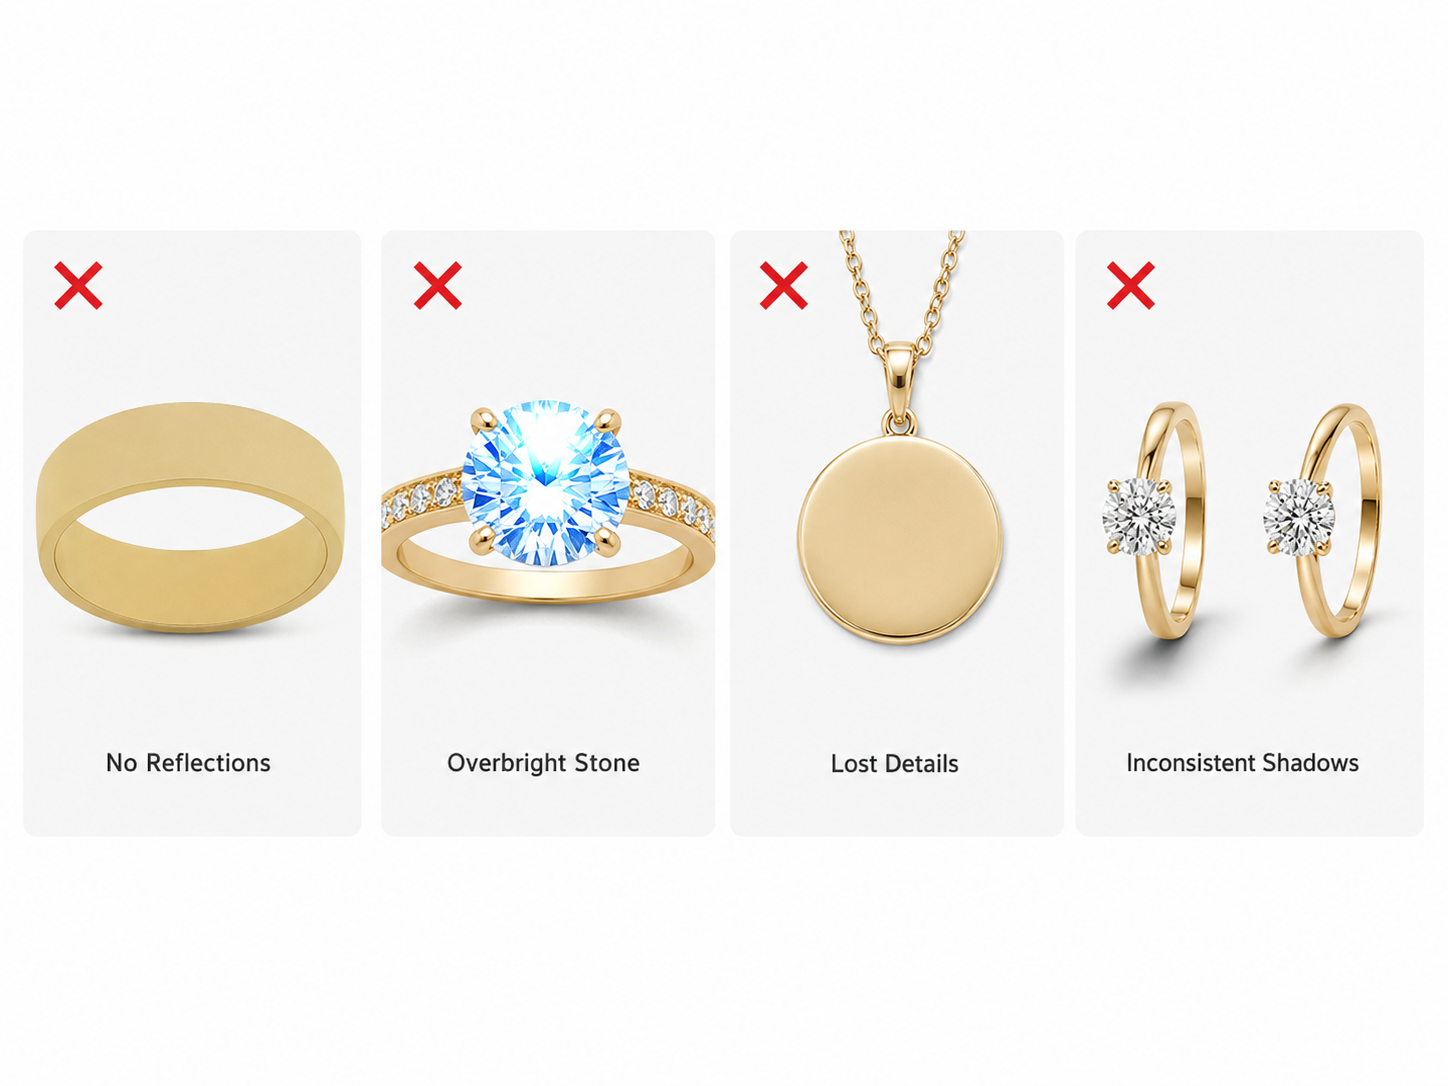
False-looking results usually appear when an edit weakens the material’s natural behavior or breaks consistency across the catalog. The warning signs below show where correction begins to change the product rather than improve its presentation. For lighter cleanup, an AI-powered photo editing workspace can handle dust, background distractions, and basic lighting issues before a closer manual review.
Removing Every Reflection From the Metal
A metal surface with one even tone often looks matte, hollow, or digitally painted. Reflections should be simplified only when they interrupt the outline or cover an important detail. Retaining a controlled range of bright and dark areas gives the piece enough visual structure to feel solid.
Making Gemstones Too Bright or Saturated
Once highlights turn pure white, the internal structure of a gemstone begins to disappear. Excess saturation can also shift the apparent grade or variety of the stone, creating a misleading product image. Lower the adjustment until the facets remain distinct and the color matches the physical reference.
Smoothing Away Prongs, Engraving, or Texture
Fine construction details can disappear when healing or smoothing crosses beyond the intended cleanup area. Soft prongs, incomplete engraving, and blurred metal texture make the image look inaccurate even if the surface appears cleaner. Protective masks around these features keep their edges separate from surrounding corrections.
Mixing Different Crops and Shadows in One Catalog
Even well-retouched products feel inconsistent when their scale, margins, and shadow direction change between images. A shared canvas template should establish the product position, baseline, crop, and surrounding space. A batch photo editor can speed up common background and quality adjustments across related files, while product scale and shadow direction still receive a final review.
FAQs
Where Can I Retouch Jewelry Photos for Free?
Browser-based AI photo editors are the easiest option for free jewelry photo retouching. They can handle basic cleanup, background removal, lighting correction, and image enhancement without requiring desktop software. Free plans may limit file size, resolution, or the number of exports.
How Can You Tell if a Jewelry Photo Has Been Retouched?
A jewelry photo has probably been heavily retouched when metal looks unnaturally smooth, reflections disappear, or gemstone color appears unusually intense. Repeated texture, rough cutout edges, and shadows that do not match the lighting can also reveal editing.
Can Jewelry Photos Be Retouched in Bulk?
Yes, jewelry photos can be retouched in bulk when they share similar lighting, backgrounds, and framing. Common adjustments can be synchronized across the set, but reflections, gemstones, and small product details still need individual inspection.
Conclusion
Strong jewelry retouching makes the product easier to understand without changing what the customer will receive. Clean surfaces, accurate materials, controlled reflections, and consistent presentation matter more than extreme shine or flawless symmetry.
You May Be Interested

100+ Father’s Day Jokes That Dad Will Actually Laugh At

150+ Instagram Bio Ideas for Moms

100+ Free Stable Diffusion Prompts to Generate Amazing AI Art
130+ Independence Day Quotes for Instagram

20 Seedance Prompts for AI Video Creation: Ready-to-Use Examples